XP-Pen Innovator 16 Review

Note: Just a heads up!
I used the new WordPress Block editor for half of this review before getting annoyed with it and switching to the old editor. Because of this, there may be some broken parts in the review which I have not noticed.
All the images broke… So I went and fixed them, but the new editor doesn’t have some image minimizing options that I used previously, so the Drawing Tests section has some large images.

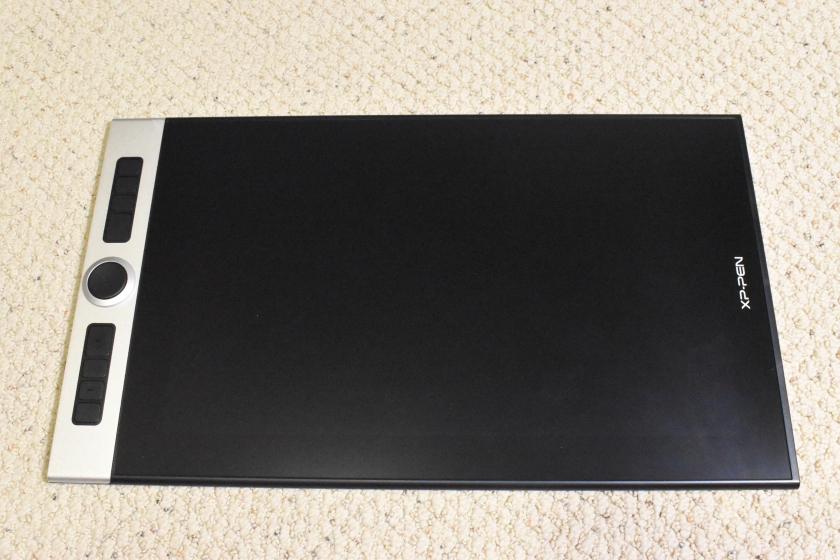
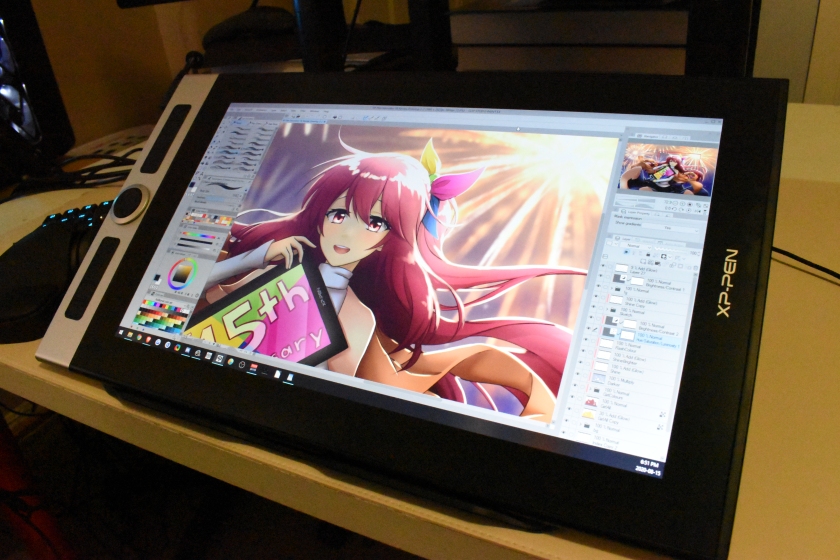
The XP-Pen Innovator 16 is the first product to be released in XP-Pen’s new Innovator series of tablets. Its selling point is its thinness of only 9mm which should technically make the tablet very portable and easy to carry around. It’s also made to look like a professional tool with its silver accent design.
Another feature which makes this tablet unique is the dual wheel that has both a physical wheel and touch wheel built-in. This is XP-Pen’s special take on wheel-type shortcut keys and I am quite a fan of it.

Going into this review, I had relatively high expectations for this tablet. XP-Pen has almost always offered mid/high quality drawing monitors, so I was hoping that they had somehow improved largely since I last reviewed their tablets around a year ago.
I can’t say that they’ve made particularly large steps forward (which is expected when their products are fairly high quality already), but the Innovator 16 is still very competitive nonetheless and actually has a few aspects where it shines above others. I can suggest sticking around for this review if you’re interested in the Innovator 16.

For this review, XP-Pen was kind enough to send me the XP-Pen Innovator 16 for review. As usual, this review is based on my honest thoughts and opinions about the tablet and I will never agree to review a product if I am required to say only good things about it.
If you believe receiving a product for free makes a review biased, now is a perfect time for you to stop reading.

As a side note, XP-Pen is currently celebrating their 15th anniversary and is holding a massive sale on all the tablets on their official web store. I suggest checking those sales out!

Anyways, onto the review!

Please note!
-I am not a Mac or Linux user!! I mainly only tested this tablet on Windows 10 version 1909.
-Prices may have changed since I wrote this review.
-Check when a review was written. Some aspects may improve or change over time, so it is in your best interest to concentrate on reviews which are less than 1 year old.
-It is good practice to check multiple reviews to cross reference their information before you make a conclusion about a tablet.


Table of Contents

  • How good is this tablet?
  • Specifications at a glance
  • What’s in the box?
  • Screen quality
  • Tablet drivers
  • Drawing tests
  • The drawing experience!
  • Conclusion
  • Places to buy the tablet


How good is this tablet?

Design choices: Mostly good!
-Nitpicks: Power button placement
Hardware quality: Very sturdy!
-Nitpicks: Coil whine if you don’t plug in the USB for power
Screen quality: Quite vibrant! Factory calibrated is a big plus!
-Nitpicks:
Tablet drivers: Fairly complete! Some restrictions.
-Nitpicks: Cannot assign keyboard+mouse shortcuts
Drawing test results: Quite satisfactory!
-Nitpicks: IAF is noticeableextremely thin lines are hard to make consistently
Actual drawing experience: Fairly enjoyable!
-Nitpicks:

Overall: An overall noteworthy tablet!

My verdict:
-If you are considering this tablet, I think it’s a good choice among the numerous 15.6-inch drawing monitors currently available on the market.

The biggest advantage this tablet has over its competitors is the fact that it actually comes factory calibrated to the sRGB and 6500K standard, so you won’t need to worry about getting colour calibration equipment in addition to the tablet!
Factory calibration is surprisingly overlooked in the drawing monitor space despite colour accuracy being fairly important for art.

Like I mentioned in the introduction, XP-Pen is currently holding a massive 15th anniversary sale on their webstore. If you want to buy the XP-Pen Innovator 16, I suggest considering it during the sale where it’s being sold for only 400 USD.

Here are some links to the anniversary edition Innovator 16 which is on sale for the same price as the normal Innovator 16:
NA: https://bit.ly/3h3cqnh
UK: https://bit.ly/3aygR6M
AU:https://bit.ly/3g7mvy2
EU: https://bit.ly/310d7Id
SEA: https://bit.ly/2CwSv0L


Specifications at a glance

Price: 499.99 USD (when this review was written)
Active Area: 13.5 x 7.6 inches, 15.6 inch diagonal

Resolution: FHD 1920 x 1080 (16:9 ratio)
Display Type: IPS, gamut = 125% sRGB/92% AdobeRGB/88% NTSC on product page
Pen Type: Battery-free

Pen Buttons: 2 side buttons, no eraser
Pen Pressure: 8192
Pen Tilt Sensitivity: Yes, levels unspecified
Shortcut Keys: 8 buttons, dual wheel
Multi-touch: No
Other features: Low-angle tablet stand included, fully-laminated display
.


What’s in the box?

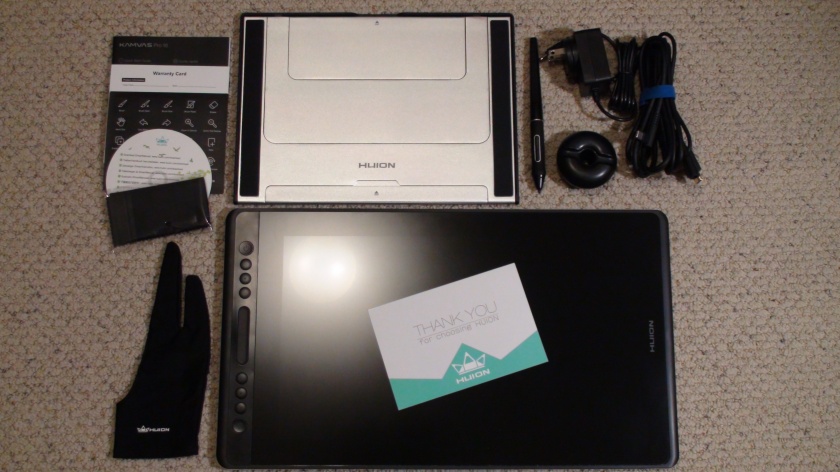
2 box

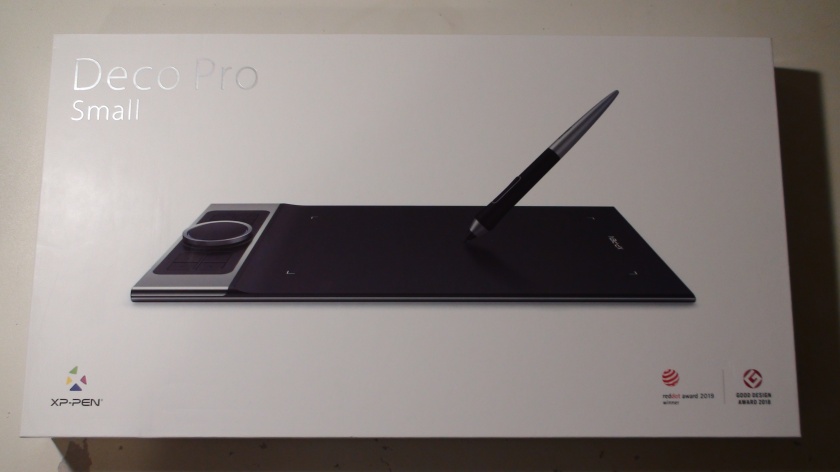
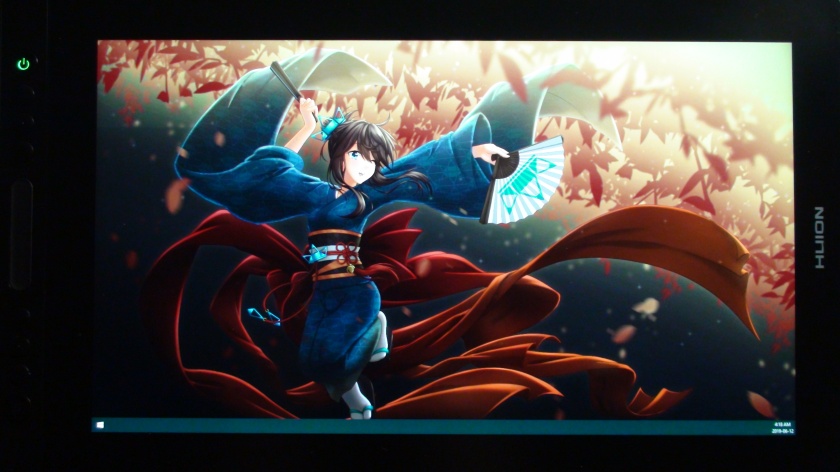
The tablet comes in a standard box with a nice design.

P.S. I received the Anniversary Edition Innovator 16 for this review.
The difference is that it has an anniversary box and some anniversary goodies.
The tablet itself is not different, so this review still applies to the non-anniversary edition Innovator 16.

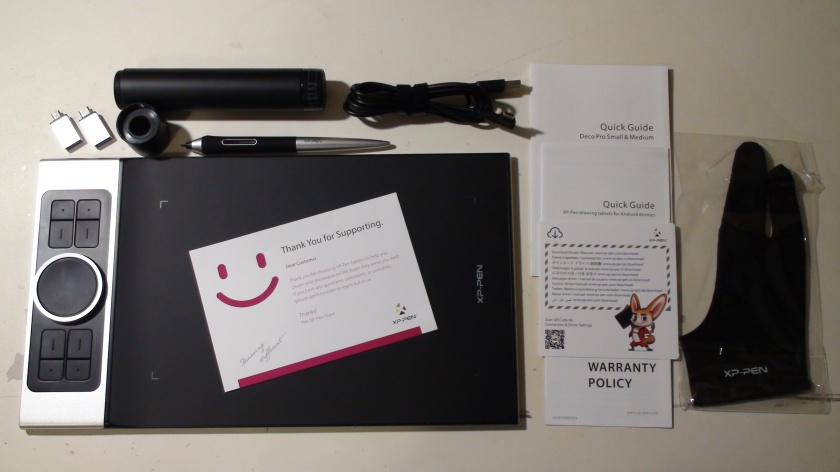
The things that come in the box:

  • XP-Pen Innovator 16 tablet
  • Low-angle tablet stand
  • XP-Pen PA5 battery-free pen
  • Pen case
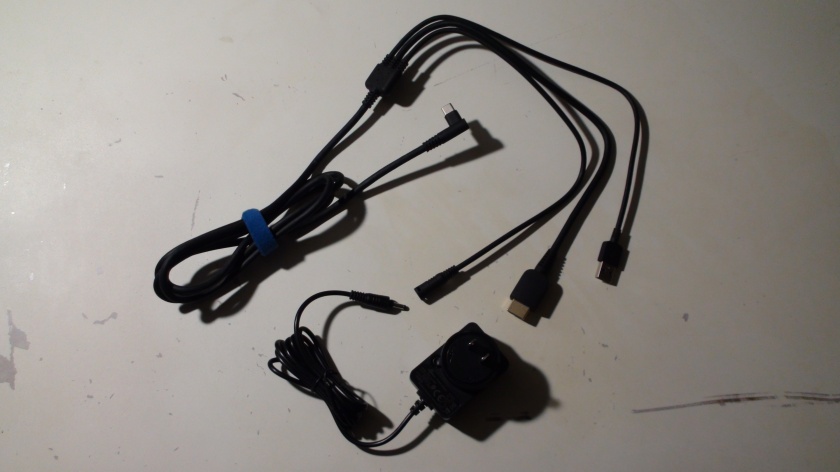
  • Combined cable (USB type-C to USB type-A, HDMI, USB type-A for power)
  • USB type-A power adapter
  • USB type-A extension cable for power
  • Pen nib replacements x8
  • Anti-fouling glove
  • Screen cleaning cloth
  • User manual

The anniversary edition extras:

  • Fenix keychain
  • Fenix postcards
  • Fenix stickers
  • XP-Pen ink pen

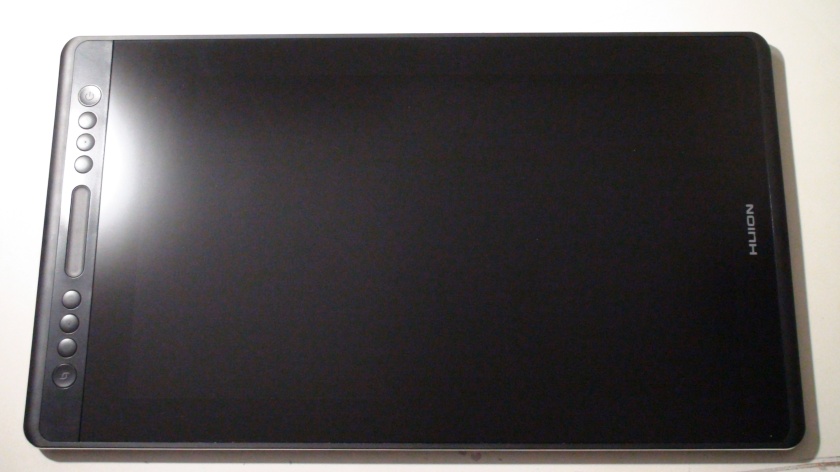
5 tablet

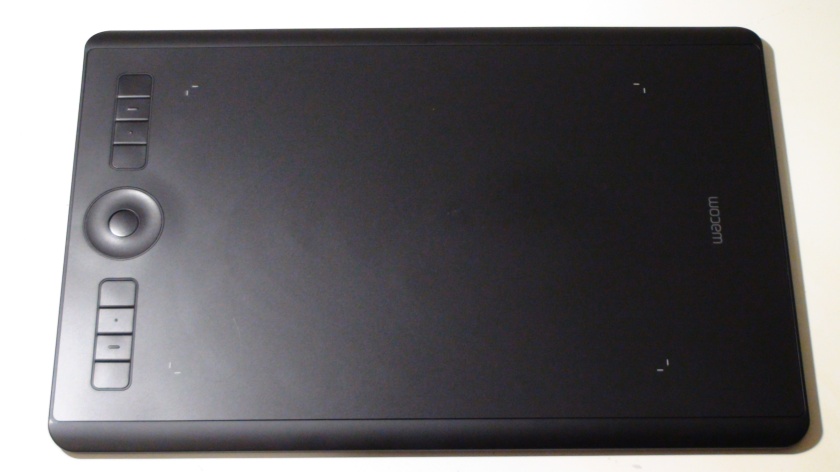
The XP-Pen Innovator 16 is a very slim and sleek looking device with silver accents that deviates from the norm of all-black drawing monitors.

As is the case with most 15.6-inch tablets, due to the extra length created by the expresskeys area, don’t expect this tablet to fit into 15.6-inch laptop bags. It should fit in 17-inch or bigger laptop bags though.

It feels sturdy when performing a simple twist test, where I grab both sides of the tablet and try twisting the tablet a bit with just my hands.

6 surface

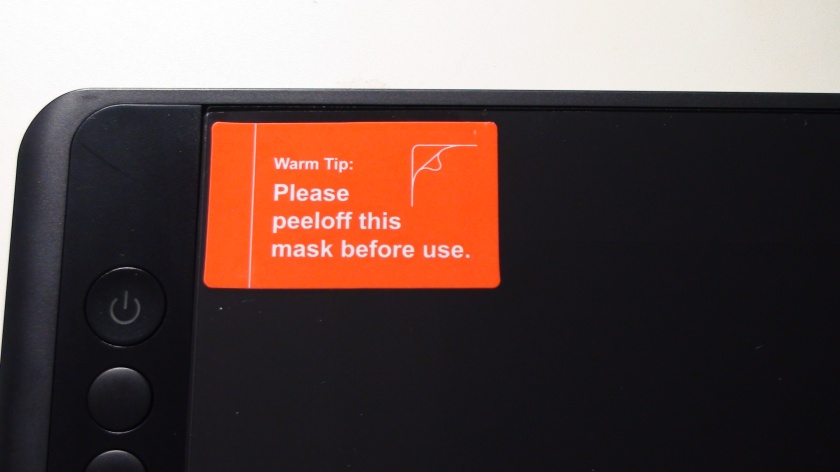
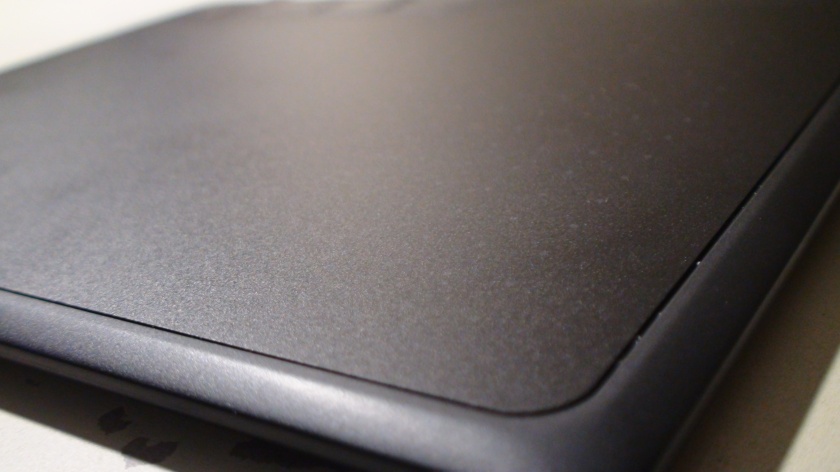
I believe this tablet comes with a textured screen protector pre-applied. I am not completely sure because it was applied so well that I couldn’t get my fingernail under it to peel off a corner to check. However, it does look like a screen protector is applied.

The texture is quite nice and it strikes a nice balance of not too rough and not too smooth (in my opinion).
It should be noted that it felt scratchy at first, but it seemed to “mellow out” and become less scratchy as I continued using it. I suggest wiping it down a few times with a microfiber cloth and giving it a few hours of usage if you find that it feels scratchy at first.

As far as I can see, there is no scratches or wearing on the surface after my week of intensive use.

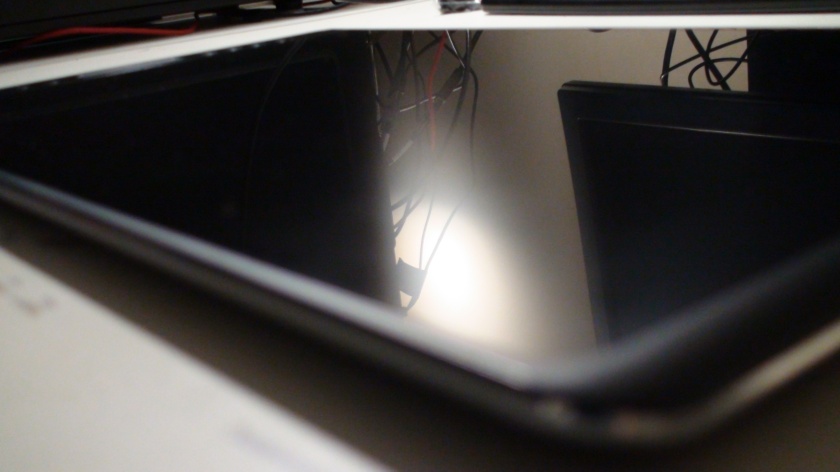
7 side profile

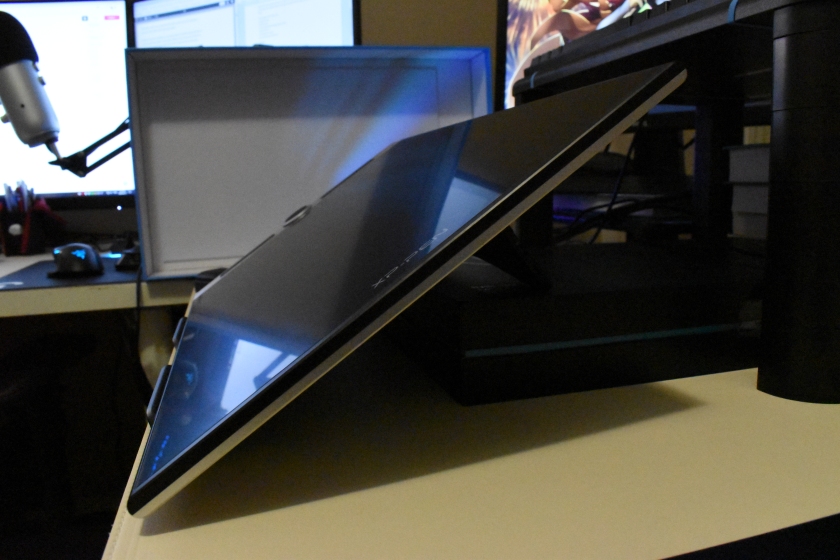
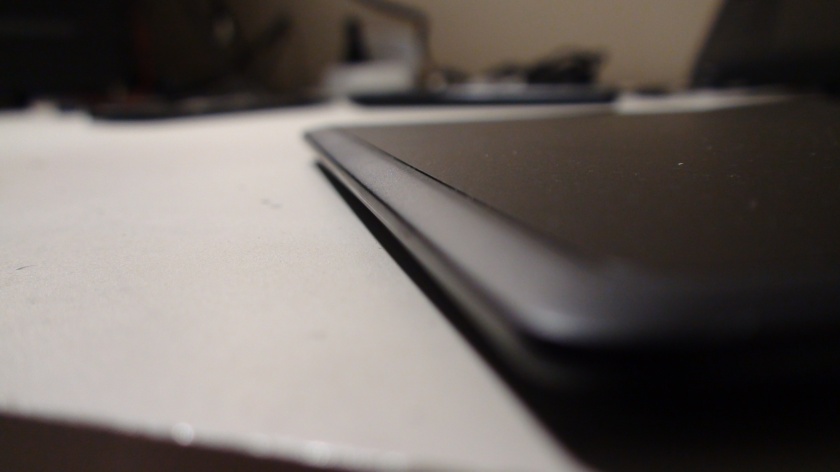
The XP-Pen Innovator 16 is advertised to be only 9mm, and yes, it is very thin when viewed from the side.

It’s actually not particularly light despite being this thin, most likely due to its metal alloy back, so don’t expect your bag to be as light as a feather with the tablet in it. However, being this thin gives the advantage of being able to slide into a laptop bag beside the laptop it’ll be used with.
Again, I will mention that it will probably only fit in 17-inch laptop bags or larger.

8 back

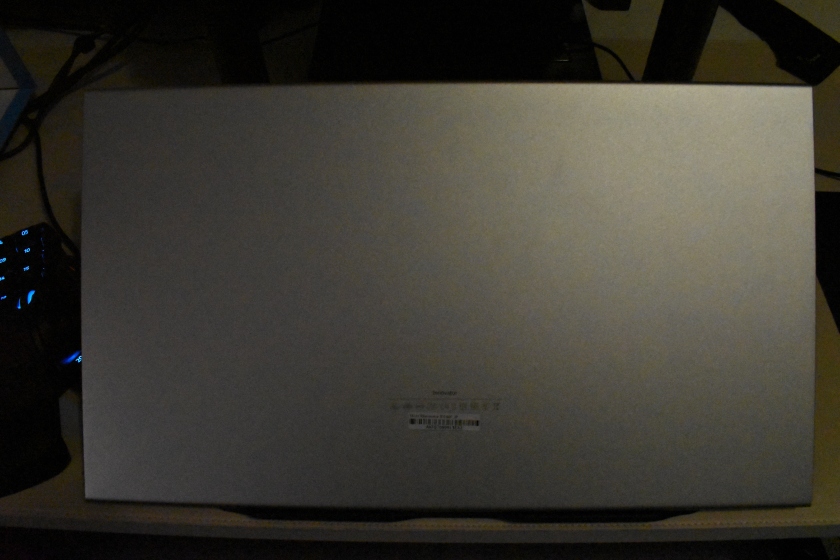
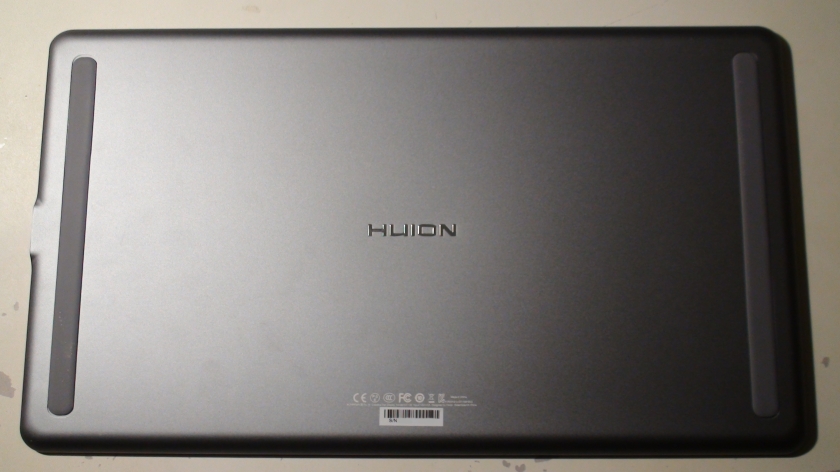
The back of the tablet is made of a silver material that seems to be a metal alloy of some sort.

I will point out here that there are no rubber feet on the back of this tablet. I would advise using it on the included plastic stand which has rubber feet on it.

9 shortcut keys

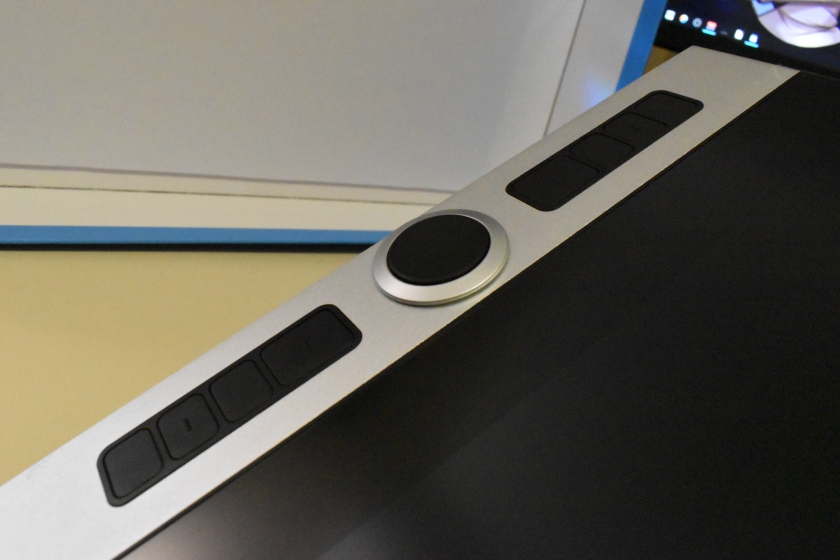
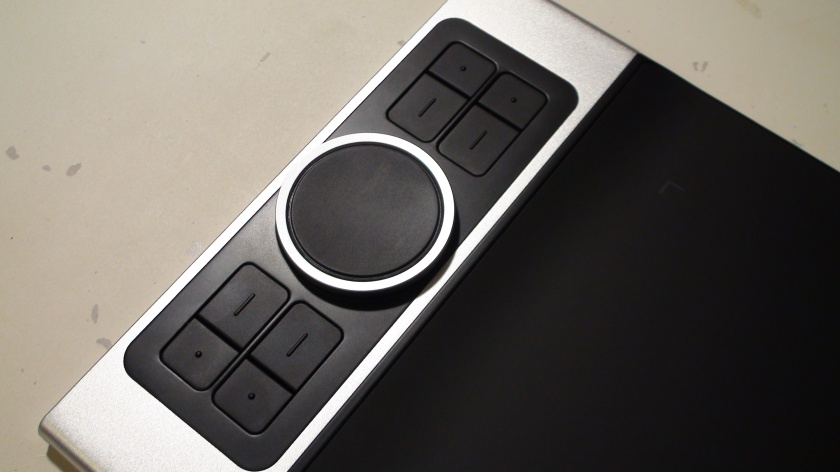
There are 8 programmable buttons and the dual wheel in a line along the side of the tablet. All the buttons are programmable through XP-Pen’s drivers.

These buttons feel great to use and are not too hard to press, and they are also not too loud. Overall, these are very nice shortcut buttons.
XP-Pen also did not forget to put bumps in the middle of every second key to help you feel which button is which. That way, you do not have to look away from your work to figure out which button your finger is on.

The dual wheel is XP-Pen’s unique take on wheel type shortcut keys. The outer ring is a physical wheel which spins very smoothly, while the center black area is a touch wheel which will sense your finger sliding in one direction or the other. Basically, there are two wheels available for use in the same package.

I personally prefer this style of dual wheel over the conventional one-function-at-a-time wheel as it allows you to access 2 wheel functions (such as zoom and rotate) seamlessly, whereas conventional wheels require you to press a “switch function” key to switch between the wheel functions, making it less convenient to use.

10 port and cables

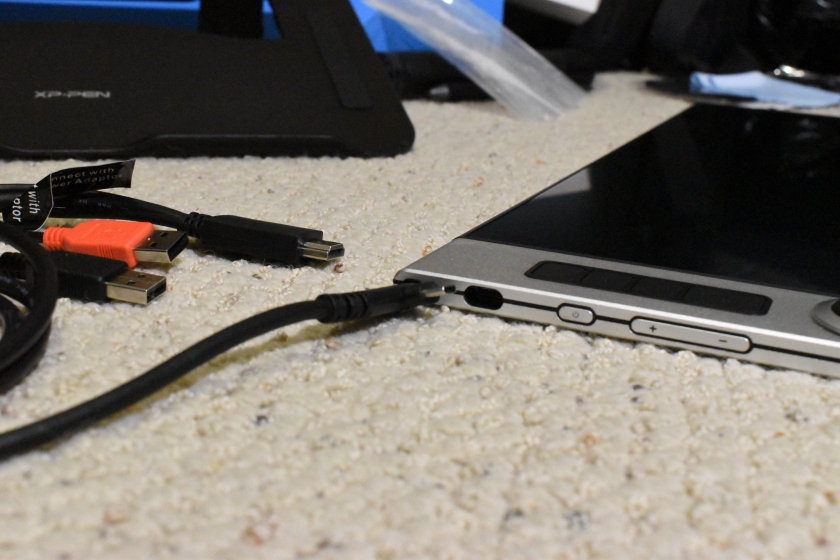
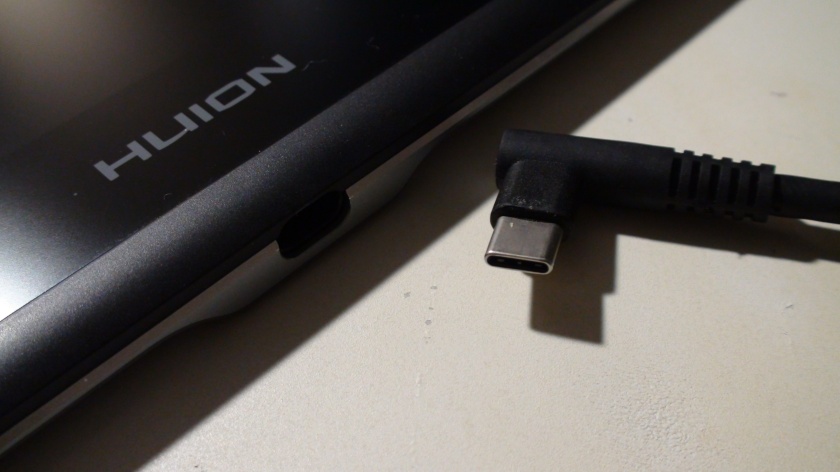
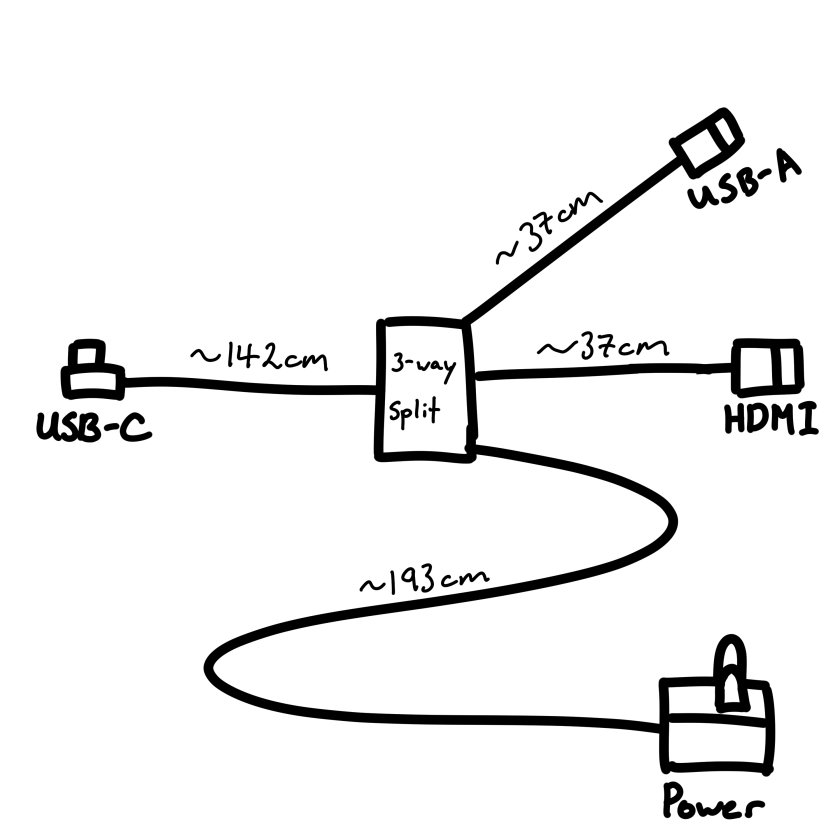
The XP-Pen Innovator 16 comes with a 3-in-1 cable that connects the tablet using a single cable that goes from USB type-C on the tablet, to USB type-A for data, HDMI for display, and USB type-A for power.

If you do not plug in the USB type-A for power and only plug in the HDMI and USB type-A for data, the screen will be powered but there will be a high pitch coil whine from the tablet around where the cable plugs into it.
This seems like it would be bad for the device, so I highly suggest plugging in the USB type-A for power into the power adapter, or into another USB port on your computer.

The USB type-C port on the tablet has a hole in front of the port. I know many people hate this design because it means you can only use a proprietary cable, however, in the case of drawing tablets, it has the advantage of supporting the cable and keeping the cable anchored to prevent the port from breaking from accidental pulls and cable weight.

This is my opinion, but I would rather replace a proprietary cable than risk having the port break from cables that are not held in place well.
If the cable breaks outside of warranty, you just have to buy a new cable. If the port breaks outside of warranty, you have to buy a whole new device.

11 OSD keys

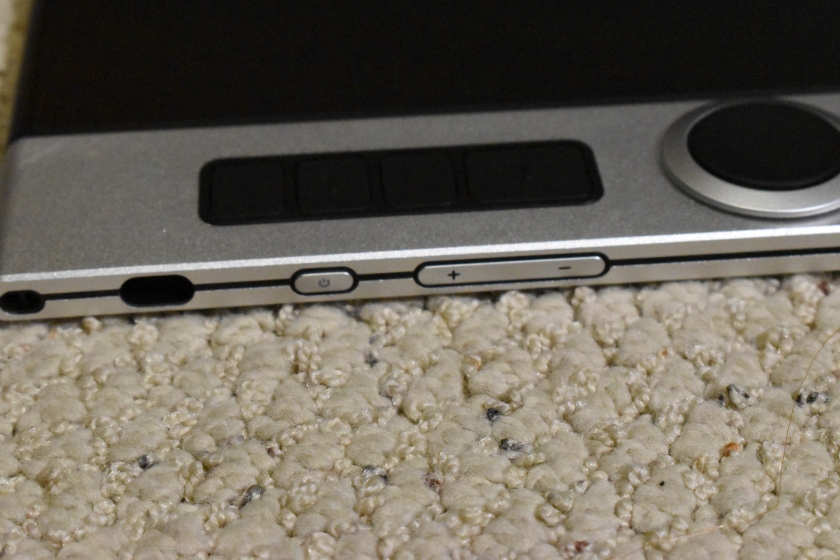
On the side of the tablet beside the shortcut keys are the power button and OSD keys.

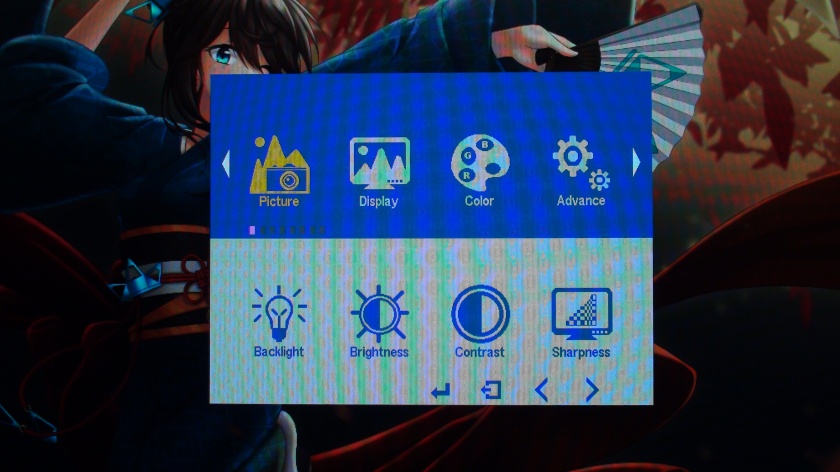
The OSD keys only adjust the brightness and the actual colour adjustments are available in the XP-Pen drivers.

One nitpick I have here is that the power key will be somewhat blocked by the cable if it’s plugged in the opposite way. You can still press the power button even when it’s like that, but it’s a slight design oversight nonetheless.

12 tablet stand

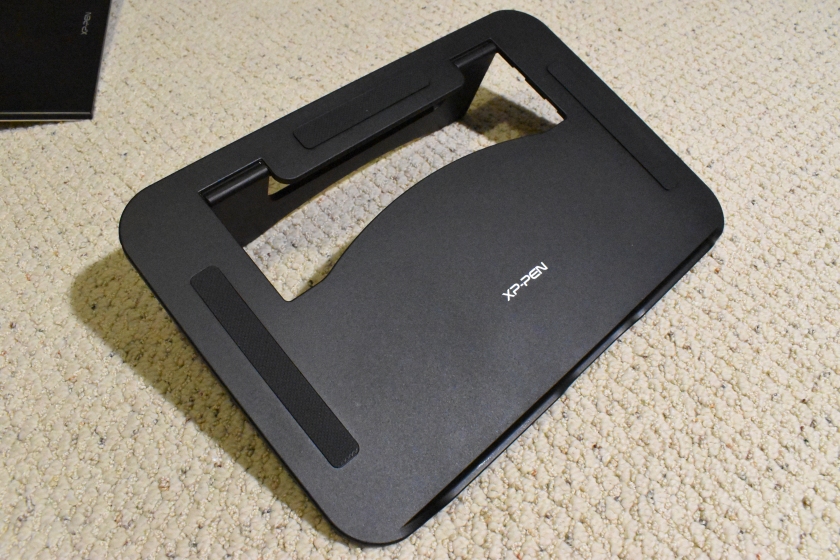
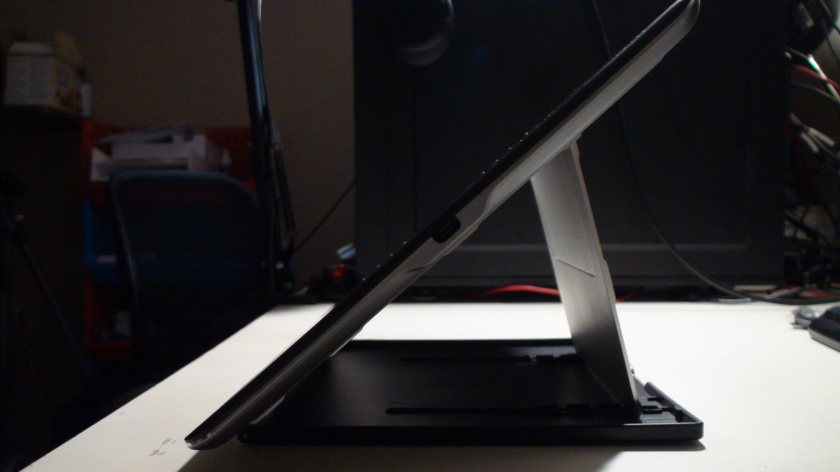
The included tablet stand is a plastic contraption with rubber feet that only supports one angle.
Personally, I find this angle quite low and uncomfortable to work on for long periods of time, so I propped it up with a box to give it a higher angle. It was quite stable even with this setup.

The XP-Pen Innovator 16 uses the PA5 pen which has a wide rubber grip design with a dull-silver accented top. It was quite comfortable to use and I have no complaints about it.

Oddly enough, this pen doesn’t have a bulge towards the bottom of the grip like most other pens do. However, the rubber was grippy enough that I didn’t have problems holding the pen without my fingers sliding down when applying heavy pressures.

The 2 pen buttons protrude slightly from the surface of the pen, making them easy to find and use by feel alone. They also have a nice tactile click and are easy to use.

The top of the pen does not have anything.

The tablet comes with a pen case for protecting and carrying around your pen if needed. The lid functions as a pen stand, while the other end holds all the replacement pen nibs and pen nib remover (the middle silver hole).
A funny thing to note here is that the pen stand doesn’t seem to hold the pen straight upright, but it does still do its job of keeping the pen standing so no issue there.


Screen quality

15 tablet screen

The XP-Pen Innovator 16 displays colours very nicely out of the box. I was very surprised to find that the colours were very accurate out of the box when I measured them.

With that said, I ran into an issue where my display colours looked very muted the first time I plugged the display in. This is because Windows had automatically assigned a random colour profile to the display which was completely wrong.

To check for this, right-click on your desktop and select “Display settings”. Then identify and select the Innovator 16 at the top and look at the Color Profile section.
If the drop-down is blank, there is no problem. However, if there is a profile in there, Google how to remove a color profile from your monitor.

16 display settings

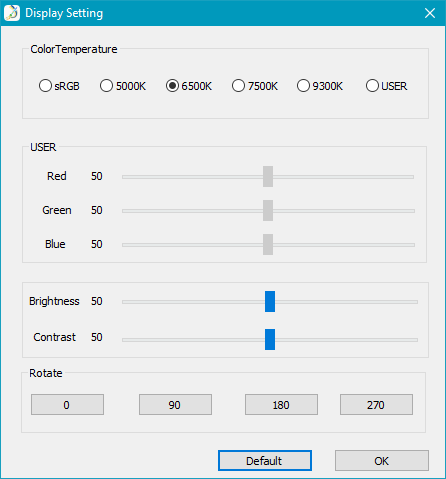
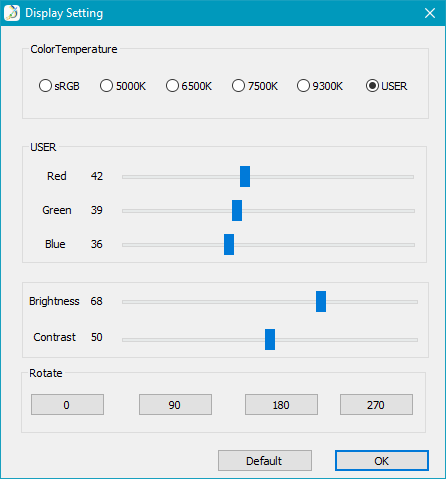
To access the colour settings, you will need to install the XP-Pen drivers, then click the ‘Display Setting’ button in the bottom right. In the screen that pops up, you will be able to adjust the colours, brightness, and contrast. You can also rotate the display from this window.

The XP-Pen Innovator 16 comes set to 6500K by default and is very accurate to that standard. I don’t recommend changing the display colours from default unless you have a colorimeter, although you can tweak the brightness to suit yourself.

Note: I have been repeatedly saying that sRGB is the colour standard most people should use, but I have actually always been calibrating to the 6500K colour temperature up to this point (whitepoint 6500K, white level 120cd/m2, gamma 2.2).
sRGB is similar to 6500K, but is slightly different. Quite frankly, I do not know which is better, but I personally prefer 6500K.

17 side view screen

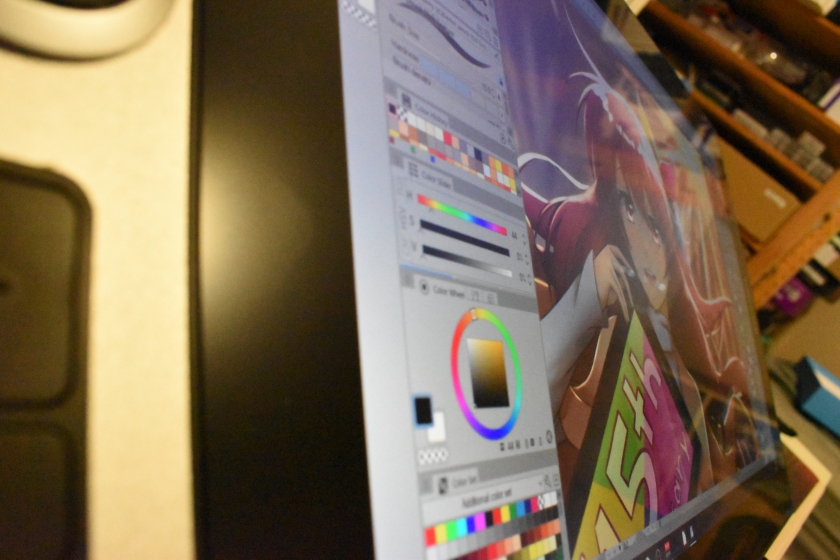
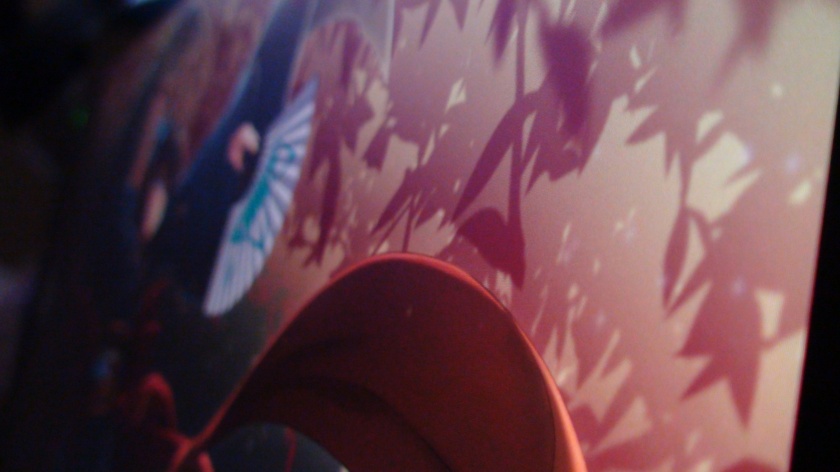
The IPS display on this tablet does a good job of allowing you to view the same colours from basically all angles. The textured screen protector does dim the colours a bit when viewing from the sides, but when viewing the screen from any “normal” drawing angle, there are no problems with the colours.

18 calibration values

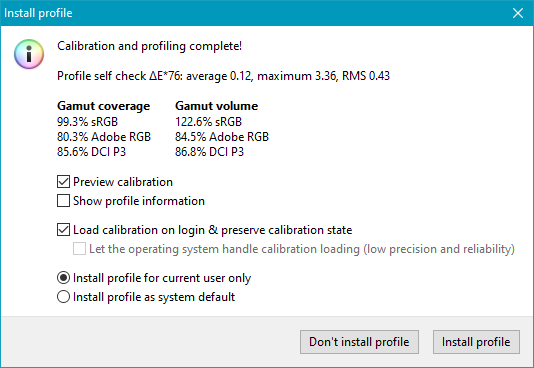
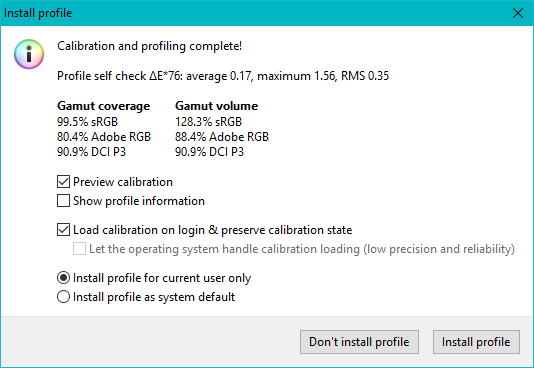
XP-Pen advertises this tablet as a 125% sRGB monitor, and from my measurements, it appears to be a truthful claim.

The above results are from my calibration using my X-Rite ColorMunki Display with DisplayCAL, and I measured that the tablet has a 123% sRGB gamut volume. A 2% difference is negligible in this measurement. (The gamut volume being what the tablet is capable of, and the gamut coverage is what my color profile uses.)
Unfortunately, the 84% AdobeRGB volume seems to fall short of XP-Pen’s 92% AdobeRGB claims, but this is still an impressive result nonetheless.

These results are great because this means that the tablet is suitable for use with colour accurate work.

19 default values

The above are my results from using the Spyder colour accuracy checker available on DisplayCAL.

I performed the above colour accuracy check with my XP-Pen Innovator 16 at default settings. As you can see, the results are all have Delta-E’s close to 0 (closer to 0 is better) and the bars on the right are all in the green which means they’re acceptably accurate.

20 calibrated values

This second colour accuracy chart is the results shown after I calibrated the display.
Compared to the previous chart, the Delta-E’s shown in this chart are better, however, it should be noted that the default settings were already more than acceptable.

I cannot stress how great it is to know that the factory default is calibrated properly. This means that people who cannot afford a colorimeter will have a monitor which has accurate colours out of the box.
Certainly, monitors do degrade over time and will need recalibration eventually, but the default calibration should last someone long enough until they decide they need a colorimeter for their work.

A Blurb About Colorimeters

If you are an aspiring digital creative working with colours, I wholeheartedly recommend investing in a colorimeter. Factory calibration can only last so long before the monitor colours start to drift and become less and less accurate, so it is extremely beneficial in the long run if you invest in a colorimeter. Even Wacom’s factory calibrated tablet monitors are no exception to this and their colours will drift over time because colour drift is an unavoidable aspect of monitors as they age.
Having a colorimeter to calibrate your monitor every month or so is vital if you want to have complete confidence in your colours at all times.

My recommendation for the best cheapest option is the Datacolor Spyder5 Express paired with the free software DisplayCAL. I do not recommend the cheaper X-Rite ColorMunki Smile because it is an old type of colorimeter which loses its reliability very quickly, whereas the Spyder5 Express and pricier models will work for many years to come.
You can read great reviews of these colorimeters at this site:
https://www.color-management-guide.com/spyder5express-review.html
https://www.color-management-guide.com/colormunki-smile-xrite-review.html
And here’s a really simple guide on how to calibrate with DisplayCAL:
https://www.pointsinfocus.com/learning/digital-darkroom/displaycal-and-argyll-cms-quick-start-guide/
Or watch this simple Youtube guide on DisplayCAL by Hardware Unboxed:
https://youtu.be/f2nVNxx1IHo
If you get Spyder colorimeter, here’s how to get the Spyder5 colorimeter to be detected by DisplayCAL:
https://hub.displaycal.net/forums/topic/spyder5-not-detected/

21 parallax

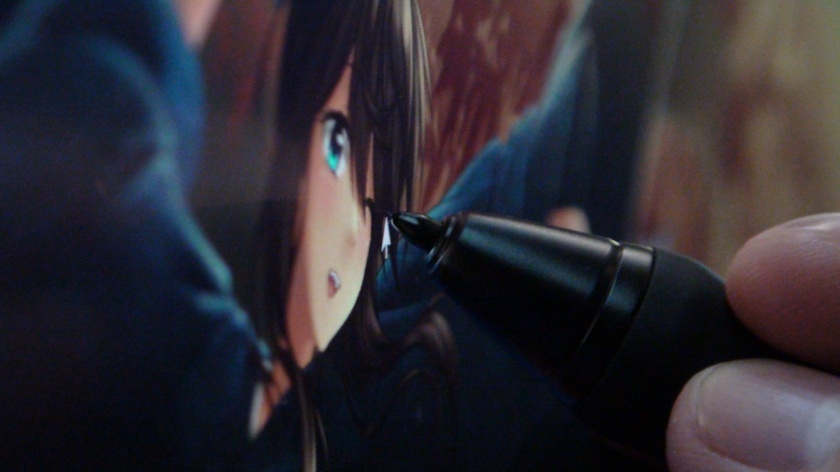
The XP-Pen Innovator 16 uses a fully-laminated display, which is the screen technology that brands use to have reduced parallax (the distance between the pen tip and the screen).

As you can see in the picture above, the pen tip is close to the cursor, however, you can also tell there’s some distance. This is probably in part due to the fact that the Innovator 16 uses a screen protector instead of an etched glass design, which adds to how much material there is between the pen and screen.

22 backlight bleed

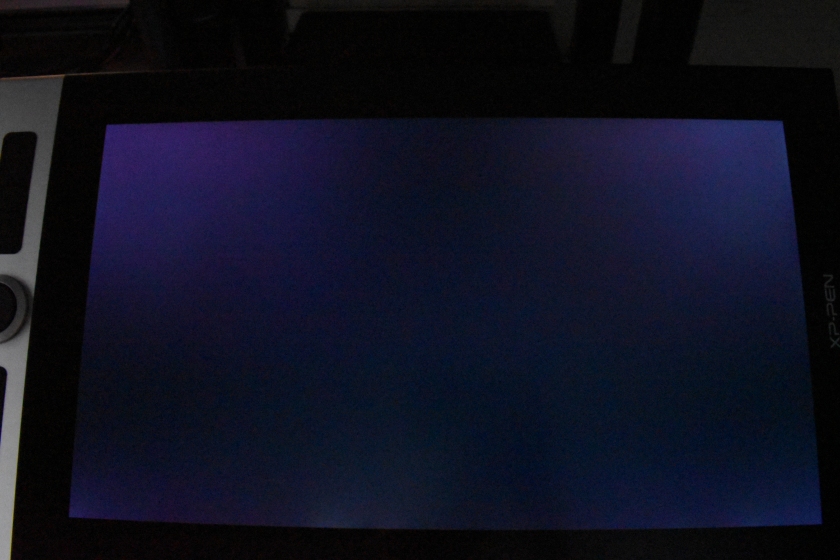
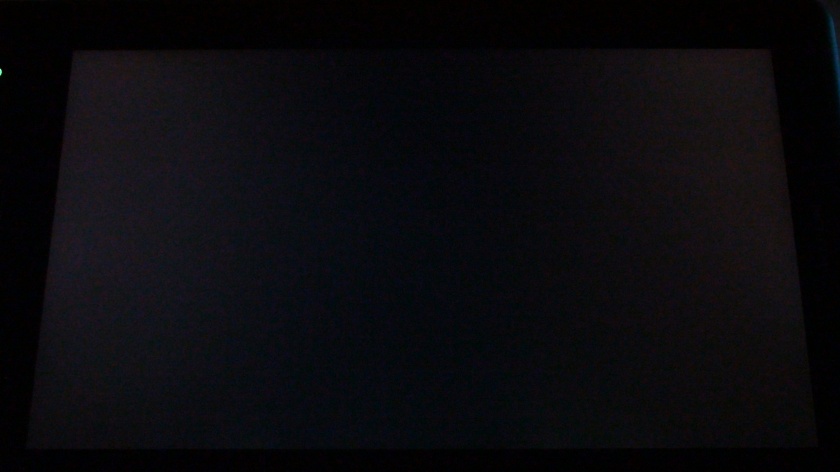
The easiest way to see light bleed is by full-screening a black image. As you can see, there is some light bleed in the corners of my tablet, and some in the middle of the bottom edge. This is a typical amount of light bleed and has no noticeable effect on colours being displayed there.
If your tablet has much more noticeable light bleed (especially if it is noticeable on all colours, not just pure black), you may want to contact XP-Pen support to get it replaced.


Tablet drivers

The XP-Pen tablet driver are extremely easy to install. Just go download the latest version directly from XP-Pen’s site and remove all other tablet drivers you have on your computer before installing it.

Once you’ve installed the driver and plugged in your tablet, the XP-Pen driver icon should appear in the system tray in the bottom right. You can access the tablet settings by clicking on that. The installer will also create a shortcut on your desktop for opening the settings.

If the installer doesn’t prompt you to restart your computer after it finishes, I wholeheartedly suggest restarting your computer anyways to allow Windows to properly update the files necessary for the driver to run smoothly.

24 drivers

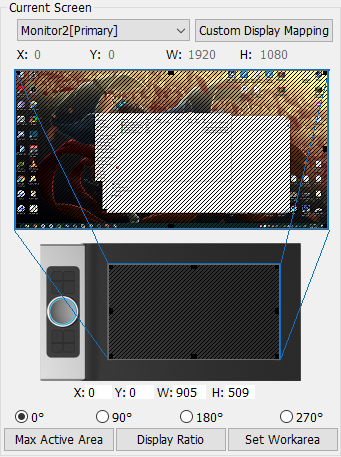
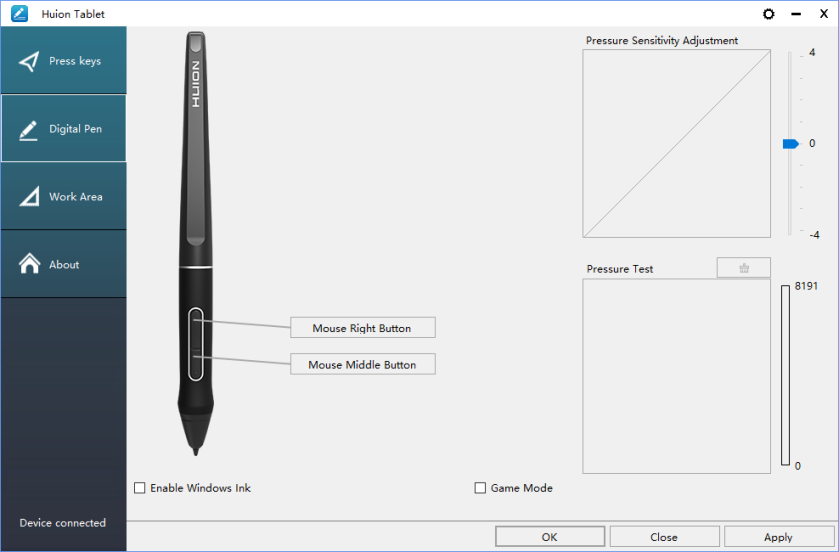
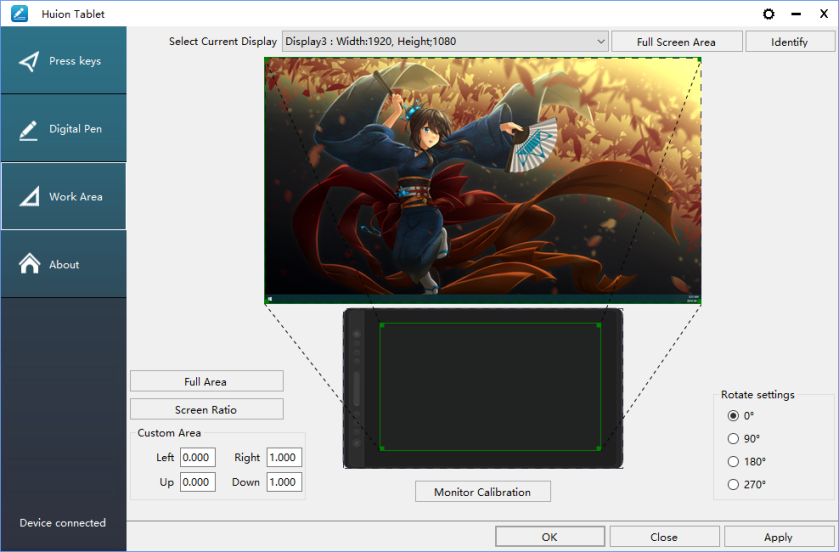
The XP-Pen driver is a simple one page driver with all the important settings in one window. Here you can set the pen buttons and pen pressure, and choose which monitor the tablet maps to.

You may need to check the Windows Ink checkbox if you use programs such as Photoshop which require Windows Ink to be turned on for pen pressure to work. Otherwise, I have found that I prefer having it unchecked.

The Barrel Button Settings section lets you choose the function assigned to the pen buttons.

You can set basically all keyboard or mouse shortcuts that you can think of using the function key option, but you unfortunately cannot combine mouse clicks with keyboard keys in the same function. This is one of the few small cons of the XP-Pen driver which has been around for a fairly long time now.

25 click sensitivity

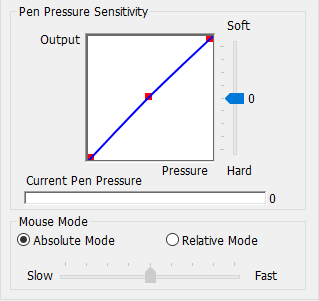
The Click Sensitivity section allows you to manipulate the pen pressure curve directly. For this pen, I didn’t find the need to change anything as the pen pressure was decent at default, but the pen pressure graph is extremely useful for making subtle changes to your overall pen pressure.

26 current screen

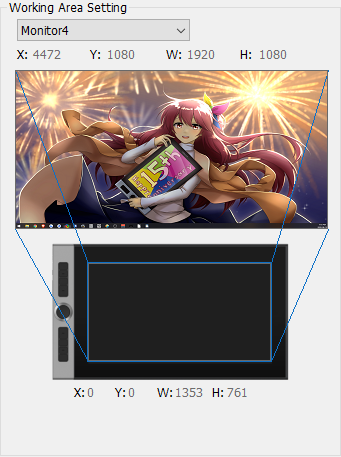
The Current Screen section controls which monitor your tablet is mapped to, and what area of your tablet is used.

If you noticed earlier, there was a function called Switch Monitor among the functions you could assign to your shortcut keys. That function cycles through all the available monitors in the drop-down list at the top of the Current Screen section when used, so you can use that to quickly switch which monitor your pen input goes to.

If you click the Express Keys button in the bottom right, a new window will open up with the options for changing the functions assigned to the shortcut keys.
You can click the Dial tabs to change the functions assigned to the physical and touch dial as well.

All the buttons can be assigned mouse clicks, keyboard functions, or the extra functions, just like the pen buttons.

The bar along the top of this window allows you to make program specific profiles which will only be active when the program you assigned is your current active window. It is a useful feature for people who want different functions for different programs.

28 display setting

The Display Setting button pulls up the colour settings, and you can also rotate the display for left-handed use here.

29 calibration

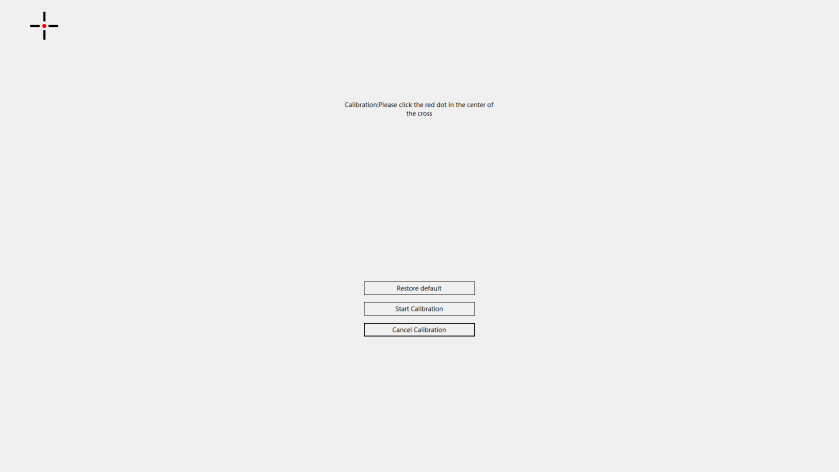
The calibrate button brings up the pen calibration which is a 5-point calibration using the 4 corners and the middle. You can click Esc on your keyboard to cancel and exit the calibration.
The default calibration had the cursor a bit higher than the pen tip, so I used to calibration and was able to fix it. I will admit, it took a bit of experimenting on clicking different parts of the red crosses, but I got a decent calibration for myself in the end.

Also, make sure to export all your settings before doing the calibration as there is no way to reset only the pen calibration. You can export your settings with the export configuration button in the bottom left of the main driver screen.
To reset the calibration, you need to click the Default button in the bottom right of the XP-Pen drivers which resets everything, not just the calibration.

I will also mention here that the pen calibration does not perfectly take into account pen tilt/direction yet. It seems to attempt to, but it is not perfect.


Drawing tests

These pen tests are all done with the same settings for both the canvas and the pens. These tests are only done in Clip Studio Paint as that is the only program where I totally understand how to remove all unwanted variables.
If you are worried about whether this tablet will work with your art program, don’t be afraid to contact support to ask them directly.

-The canvas will always be a 3000x3000px 300dpi page (the above test page is a 3000x6000px 300dpi page, so just two pages stuck together).
-The test pens are mostly all 100px linear pressure curve pens. Pen pressure for size and/or opacity is enabled based on the test.
-The slow ruler line test uses a 10px no pen pressure pen to clearly show wobble and jitter. I also use a 50px pen pressure enabled pen to see the visibility of wobble/jitter with pen pressure is enabled.
-The IAF (Initial Activation Force) test uses a 300px linear pressure pen to show the thinnest lines possible, as well as demonstrate the IAF of the tablet.

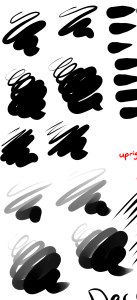
31 scribble test

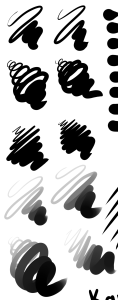
1) Scribble Test – Grade: Pass
Test pen 1 – 100px – pen pressure: size
Test pen 2 – 100px – pen pressure: size+opacity

For my pen tests, I always start out with a few pen pressure scribbles to see if I can do some nice squiggly lines with increasing pen pressure. I also do some back and forth shading and some spirals with increasing pen pressure.

With the XP-Pen Innovator 16, I had no problems doing my little scribbles going from thin to thick. I didn’t have any problems controlling my strokes and making both thin and thick lines was relatively easy. This tablet gets an easy pass here.

32 slow ruler test

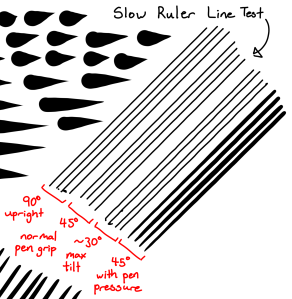
2) Slow Ruler Line Test – Grade: Pass
Test pen 1 – 10px – pen pressure: none
Test pen 2 – 50px – pen pressure: size

The slow ruler line tests done with a no pen pressure pen were quite good at all angles. It can be improved, certainly, but it is more than acceptable.

This tablet gets a pass here.

33 quick hatching test

3) Quick Hatching Test – Grade: Pass
Test pen 1 – 100px – pen pressure: size

The quick hatching test is to check whether the tablet keeps up with pen inputs. Usually, the only way to fail this section is if the pen is noticeably laggy and causes unwanted inputs like fishhooks at the beginning or end of the line.

As you can see, this tablet appears to have no problems with fishhooks. I also never noticed the cursor lagging so far behind the pen that it was a problem, so it gets a pass here.

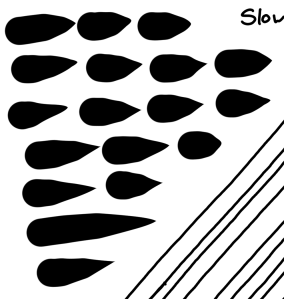
34 short taper

4) Short Release Taper Test – Grade: Pass-ish
Test pen 1 – 100px – pen pressure: size

This test is meant to see the smoothness of the pen pressure taper when going from max to min pressure quickly. Basically, you press your pen down hard then flick to the side to see how smoothly the stroke tapers.

With the XP-Pen Innovator 16, these tapers are not quite as smooth as I would like them to be, but they are an improvement from the pen tapers which I saw from XP-Pen before.

At first, I thought this issue had been fixed because it didn’t occur frequently while I was drawing on the tablet. However, the pen tests show me that the tapers are not quite perfect yet.
Because of the improvement, this tablet receives a pass-ish here.

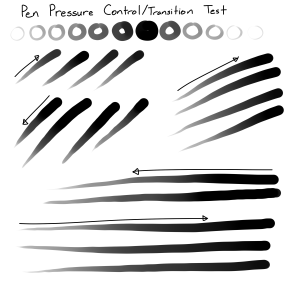
35 pen pressure

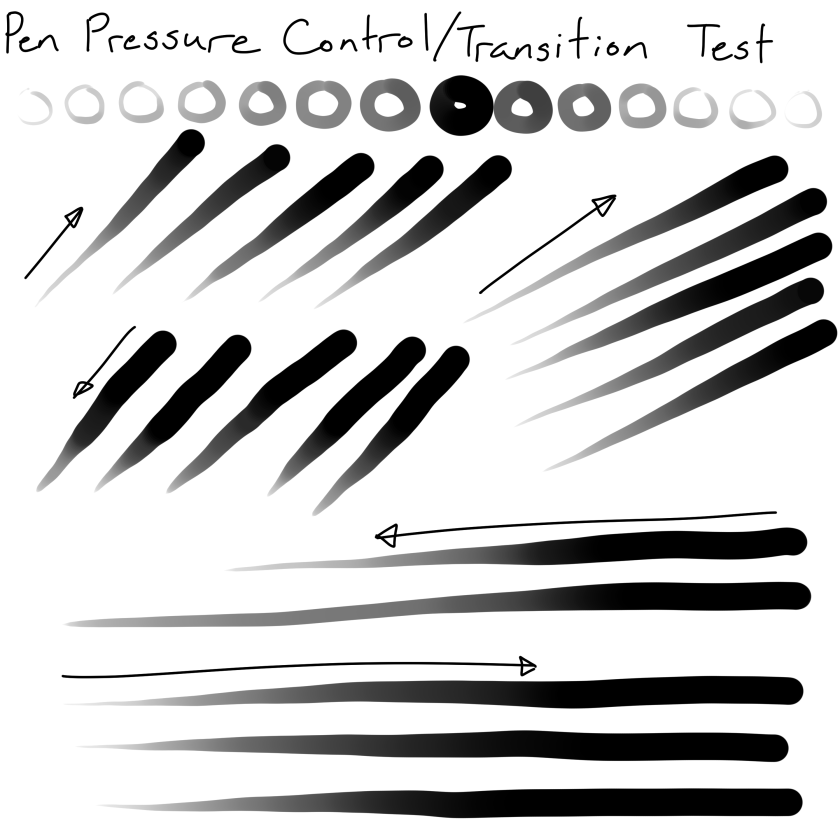
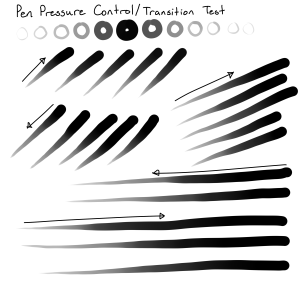
5) Pen Pressure Control/Transition Test – Grade: Pass
Test pen 1 – 100px – pen pressure: size+opacity

This section is to test the smoothness of the transitions in pen pressure.
-The circles at the top are one of Youtuber Brad Colbow’s tests. It is used to check if you can properly control the pen pressure all the way around a circle. If there is a pressure jump, some circles will feel impossible to control due to that jump.
-The lines at the bottom are slow strokes done with smooth increases or decreases to pen pressure in mind. The arrow points in the direction which the stroke was done, and the smoothness of the gradients show how smooth the pen pressure transitions.

In terms of the pen pressure control circles, I had some issue trying to get the thinnest circles done consistently, however, all the rest of the circles were easily accomplished with fairly good consistency.

I will give this tablet a pass here since there don’t appear to be any noticeable issues in the pen pressure transitions either.

6) Initial Activation Force & Lightest Pen Pressure Test – Grade: Pass-ish
Test pen 1 – 300px – pen pressure: size

This test tries to demonstrate the IAF of the tablet, and also shows the lowest possible pen pressure the tablet is capable of producing consistently.
IAF is the amount of force necessary to cause the pen to output a line. Ideally, your tablet will have an extremely low IAF where the pen will output a line with the least amount of force possible.
A high IAF causes issues such as light pen taps not registering as clicks, and the inability to sketch very lightly, both of which become quite annoying the more you experience it.

For this test page, the squiggly lines should begin right on the start line.
-If the line begins right on the start line, this indicates that the IAF is extremely low (low IAF is best) and the line just appears naturally without effort.
-On the other hand, if the line does not begin on the start line and instead begins further along the stroke, this means that the IAF is high so I needed to search for the IAF by increasing my force little by little until I finally started outputting a line.

An example of the ideal test page is the Huion New 1060 Plus (2048) IAF test page which I included above for comparison. Almost all the lines begin right on the start line meaning it has extremely low IAF, and the lines are almost transparent showing that the tablet is capable of drawing extremely light pen pressures.

The XP-Pen Innovator 16 has a semi-low IAF which doesn’t begin right when the nib touches the screen. As you can see, I was not able to get the lines to start on the start line consistently, but I was able to start them pretty close to it almost every time.
Basically, the IAF is low enough that I don’t consider it an issue, but it is certainly not perfect.

In terms of the lightest pen pressure, I will admit that I had a fairly hard time getting a super thin line using the 300px test pen. The thin lines done with this tablet obviously pale in comparison to the Huion New 1060 Plus (2048) IAF test page which is the ideal, but this thinness is decent when not using a 300px pen and is acceptable.

Overall, the XP-Pen Innovator 16 has an acceptably low IAF and is able to draw acceptably thin lines. This tablet gets a pass-ish here since it could be better.

37 tilt test

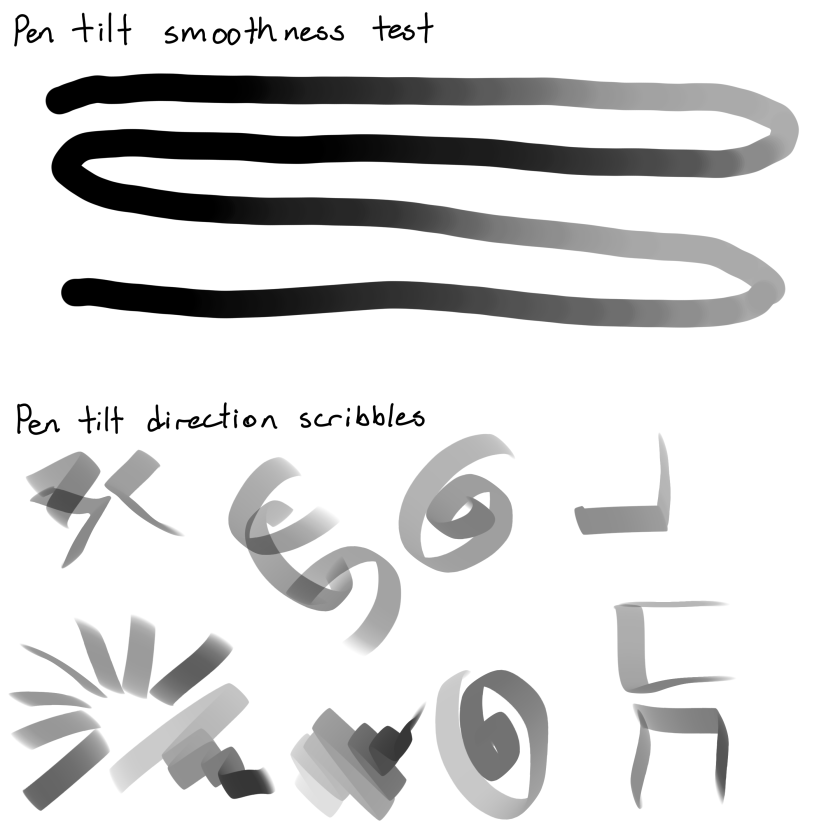
7) Pen Tilt Test – Pass-ish
Test pen 1 – 100px – pen tilt: opacity
Test pen 2 – 100px – flat pen – pen tilt: direction

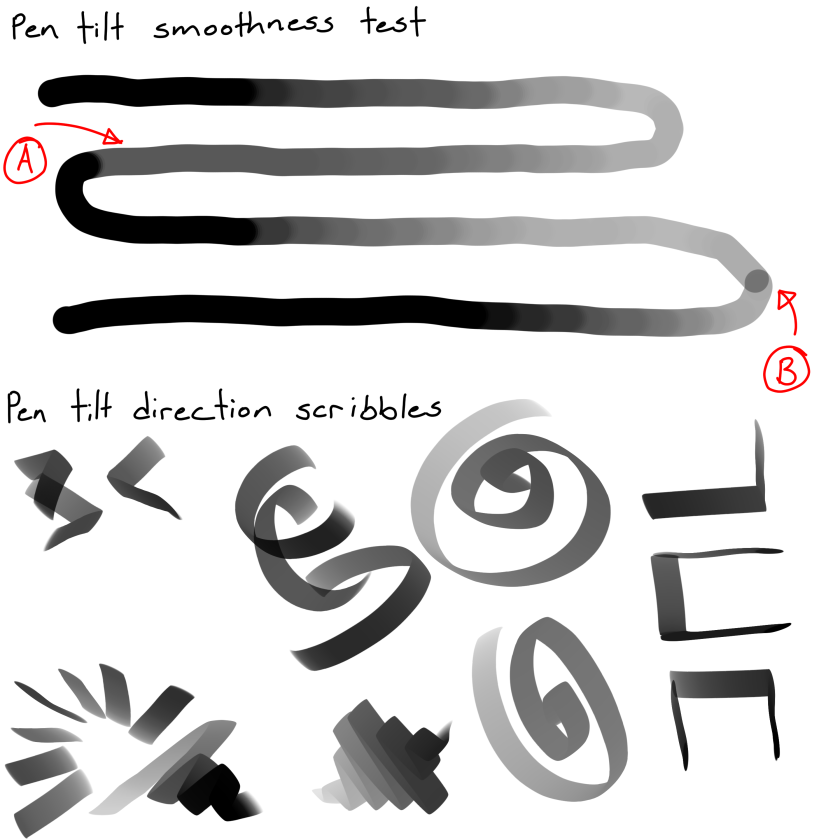
This test shows the smoothness of the pen tilt by gradually tilting the pen while slowly moving the pen to the side. This section also includes scribbles using the pen direction determined by pen tilt.

As you can see in the smoothness test, the pen tilt transitions on the XP-Pen Innovator 16 are not particularly smooth. You can see all the steps in the gradient, and there were some places where the pen tilt stopped working for a brief moment.

Fortunately (or unfortunately), XP-Pen doesn’t specify the number of pen tilt levels they have on the XP-Pen Innovator 16’s product page, so they aren’t lying about “having” pen tilt, but you can clearly tell it’s not particularly high quality pen tilt.

This tablet will get a pass-ish here since they have pen tilt, but it’s not very high quality.

Overall

So all in all, the drawing test results are:
1) Scribble Test – Pass
2) Slow Ruler Line Test – Pass
3) Quick Hatching Test – Pass
4) Short Release Taper Test – Pass-ish
5) Pen Pressure Control/Transition Test – Pass
6) Initial Activation Force & Lightest Pen Pressure Test – Pass-ish

Non-Vital Drawing Tests:
7) Pen Tilt Test – Pass-ish

Ideally, all the above tests should have at least a “Pass-ish” for their grades because the most vital function of a drawing tablet is to draw properly and predictably. Failing any of these tests means that it doesn’t do that.


The drawing experience!

The actual drawing experience on the XP-Pen Innovator 16 was quite enjoyable. The pen pressure worked as expected for the most part, and no issues occurred during the creation of my drawing.

I certainly noticed that I sometimes had to tap harder than expected to click something because of the slightly higher IAF, but it was never bad enough that I thought the IAF was an issue.

An interesting thing to note is that the screen does not get warm anywhere. The warmest part is actually not even on the screen and is on the bezel beside the shortcut keys, which is to be expected as that’s where the cable is connected to the tablet.

Oddly enough, I don’t actually have anything else to comment on for the drawing experience. It worked as expected while I was drawing on it and nothing stood out to me as an annoyance.
I suppose that’s a compliment coming from me considering I’m rather critical of every small thing that annoys me about a tablet.


Conclusion

The XP-Pen Innovator 16 is a very good tablet which is certainly worth your consideration if you’re interested in its slim and sleek looks.
I feel like the 500 USD price tag is somewhat high, but I suppose that’s a reasonable price considering the great build quality with its metal alloy body.

For me personally, I feel like the selling point of the Innovator 16 is the fact that it comes with good colour calibration out of the box.
The 9mm thinness which they advertise certainly makes the tablet slim and sleek, but I’ve never really been aboard the “make it thinner” hype.

Another selling point would be the shortcut keys accompanied by the dual wheel. Compared to most other 15.6-inch drawing monitors options, 8 button sand 2 wheels is quite a lot. So if you want to mainly stick to using shortcut keys on your tablet, this tablet might have enough for you to work comfortably with just shortcut keys.
It’s a bonus that the shortcut keys and wheel feel great to use because of how well they’re built.

If you’re looking for a good, fairly large drawing monitor as a workstation that you can carry around, the XP-Pen Innovator 16 is certainly a looker which performs quite decently even among the many 15.6-inch options currently available in the tablet market.


Places to buy the tablet

Here are the links to the anniversary edition Innovator 16 on XP-Pen’s webstore. It is the same price as the normal Innovator 16 during the anniversary sales!

I will also mention that XP-Pen has included “golden tickets” in some of their anniversary editions boxes. If you’re lucky enough to find one in your box, you can get a full refund for your tablet!

Huion Inspiroy Dial Q620M Review

(Dec 25, 2019) Update: Unfortunately, it appears my pre-release model Q620M does not perform as well as the newer consumer batches of Q620M’s.
Because of this, the Drawing Tests section of this review may not be completely accurate about this tablet’s drawing performance. Please keep this in mind.

In terms of my overall conclusion about this tablet, I believe it is quite good without the drawing performance issues.

(Nov 29, 2019) Update: It was brought to my attention by a reader that their Q620M has much smoother pen pressure transitions than mine.
I have a pre-release model which Huion sent me before they released this tablet to the public,
so it is very possible that the consumer models are better in the Pen Pressure Control/Transition Test of my drawing tests section (or my tablet is defective).
Their test in CSP: https://imgur.com/s4zkYTH

I am currently in the process of asking Huion about this difference in pen pressure quality.


The Huion Inspiroy Dial Q620M is one of Huion’s newest tablets and it features a large drawing surface area complemented by shortcut keys and a dial. It also has wireless mode via USB dongle, pen tilt capabilities, Android compatibility, and is compatible with Windows Radial Controller Protocol (if your program supports it).
Based on the specifications written on paper, it’s quite the fully fledged package.
Note: I do not talk about the Android compatibility feature as I feel I do not have the right tools and experience to judge that feature.

Going into this review, I had fairly high expectations for this tablet because I know Huion can make tablets that perform spectacularly. However, I have found that Huion often tweaks pen pressure settings and makes it worse rather than better in their newer devices.
Did it live up to my expectations? Yes, I think this tablet is well up there among the “good” tablets. However, I felt that there were some parts of the pen and pen pressure which Huion could have pulled off better.

For this review, Huion was kind enough to supply me with the Huion Q620M. As usual, this review is based on my honest thoughts and opinions about this tablet and I will never agree to review a product if I am required to say only good things about it.
If you believe receiving a review product for free makes a review biased, now is a perfect time for you to stop reading.

Anyways, with all that out of the way, onto the review!

Please note!
-I am not a Mac or Linux user!! I mainly only tested this tablet on Windows 10 version 1803.
-Prices may have changed since I wrote this review.
-Check when a review was written. Some aspects may improve or change over time, so it is in your best interest to concentrate on reviews which are less than 1 year old.
-It is good practice to check multiple reviews to cross reference their information before you make a conclusion about a tablet.


Table of Contents


How good is this tablet?

Design choices: Mostly good!
-Nitpicks: Battery indicator lights don’t stay on, you can’t tell the buttons apart by feel
Hardware quality: Fairly solid!
-Nitpicks:
Tablet drivers: Well featured!
-Nitpicks: No reset to default for manual pressure curve, can’t disable dial directly
Drawing test results: Decent results.
-Nitpicks: Imperfect quick stroke tapering, imperfect pen pressure transition
Actual drawing experience: Fairly enjoyable!
-Nitpicks: Creaking pen, very brief wireless cutouts

Overall: A fairly good buy for 110 USD.

My verdict:
-I can recommend this tablet to anyone interested in it for its many features. However, it’s not a perfect tablet so you should probably take note of the issues I noticed with its drawing performance.

To me, it feels like the drawing capabilities are rather lacking for its 110 USD price. I certainly never noticed any issues while drawing, but my drawing tests show quite a few places where improvements could be made.
All in all, it draws decently enough that I don’t completely recommend against it.

(Dec 25, 2019) Update: Unfortunately, it appears my pre-release model Q620M does not perform as well as the newer consumer batches of Q620M’s.
Because of this, the Drawing Tests section of this review may not be completely accurate about this tablet’s drawing performance. Please keep this in mind.

In terms of my overall conclusion about this tablet, I believe it is quite good without the drawing performance issues.


Specifications at a glance

Price: 109.99 USD (when this review was written)
Active Area: 10.5 x 6.56 inches
Pen Type: Battery-free
Pen Buttons: 2 side buttons, no eraser
Pen Pressure: 8192
Pen Tilt Sensitivity: Yes, levels unspecified
Shortcut Keys: 8 buttons, 1 dial
Multi-touch: None
Other features: Wireless mode, Android compatible with OTG adapter (works with wired and wireless), compatible with Windows Radial Controller Protocol


What’s in the box?

2 - Box

The tablet comes in a sleek black box accented with some of Huion’s blue.

3 - Contents

The things that come in the box:

  • Huion Inspiroy Dial Q620M tablet
  • Huion PW500 battery-free pen
  • Pen stand
  • Tablet cable (USB type-A to USB type-C)
  • OTG adapters (USB type-C, Micro-USB)
  • Wireless receiver (USB type-A)
  • Pen nib replacements x10
  • User manual
  • Driver installation CD shaped instruction card
  • Warranty card
  • “Thank you” card

1 - Tablet

The Huion Q620M has a nice aesthetic with a black body and silver accents around the shortcut buttons. The centers of the buttons also light up when turning the tablet on/off.

One thing I would like to note is that the light up buttons are supposed to indicate the current battery level of the tablet by lighting up more or less LEDs based on the remaining battery.
However, for battery saving reasons, Huion decided to only have it flash once when you power on/off the tablet, so the light doesn’t actually stay on and tell you the current battery level of the tablet.
I personally would prefer to be able to see the remaining battery level just by glancing at the tablet instead of opening up the drivers to look at the battery indicator which is in there. That’s just my opinion though.

As expected from such a thin tablet, there is a tiny bit of flex when doing a simple twist test by gripping both ends of the tablet and twisting. However, this amount of flex shouldn’t cause any problems.

5 - Tablet texture

The Huion Q620M has a rough texture which is rather unusual for a Huion tablet because they used to stick to much smoother textures. It appears lots of people complained that the previous texture was too smooth for their liking, so Huion probably moved to rougher textures in response to that.

6 - pen nib wear

With regards to pen nib wear, this is how much my pen nib wore down through my several days of testing. It’s not as bad as other rough texture tablets, but it is certainly wearing fairly quickly.
Pen nibs being worn down is the cost of wanting rougher textures on your tablets. At least Huion courteously provides you with 10 replacement pen nibs out of the box rather than the measly 3 which Wacom does.

Personally, I preferred the smoother texture because my pen nibs literally never wore down, but I don’t particularly hate the rough texture either.

7 - Tablet back

The back of the tablet has 4 round rubber feet and the usual information sticker. The rubber feet do their job and keep the tablet in place.

8 - Tablet edge

The edges all around the tablet are the same design, with a small bevel right at the edge preventing it from being a sharp corner.

This design is nice in that it makes it so that the edge doesn’t dig into your wrist because it’s not a sharp corner. I was afraid that all these new tablets were going to have the sharp edge design, but it looks like Huion found a way to avoid that issue. Good on them.

9 - Tablet shortcut keys

The shortcut buttons are fairly good and have a decent click to them. I’m not sure if it’s because of the size, but I felt that they required slightly more force to press than I would have liked. Overall, they are pretty nice to use though.
Unfortunately, they have absolutely no bumps or differences which allow you to recognize between them without looking down at them. At least a bump on one or two of the buttons would have made them much easier to navigate.

The dial is a wheel with 24-points for a full revolution. Every point along the rotation, it gives off a satisfying click and lets you know that you’ve spun the wheel 1 increment.
The dial spins fantastically and I have no complains about how it feels and performs.

10 - Tablet port

This tablet uses an L-shaped USB type-C cable which connects to a USB type-A port on your computer.

Thanks to the nature of USB type-C, you can reverse the L-shaped cable for use in both right and left-handed modes.

11 - Tablet power button

If you want to use the tablet in wireless mode, you just click the power button which is located on the top edge of the tablet by the dial.

12 - Pen

The Huion Q620M uses the PW500 battery-free pen, which appears to be the “premium” line of Huion’s pens used on higher priced devices like the Huion WH1409 V2 and Huion Kamvas Pro 22.
It features a wide semi-hard/semi-soft rubber grip which has become the norm for tablets in recent years.

Unfortunately, when I took a few Huion pens apart, I could see no difference between the low-end PW100 pen and the PW500/507 pen, so I’m not sure what warrants its 50 USD asking price.

I have also found that the PW500/507 pens sometimes “creak” while in use, where it feels like the pen nib is not sliding smoothly in and out of the pen.
I have never had this issue with the PW100 pens, so I’m not sure what the cause is. It gets a bit annoying during a long drawing session, but it has never seemed to cause any issues in the actual drawing I’m working on.

Holding this pen is very comfortable and it feels good to draw with. The buttons are also protruding from the grip so you can find them easily without having to glance over at your pen every time you want to use it.

The top of the pen does not have anything.

The pen stand is a round donut shape which lets you stand the pen upright or sideways on it. It’s rather weighty and gets a good grip on the table with its rubber feet.

The inside of the pen stand holds the 10 replacement pen nibs and the pen nib remover tool in the middle.


Tablet drivers

The tablet drivers are extremely easy to install. You don’t even need to have your tablet plugged in to install them! Just go download the latest version from huion.com and remove all other tablet drivers you have on your computer before installing it.

Once you’ve installed the driver, the icon shows up in your taskbar, and the driver also creates a shortcut on your desktop.

Although the installer doesn’t prompt you to restart your computer after it finishes, I wholeheartedly suggesting restarting your computer anyways to allow Windows to properly update the files necessary for the driver to run smoothly.

16 - Drivers

In the driver, you can configure your tablet expresskeys, pen buttons, pen pressure curve, and work area. There’s also an option to save different profiles, although the save and open buttons are named a bit ambiguously (they’re the import config and export config buttons in the “About” section).

If you see a “Require Admin” button along the bottom of the driver when you first run it, click it to give your driver proper administrator privileges so that it can make changes to system files when necessary. However, I have not had problems running the drivers without clicking it so I’m not sure what it changes.

You can check the battery level of the Q620M in the bottom left of the drivers.

17 - Press Keys

The Press Keys tab allows you to customize the functions mapped to your expresskeys. As you can see above, the hotkeys menu has keyboard shortcuts, pen clicks, and some “switch” functions available. The drop down menu for the keyboard shortcuts has every keyboard key that I can think of.

The Huion shortcut keys do not have anti-ghosting capabilities. In other words, you cannot use two buttons at the same time. This will not matter in most cases, but you should keep this in mind if you think it affects you.
Every button will work at the same time as the pen nib though, including the pen buttons.

As you can see along the bottom, there is a checkbox to disable Windows Radial, which disables the compatibility with Windows Radial software. However, there is no checkbox which disables the dial itself, so you can end up accidentally messing things up by brushing against the dial.
If there was a button to disable the dial completely, that would be nice, but for now you have to manually take off all the shortcuts assigned to the dial to “disable” it.

Update (Dec 25, 2019): Huion has added a checkbox which allows you to disable the dial itself starting with the Dec 20, 2019 driver.

18 - Digital pen

The Digital Pen tab allows you to customize the pen buttons and the pen pressure curve. The pen buttons have the same amount of configuration as the expresskeys.

Oddly enough, although Huion has implemented a new pen pressure curve which you can now adjust directly, they forgot to put in a “reset to default” button for it.

Usually you will need to uncheck the “Enable Windows Ink” option to prevent Windows Ink from messing with your drawing. That said, some programs such as Photoshop usually do not work if it is not turned on, so play with that option as you see fit.

19 - Work Area

The Work Area tab allows you to customize the monitor your tablet is mapped to, and the size of the active area your tablet uses. Pick your monitor from the drop down menu, then click the Full Area button, and then click the Screen Ratio button to properly adjust your tablet area to match your monitor.

There is also the option to rotate your tablet input for left-handed use.

20 - Driver settings

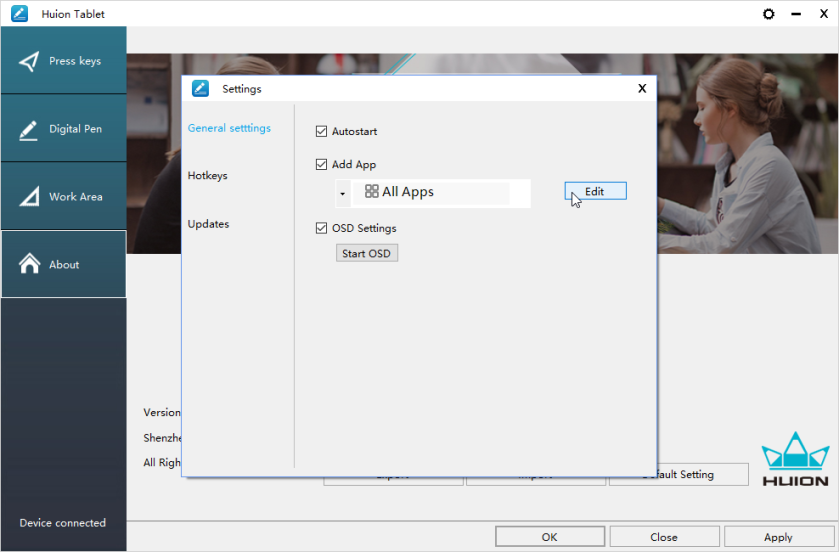
In the drivers, you also have the option to create automatically switching profiles for different programs. You can access this by pressing the gear button in the top right corner of the Huion drivers.
To edit the profiles for each program, just select the program and click the edit button and it will show you the settings which are set for that specific application.

You can also check for driver updates from here, although I have found that it does not always work properly. It is much more reliable to go straight to Huion’s website to check for updates.


Drawing tests

(Dec 25, 2019) Update: Unfortunately, it appears my pre-release model Q620M does not perform as well as the newer consumer batches of Q620M’s.
Because of this, the Drawing Tests section of this review may not be completely accurate about this tablet’s drawing performance. Please keep this in mind.

In terms of my overall conclusion about this tablet, I believe it is quite good without the drawing performance issues.

These pen tests are all done with the same settings for both the canvas and the pens. These tests are only done in Clip Studio Paint as that is the only program where I totally understand how to remove all unwanted variables.
If you are worried about whether this tablet will work with your art program, don’t be afraid to contact support to ask them directly.

-The canvas will always be a 3000x3000px 300dpi page (the above test page is a 3000x6000px 300dpi page, so just two pages stuck together).
-The test pens are mostly all 100px linear pressure curve pens. Pen pressure for size and/or opacity is enabled based on the test.
-The slow ruler line test uses a 10px no pen pressure pen to clearly show wobble and jitter. I also use a 50px pen pressure enabled pen to see the visibility of wobble/jitter with pen pressure is enabled.
-The IAF (Initial Activation Force) test uses a 300px linear pressure pen to show the thinnest lines possible, as well as demonstrate the IAF of the tablet.

Huion Q620M Test Page-1

1) Scribble Test – Grade: Pass
Test pen 1 – 100px – pen pressure: size
Test pen 2 – 100px – pen pressure: size+opacity

For my pen tests, I always start out with a few pen pressure scribbles to see if I can do some nice squiggly lines with increasing pen pressure. I also do some back and forth shading and some spirals with increasing pen pressure.

With the Huion Q620M, I had almost no problems doing my little scribbles going from thin to thick. I sometimes wasn’t able to start with as thin a line as I wanted, but I believe that is more attributed to my lack of practice recently.

This tablet gets a pass here.

Huion Q620M Test Page-2

2) Slow Ruler Line Test – Grade: Pass-ish
Test pen 1 – 10px – pen pressure: none
Test pen 2 – 50px – pen pressure: size

The slow ruler line tests done with a no pen pressure pen were decent at all pen angles, but you could clearly see some wobble, especially when the pen was tilted all the way over.

This tablet gets a pass-ish here because the wobble is not ridiculous, but it’s not particularly good either.

Huion Q620M Test Page-3

3) Quick Hatching Test – Grade: Pass
Test pen 1 – 100px – pen pressure: size

The quick hatching test is to check whether the tablet keeps up with pen inputs. Usually, the only way to fail this section is if the pen is noticeably laggy and causes unwanted inputs like fishhooks at the beginning or end of the line.

As you can see, this tablet appears to have no problems with fishhooks. I also never noticed the cursor lagging so far behind the pen that it was a problem, so it gets a pass here.

Huion Q620M Test Page-4

4) Short Release Taper Test – Grade: Pass-ish
Test pen 1 – 100px – pen pressure: size

This test is meant to see the smoothness of the pen pressure taper when going from max to min pressure quickly. Basically, you press your pen down hard then flick to the side to see how smoothly the stroke tapers.

With the Huion Q620M, there was some noticeable corners on quite a few of the strokes which I have pointed to with a red arrow. It’s not a very big issue as you can barely see it from a distance, but it should be noted nonetheless.

The tablet gets a pass-ish here.

Huion Q620M Test Page-5

5) Pen Pressure Control/Transition Test – Grade: Fail
Test pen 1 – 100px – pen pressure: size+opacity

This section is to test the smoothness of the transitions in pen pressure.
-The circles at the top are one of Youtuber Brad Colbow’s tests. It is used to check if you can properly control the pen pressure all the way around a circle. If there is a pressure jump, some circles will feel impossible to control due to that jump.
-The lines at the bottom are slow strokes done with smooth increases or decreases to pen pressure in mind. The arrow points in the direction which the stroke was done, and the smoothness of the gradients show how smooth the pen pressure transitions.

In terms of the pen pressure control circles, I had no problems doing all the different circles smoothly. I was even able to do super thin circles with this tablet.

Unfortunately, for the pen pressure transitions below the circles, I could see clear pen pressure jumping. Oddly enough, it was easy to go from low to high pressure, but when going from high to low, my strokes almost always ended up with a thick ending rather than the super thin lines I expected to get.

I suppose I can only give this tablet a fail here.

Please note: I have a pre-release model which Huion sent me before they released this tablet to the public.
It was brought to my attention by a reader that their Q620M has much smoother pen pressure transitions than mine, so it is very possible that the consumer models are better in this section of the drawing tests.
Their test in CSP: https://imgur.com/s4zkYTH

It appears the pen tapering issue is the same for both models, however.

6) Initial Activation Force & Lightest Pen Pressure Test – Grade: Pass-ish
Test pen 1 – 300px – pen pressure: size

This test tries to demonstrate the IAF of the tablet, and also shows the lowest possible pen pressure the tablet is capable of producing consistently.
IAF is the amount of force necessary to cause the pen to output a line. Ideally, your tablet will have an extremely low IAF where the pen will output a line with the least amount of force possible.
A high IAF causes issues such as light pen taps not registering as clicks, and the inability to sketch very lightly, both of which become quite annoying the more you experience it.

For this test page, the squiggly lines should begin right on the start line.
-If the line begins right on the start line, this indicates that the IAF is extremely low (low IAF is best) and the line just appears naturally without effort.
-On the other hand, if the line does not begin on the start line and instead begins further along the stroke, this means that the IAF is high so I needed to search for the IAF by increasing my force little by little until I finally started outputting a line.

An example of the ideal test page is the Huion New 1060 Plus (2048) IAF test page which I included above for comparison. Almost all the lines begin right on the start line meaning it has extremely low IAF, and the lines are almost transparent showing that the tablet is capable of drawing extremely light pen pressures.

The Huion Q620M has a fairly low IAF which I could find almost right away. As you can see, I was able to get a lot of the lines to start on the start line. However, due to how loose the pen nib is, there were times when I felt like the lines should have started, but only started way further down the line.
The looseness of the nib affected my double tapping quite a bit though, so I had to consciously press harder/further to make sure all my double taps properly registered.

In terms of the lightest pen pressure, I could consistently get thin lines with the 300px IAF test pen. The thin lines on this tablet are impressively thin, and I had no trouble consistently getting the thinnest lines possible.
Of course, it’s not as amazing as the ideal Huion New 1060 Plus (2048) lines, but they’re still quite impressive nonetheless.

Overall, the Huion Q620M has a fairly low IAF and is able to draw decently thin lines consistently. This tablet gets a pass-ish here.

Huion Q620M Pen Tilt Tests

7) Pen Tilt Test – Fail
Test pen 1 – 100px – pen tilt: opacity
Test pen 2 – 100px – flat pen – pen tilt: direction

This test shows the smoothness of the pen tilt by gradually tilting the pen while slowly moving the pen to the side. This section also includes scribbles using the pen direction determined by pen tilt.

As you can see in the smoothness test, the pen tilt transitions on the Huion Q620M is not very smooth.
It’s a good thing they didn’t advertise +/-60 levels, and just said “up to 60 degrees tilt support”, because this is clearly not 60 different levels.

This tablet gets a fail here.

Overall

So all in all, the drawing test results are:
1) Scribble Test – Pass
2) Slow Ruler Line Test – Pass-ish
3) Quick Hatching Test – Pass
4) Short Release Taper Test – Pass-ish
5) Pen Pressure Control/Transition Test – Fail
6) Initial Activation Force & Lightest Pen Pressure Test – Pass-ish

Non-Vital Drawing Tests:
7) Pen Tilt Test – Fail

Ideally, all the above tests should have at least a “Pass-ish” for their grades because the most vital function of a drawing tablet is to draw properly and predictably. Failing any of these tests means that it doesn’t do that.


The drawing experience!

Surprisingly, despite the somewhat subpar drawing test results in the previous section, I found drawing on the Huion Q620M to be fairly enjoyable.

This time, I decided to do my drawing tests after I spent my time finishing my review drawing on it, so I was pretty surprised at how bad the drawing test results were. Of course, I noticed issues like the double tapping not registering unless I pressed harder, but the pen pressure issues came as a surprise to me.
Basically, they’re certainly issues which people should look out for, but it probably won’t affect your drawing too much, so keep it in mind as such.

For every review, I don’t replace the pen nib so that I can see how much it wears through a single review drawing. With this tablet, I felt it spin in the pen and roll over the flat edge a few times while drawing, and that was a bit of a minor nuisance as well.
It didn’t really affect my drawing in a significant way, but I certainly felt and noticed it every time it happened. At least there’s 10 replacement nibs at the ready for you to replace when a flat side appears.

With regards to the wireless mode of the tablet, I found that it worked really well and felt exactly like using the tablet through cable.
The only issue I found with the wireless was that it would freeze for a second or two once every 10-20 minutes. As you can tell, it’s a small issue, but you start noticing it over a long drawing session where you’ll encounter it more than a few times.


Conclusion

I can recommend this tablet to anyone interested in it for its many features, but like I said at the start, it’s not a perfect tablet so you should probably take note of the issues I noticed with its drawing performance.

With its 110 USD price, I kind of expected it to perform as well as the Huion H1060P which I use as the baseline for 100 USD tablets. Unfortunately, it seems like work was put into cramming as many features into this tablet as they could, rather than refining the base drawing capabilities to their absolute best.

If you’re looking for a tablet with loads of features, this one is quite good. However, for the price, the drawing capabilities feel lacking.

(Dec 25, 2019) Update: Unfortunately, it appears my pre-release model Q620M does not perform as well as the newer consumer batches of Q620M’s.
Because of this, the Drawing Tests section of this review may not be completely accurate about this tablet’s drawing performance. Please keep this in mind.

In terms of my overall conclusion about this tablet, I believe it is quite good without the drawing performance issues.


Places to buy the tablet

Huion Store | Amazon.com | Amazon.ca | AliExpress
People living in other regions should check their regions Amazon or see if the Huion Store ships to them.

If you have any questions about the tablet, feel free to ask me!

Black Friday Sale
Huion is currently having a Black Friday Sale on their official store, so it will be a 20% off discount for the Inspiroy Dial. Below are the links to the Inspiroy Dial:
Official Store
Aliexpress
Amazon-US
Amazon-CA
Amazon-UK
Amazon-DE
Amazon-FR
Amazon-ES
Amazon-IT

XP-Pen Artist 12 Pro Review

The XP-Pen Artist 12 Pro is a continuation of the Artist Pro series which previously only offered tablets larger than 15.6-inch. With the release of the Artist 12 Pro and Artist 13 Pro, the Artist Pro series now has all the common sizes ranging from 12-inch to 22-inch.

The XP-Pen Artist 12 Pro specifically is meant to be a new and improved version of the previous Artist 12 with improvements made to many aspects of the tablet such as a better screen and more comfortable pen.

For this review, XP-Pen was kind enough to supply me with the XP-Pen Artist 12 Pro. As usual, this review is based on my honest thoughts and opinions about the tablet and I will never agree to review a product if I am required to say only good things about it.
If you believe receiving a review product for free makes a review biased, now is a perfect time for you to stop reading.

Anyways, onto the review!

Please note!
-I am not a Mac or Linux user!! I mainly only tested this tablet on Windows 10 version 1803.
-Prices may have changed since I wrote this review.
-Check when a review was written. Some aspects may improve or change over time, so it is in your best interest to concentrate on reviews which are less than 1 year old.
-It is good practice to check multiple reviews to cross reference their information before you make a conclusion about a tablet.


Table of Contents


How good is this tablet?

Design choices: Almost perfect!
-Nitpicks: Cable sticks straight out of tablet
Hardware quality: Very sturdy!
-Nitpicks:
Screen quality: Very good!
-Nitpicks:
Tablet drivers: Good design!
-Nitpicks:
Drawing test results: Mostly good.
-Nitpicks: Quick tapers are not smoothpen tilt is not particularly good
Actual drawing experience: Decent.
-Nitpicks: Bad cursor accuracy

Overall: A tablet with loads of potential, but brought down by its problems.

My verdict:
-If you are considering this tablet, I can’t wholeheartedly recommend it how it currently is, but you can still take it into consideration.

The biggest issue is the bad cursor accuracy. With any tablet, you want the cursor to follow your pen exactly the way you move, but with the Artist 12 Pro you can actually move the pen around the cursor without moving the cursor itself. Also, the cursor will often move in 2 pixel increments rather than follow the pen to every single pixel on your screen.
This affects small detail work as you will have a hard time aiming at a specific point, and doing very small strokes becomes more difficult. I believe this is the biggest con of this tablet.

The other issue, the non-smooth pen tapering, is not as intrusive as the bad cursor accuracy and you can still draw quite well with it.
However, XP-Pen still hasn’t been able to fix it despite saying they would work on it from my Artist 15.6 Pro review (March 15, 2019), so I think you should keep it in mind as a quirk of all XP-Pen products.

XP-Pen gave me a promotion code to share, so if you’re interested in this tablet, make sure you use the code to save some money!

10%off:HK28UNG4 , works on online store below till Oct. 30th
Website store: http://bit.ly/2n6MQ9J (US,UK,AU promo code works)

Specifications at a glance

Price: 249.99 USD (when this review was written)
Active Area: 10 x 5.7 inches, 11.6 inch diagonal

Resolution: FHD 1920 x 1080 (16:9 ratio)
Display Type: IPS, gamut = 72% NTSC on product page
Pen Type: 
Battery-free
Pen Buttons: 2 side buttons, no eraser
Pen Pressure: 8192
Pen Tilt Sensitivity: None
Shortcut Keys: 8 buttons, 1 red dial
Multi-touch: No
Other features: Single angle tablet stand included.


What’s in the box?

2 - Box

The tablet comes in a white box with a front view image of tablet with a pretty drawing displayed on it.

3 - Contents

The things that come in the box:

  • XP-Pen Artist 12 Pro tablet
  • XP-Pen PA2 battery-free pen
  • Pen case
  • Combined cable (USB type-C to USB type-A, HDMI, and USB type-A for power)
  • USB type-A extension cable (for power)
  • USB power adapter
  • Outlet adapters for international power outlets
  • HDMI to Mini-DisplayPort adapter
  • Pen nib replacements x8
  • Anti-fouling glove
  • Screen cleaning cloth
  • User manual
  • Warranty policy and warranty card
  • “Thank you” card

4 - Tablet Sticker

When you first take out the tablet, it will have a sticker on it instructing you to take off the protective layer which protects the actual screen protector beneath it. If you do not take this layer off, you will not get to experience the nice matte texture of the actual screen protector beneath it.

5 - Tablet Overall

The XP-Pen Artist 12 Pro is designed in the same way as the Artist 15.6 Pro, except with a smaller screen.
It has a screen surrounded by decently large bezels and physical shortcut keys along one side. The red dial on the side is really the only thing that is different form other similar tablets in terms of looks.

The tablet feels sturdy when performing a twist test, where I grab both sides of the tablet and try twisting the tablet a bit with just my hands.

6 - Tablet surface

The tablet comes with a pre-applied screen protector which has a nice matte anti-glare texture. The texture is on the smoother side, but it has enough texture to not feel too slippery to draw on, and it also does not compromise screen clarity at all.

The advantage of a pre-applied screen protector (over textured glass) is that you will be able to replace it in the future if it becomes worn down from lots of use. It also saves ou from the hassle of having to go buy and apply your own screen protector.
I believe this screen protector will last you quite a while considering mine has absolutely no scratches from my month of testing.

7 - Tablet side

The XP-Pen Artist 12 Pro is thin like its 15.6-inch sibling, so it is very portable, especially with its smaller screen. It should have no problems fitting in any standard sized bag.

8 - Tablet back

On the back of the tablet, there are 2 large rubber feet spanning the width of the tablet. There is also the information sticker with the S/N number on it.

There are no VESA screw holes on the back of this tablet, so you will need to get a bit creative or use an adapter if you want to use it on a monitor arm.

9 - Tablet shortcut keys

Along the side of the tablet, there are 8 physical shortcut buttons and a red dial. All of the buttons feel fantastic to use and require very little strength to press while also making very satisfying clicks as feedback.

These shortcut keys also have anti-ghosting capabilities, meaning you can press multiple buttons at once and have them all work, the same way pressing multiple keys on a keyboard activates all of them at once. This also applies to the pen buttons, so you can use combinations of shortcut keys and pen buttons if you need to. This feature may seem like a given, but not every tablet company does this.

The red dial is a function wheel which spins extremely smoothly and is an absolute pleasure to use. It clicks quietly as feedback and clicks 24 times in a full rotation, meaning your assigned function will activate 24 times in one spin. Since there are so many activation points, you can control very precisely whether you want to go fast or slow with the red dial.

For some reason, many small drawing monitors have less shortcut buttons than their larger brethren, but that is not the case with the Artist 12 Pro. It has the full 8 buttons plus red dial that the Artist 15.6 Pro does, and this makes it completely possible to draw on the Artist 12 Pro while mainly using the shortcut buttons.
I used the shortcut keys for a while and they were very enjoyable to use, especially because there are actually enough shortcut keys on this tablet for most of my functions.
However, I am simply more used to using my keyboard, so I did most of my drawing with keyboard anyways.

10 - Tablet OSD buttons

This tablet has 3 buttons along the right side of the tablet (in right-handed mode) which are for power, brightness up, and brightness down. The tablet itself does not have a dedicated OSD settings button, and you instead need to change screen colours through the XP-Pen driver software.

The power button will glow a dark blue to indicate that the tablet is powered on.

The XP-Pen Artist 12 Pro has a USB type-C port on it to connect to the combined USB/HDMI/power cable. I praised the choice of a USB type-C cable on the Huion Kamvas Pro 13, but the way it was implemented on the XP-Pen Artist 12 Pro really throws away the advantage that using USB type-C offers in the first place.

The advantage of using USB type-C on a tablet is mainly to make the cable flippable for use in left-handed mode. On the XP-Pen Artist 12 Pro, the cable is just a straight cable, not an L-shaped cable, meaning that it doesn’t take advantage of the multi-direction feature of USB type-C.

To give credit where credit is due, it is good that they created a tunnel in front of the port to better support the cable weight and prevent it from breaking the port over time, and the cable fits fairly snugly into that tunnel. However, making the cable L-shaped would have improved cable life (because people wouldn’t need to bend the cable out of the way like I did), and also would have made the cable much harder to break in general (because you wouldn’t be able to accidentally snag it on things).
The straight cable is such an easy way to accidentally break the tablet because it juts straight out of the tablet, whereas an L-shaped cable would be much harder to accidentally snag and subsequently break the port/tablet.

XP-Pen told me they didn’t use the L-shaped cable because it would cover the OSD buttons, but there’s absolutely enough distance between the port and the OSD buttons that you should be able to push the cable slightly out of the way to access the OSD buttons.

11 - Tablet Cable

The included cable is a combined cable which goes from USB type-C on the tablet to USB type-A and HDMI on the computer. The tablet can be powered solely by the computer if your USB port can provide enough power, but if it can’t, the extra red USB type-A connector will need to be connected to another USB port on your computer, or a power outlet using the included power outlet to USB adapter.

I was using the tablet without connecting it to a power adapter for most of my review. As far as I could see, there were no noticeable differences between having it powered by a single USB port, or a power outlet, but this will be different based on how much power your USB port can supply.

The HDMI portion of the cable is where all the cables come together, so I will give measurements of the cable length from there.
-The HDMI to USB type-C is ~170cm.
-The HDMI to USB type-A is ~58cm.
-The HDMI to USb type-A power is ~200cm (this includes the USB extension cable).

Many people complain that a combined cable like this is bad because if one part of it breaks, then you have to buy a whole new cable. These people say that they would much rather have separate cables.
However, from what I have seen, just as many people complain about having multiple separate cables coming out of a tablet, saying it looks messy. These people say that they would much rather have a combined cable.

Personally, I think a combined cable is better, especially because the replacement cable only costs ~25 USD on XP-Pen’s store.
Whether you have separate cables or one combined cable, when one cable breaks, you have to replace it. If it only costs ~25 USD, a combined cable seems like the better choice because it’s a cleaner one cable solution.

Of course, this is under the assumption that XP-Pen’s cables don’t die every month or something stupid like that. Has the cable broken for me yet after one month of usage? Nope. I really doubt it’s going to break frequently enough that paying ~25 USD for another one is going to be a problem. Make sure you use the 1 year warranty (18 months if you bought it off the official XP-Pen site) if yours breaks within the first year.

13 - Tablet stand

This is the new XP-Pen AC42 stand which comes included with the XP-Pen Artist 12 Pro.

It is a simple all-plastic one angle stand which gives you a pretty low angle of around 20 degrees. With the legs snapped into place, it is very sturdy and there is no fear of it collapsing under normal pressure.
As there is no rubber on the bottom lip of the stand, if you lean very heavily on the top half of the tablet, the bottom part of the tablet will dislodge itself causing the tablet to slide off the stand. However, this has never happened to me without purposefully leaning really heavily on the top edge of the tablet, so I believe this is a non-issue for this stand in particular.

This stand is quite a low angle so you may want to consider buying a different stand for a more comfortable experience as it certainly hurt my neck trying to draw for long periods at that angle. With that said, it’s better than having no stand and it will do in a pinch by propping it up with other things like textbooks to get a better angle.

This tablet uses the newest XP-Pen PA2 battery-free pen. It has a rubber grip with a plastic top, and has a nice shape with a bulge near the bottom to allow for an easy and comfortable grip on the pen.

The pen buttons are surrounded by a little plastic “island” which you can feel very clearly when trying to find it in your hand. The buttons themselves protrude slightly from the surrounding plastic and are quite easy to press. They also give a nice tactile click when pressed.

The top of the pen does not have anything.

15 - Pen nib

There is almost no visible difference between the PA2 pen and the previous P05R pen. However, if you look closer you will notice that the pen nib is a little bit thinner.

The PA2 is made differently so that it uses longer and thinner nibs which has two main benefits.
The first benefit is increasing the stability of the pen nib in the pen, so the pen now makes less noise when drawing strokes and the pen nib wiggles less in the holder.
The second benefit is blocking slightly less of your screen so that you can see your cursor better when using smaller brushes.
Overall, it’s a great new pen design and I really like how it feels to use.

16 - Pen case

The tablet comes with a pen case which I like very much. The lid becomes a pen stand, and all the pen nibs are stored on the opposite side. The pen case also helps with carrying around the pen safely with your tablet if you take it out with you.


Screen quality

17 - Screen

The XP-Pen Artist 12 Pro comes with fairly nice colours out of the box which are just slightly brighter than they should be.
Honestly, the default settings are decent enough to be used as is, however, if you have a colorimeter, you will notice that the colours are slightly off from sRGB.

18 - Display Setting

To access the colour settings, you will need to install the XP-Pen drivers, then click the ‘Display Setting’ button in the bottom right. In the screen that pops up, you will be able to adjust the colours, brightness, and contrast. You can also rotate the display from this window.

Above are my settings which are roughly sRGB. You can use those settings to roughly calibrate your XP-Pen Artist 12 Pro if you get one, but I am not sure how similar the colours are between my device and others, so be warned that it might not be the right settings for all XP-Pen Artist 12 Pro devices.
*It should be noted that you should leave the Contrast as is if yours is different. I did not change my contrast from default, so if your default is different from mine, you should most likely leave it as is.

19 - Viewing angle

The IPS display on this tablet is very good and you can view the colours from basically all angles without any noticeable changes in the colours. The textured anti-glare screen protector does dim what you can see from the sides a bit, but there are absolutely no problems with colours when viewing the screen from any “normal” angle.

20 - Calibration result

XP-Pen advertises this tablet as a 72% NTSC (roughly 100% sRGB) monitor, and from my measurements, it appears to be slightly less than that. From what I could see with my eyes, I think it was lacking in the cyan/blue colour saturations and that is probably why I measured 90% sRGB instead of 100% sRGB.

The above results are from my calibration using my X-Rite ColorMunki Display with DisplayCAL, and I measured that the tablet has a 96% sRGB volume and 90% sRGB coverage. (Quite honestly, I still don’t understand the difference between volume and coverage. I think I read that only coverage matters though.)

Despite seeming like a disappointing result, the colours on the Artist 12 Pro are leagues better than the colours on the previous Artist 12. It could have been better, but these colours should be more than satisfactory for the general art hobbyist.

21 - Before calibration

The above are my results from using the Spyder colour accuracy checker available on DisplayCAL. This shows the colour accuracy of the screen before calibration. (Smaller Delta-E’s means better.)

22 - After calibration

The above are my results from using the Spyder colour accuracy checker after calibrating to sRGB.
As you can see, the monitor is capable of displaying fairly accurate colours for non-cyan colours. As I mentioned before, the cyan/blue colours are noticeably less saturated to the naked eye. It’s not horribly off, but you can still see it if you put it side by side with a true 100% sRGB monitor.

A Blurb About Colorimeters

If you are an aspiring digital creative working with colours, I wholeheartedly recommend investing in a colorimeter. Factory calibration can only last so long before the monitor colours start to drift and become less and less accurate, so it is extremely beneficial in the long run if you invest in a colorimeter. Even Wacom’s factory calibrated tablet monitors are no exception to this and their colours will drift over time because colour drift is an unavoidable aspect of monitors as they age.
Having a colorimeter to calibrate your monitor every month or so is vital if you want to have complete confidence in your colours at all times.

My recommendation for the best cheapest option is the Datacolor Spyder5 Express paired with the free software DisplayCAL. I do not recommend the cheaper X-Rite ColorMunki Smile because it is an old type of colorimeter which loses its reliability very quickly, whereas the Spyder5 Express and pricier models will work for many years to come.
You can read great reviews of these colorimeters at this site:
https://www.color-management-guide.com/spyder5express-review.html
https://www.color-management-guide.com/colormunki-smile-xrite-review.html
And here’s a really simple guide on how to calibrate with DisplayCAL:
https://www.pointsinfocus.com/learning/digital-darkroom/displaycal-and-argyll-cms-quick-start-guide/
As well as how to get the Spyder5 colorimeter to be detected by DisplayCAL:
https://hub.displaycal.net/forums/topic/spyder5-not-detected/

23 - Parallax

The XP-Pen Artist 12 Pro uses a fully-laminated display, which is the screen technology that other brands such as Wacom, Microsoft, Apple, etc have used to reduce parallax (the distance between the pen tip and the screen).

As you can see in the picture above, the pen tip is really close to the cursor, with big reductions made to the thickness of the glass using the fully-laminated display. However, the glass is not thin enough to be completely unnoticeable.

Just like many other fully-laminated displays, due to the thinness of the glass, you can cause ripples on the screen to appear when pressing hard. These ripples only happen when you press around 100% pen pressure or harder, and are only slightly noticeable on a very dark colour background. I believe this is not a problem as you will most likely never notice it and it will not affect your drawing.

24 - Light bleed

The easiest way to see light bleed is by full-screening a black image. As you can see, there are a few spots of light bleed around the edges of my tablet. It may seem like a lot, but it has no noticeable effect on non-black colours being displayed there.
If your tablet has much more noticeable light bleed (especially if it is noticeable on all colours, not just pure black), you may want to contact XP-Pen support to get it replaced.


Tablet drivers

The XP-Pen tablet driver are extremely easy to install. Just go download the latest version directly from XP-Pen’s site and remove all other tablet drivers you have on your computer before installing it.

Once you’ve installed the driver and plugged in your tablet, the XP-Pen driver icon should appear in the system tray in the bottom right. You can access the tablet settings by clicking on that. The installer will also create a shortcut on your desktop for opening the settings.

If the installer doesn’t prompt you to restart your computer after it finishes, I wholeheartedly suggest restarting your computer anyways to allow Windows to properly update the files necessary for the driver to run smoothly.

26 - Driver main menu

The XP-Pen driver is a simple one page driver with all the important settings in one window. Here you can set the pen buttons and pen pressure, and choose which monitor the tablet maps to.

You may need to check the Windows Ink checkbox if you use programs such as Photoshop which require Windows Ink to be turned on for pen pressure to work.

The Barrel Button Settings section lets you choose the function assigned to the pen buttons.

You can set basically all keyboard or mouse shortcuts that you can think of using the function key option, but you unfortunately cannot combine mouse clicks with keyboard keys in the same function. This is one of the few small cons of the XP-Pen driver which has been around for a fairly long time now.

28 - Driver click sensitivity

The Click Sensitivity section allows you to manipulate the pen pressure curve directly. For this pen, I didn’t find the need to change anything as the pen pressure was decent at default, but the pen pressure graph is extremely useful for making subtle changes to your overall pen pressure.

A cool thing to note is that the only other tablet drivers with this custom pen pressure graph is Wacom’s Intuos Pro and Cintiq drivers. Wacom’s low-end Intuos tablets do not offer you the pen pressure graph, and none of the Wacom alternatives aside from XP-Pen offer it either!

29 - Driver current screen

The Working Area Setting section controls which monitor your tablet is mapped to, and what area of your tablet is used.

If you noticed earlier, there was a function called Switch Monitor among the functions you could assign to your shortcut keys. That function cycles through all the available monitors in the drop-down list at the top of the Current Screen section when used, so you can use that to quickly switch which monitor your pen input goes to.

If you click the Express Keys button in the bottom right, a new window will open up with the options for changing the functions assigned to the shortcut keys.
You can click the Dial tab to change the functions assigned to the red dial as well.

All the buttons can be assigned mouse clicks, keyboard functions, or the extra functions, just like the pen buttons.

The bar along the top of this window allows you to make program specific profiles which will only be active when the program you assigned is your current active window. It is a useful feature for people who want different functions for different programs.

Unfortunately, if you intend to assign multiple functions to the red dial, you will need to assign one of the shortcut buttons to the KL/KR Switch Function to allow you to toggle between the multiple functions assigned to the touch bar. This means that you effectively have 7 shortcut keys to work with instead of 8. In this case, 7 shortcut keys plus the red dial was enough for all of my functions though, unlike on the XP-Pen Deco 03 where I effectively only had 5 buttons to work with.
The “hints” also only show up on your main screen, not the screen assigned to your tablet, so they don’t help you figure out what function your red dial is on at all since you can’t see the hints on the right screen anyways.

31 - Driver display setting

The Display Setting button pulls up the colour settings, and you can also rotate the display for left-handed use here.

32 - Driver calibration

The Calibrate button brings up the pen calibration which is a 5-point calibration using the 4 corners and the middle. You can click Esc on your keyboard to cancel and exit the calibration.

Also, make sure to export all your settings before doing the calibration as there is no way to reset only the pen calibration. You can export your settings with the export configuration button in the bottom left of the main driver screen.
To reset the calibration, you need to click the Default button in the bottom right of the XP-Pen drivers which resets everything, not just the calibration.

In the very first driver, the calibrate function was broken and was unable to cope with multi-screen setups. However, XP-Pen quickly fixed that issue and released a new driver with that issue fixed. If you have seen a review speaking about how the calibration does not work, it has been fixed already with the newer drivers.


Drawing tests

These pen tests are all done with the same settings for both the canvas and the pens. These tests are only done in Clip Studio Paint as that is the only program where I totally understand how to remove all unwanted variables.
If you are worried about whether this tablet will work with your art program, don’t be afraid to contact support to ask them directly.

-The canvas will always be a 3000x3000px 300dpi page (the above test page is a 3000x6000px 300dpi page, so just two pages stuck together).
-The test pens are mostly all 100px linear pressure curve pens. Pen pressure for size and/or opacity is enabled based on the test.
-The slow ruler line test uses a 10px no pen pressure pen to clearly show wobble and jitter. I also use a 50px pen pressure enabled pen to see the visibility of wobble/jitter with pen pressure is enabled.
-The IAF (Initial Activation Force) test uses a 300px linear pressure pen to show the thinnest lines possible, as well as demonstrate the IAF of the tablet.

XP-Pen Artist 12 Pro Test Page-1

1) Scribble Test – Grade: Pass
Test pen 1 – 100px – pen pressure: size
Test pen 2 – 100px – pen pressure: size+opacity

For my pen tests, I always start out with a few pen pressure scribbles to see if I can do some nice squiggly lines with increasing pen pressure. I also do some back and forth shading and some spirals with increasing pen pressure.

With the XP-Pen Artist 12 Pro, I had no problems doing my little scribbles going from thin to thick. I didn’t have any problems controlling my strokes and making both thin and thick lines was relatively easy. This tablet gets an easy pass here.

XP-Pen Artist 12 Pro Test Page-2

2) Slow Ruler Line Test – Grade: Pass
Test pen 1 – 10px – pen pressure: none
Test pen 2 – 50px – pen pressure: size

The slow ruler line tests done with a no pen pressure pen were quite good at all angles, but you can clearly see some wobble when tilting the pen completely over.
However, this amount of wobble at max tilt is small enough that it shouldn’t be counted as a problem when drawing. It can be improved, certainly, but it is more than acceptable.

This tablet gets a pass here.

XP-Pen Artist 12 Pro Test Page-3

3) Quick Hatching Test – Grade: Pass
Test pen 1 – 100px – pen pressure: size

The quick hatching test is to check whether the tablet keeps up with pen inputs. Usually, the only way to fail this section is if the pen is noticeably laggy and causes unwanted inputs like fishhooks at the beginning or end of the line.

As you can see, this tablet appears to have no problems with fishhooks. I also never noticed the cursor lagging so far behind the pen that it was a problem, so it gets a pass here.

XP-Pen Artist 12 Pro Test Page-4

4) Short Release Taper Test – Grade: Fail
Test pen 1 – 100px – pen pressure: size

This test is meant to see the smoothness of the pen pressure taper when going from max to min pressure quickly. Basically, you press your pen down hard then flick to the side to see how smoothly the stroke tapers.

With the XP-Pen Artist 12 Pro, these tapers are not smooth and you can clearly see this. This issue applies to all very quick tapers that start from max pressure. In other words, it can also happen on longer strokes as well if you are drawing them very quickly.

Fortunately, this is not an issue that you often notice while drawing on the tablet, and most of the time you are not moving fast enough to cause this issue to appear in your longer strokes.
However, this tablet fails this section even if that is the case.

It appears that this is an issue with all of XP-Pen’s current tablets which use the newer drivers (Deco 03, Artist 12, Artist 15.6 Pro, etc). This issue did not occur on any of XP-Pen’s older tablets which used the old drivers (Star03 V1, Artist 22HD, etc).
I have notified XP-Pen about this and they told me they will work on fixing it, but there has been no update regarding a fix since March 15, 2019. I think it’s almost safe to assume that they won’t be fixing this.

XP-Pen Artist 12 Pro Test Page-5

5) Pen Pressure Control/Transition Test – Grade: Pass
Test pen 1 – 100px – pen pressure: size+opacity

This section is to test the smoothness of the transitions in pen pressure.
-The circles at the top are one of Youtuber Brad Colbow’s tests. It is used to check if you can properly control the pen pressure all the way around a circle. If there is a pressure jump, some circles will feel impossible to control due to that jump.
-The lines at the bottom are slow strokes done with smooth increases or decreases to pen pressure in mind. The arrow points in the direction which the stroke was done, and the smoothness of the gradients show how smooth the pen pressure transitions.

In terms of the pen pressure control circles, I had no problems doing all the different circles smoothly. They showed no signs of pen pressure jumping and it was very easy to do all the different line weights.

I will give this tablet a pass here since there don’t appear to be any noticeable issues in the pen pressure transitions either.

6) Initial Activation Force & Lightest Pen Pressure Test – Grade: Pass-ish
Test pen 1 – 300px – pen pressure: size

This test tries to demonstrate the IAF of the tablet, and also shows the lowest possible pen pressure the tablet is capable of producing consistently.
IAF is the amount of force necessary to cause the pen to output a line. Ideally, your tablet will have an extremely low IAF where the pen will output a line with the least amount of force possible.
A high IAF causes issues such as light pen taps not registering as clicks, and the inability to sketch very lightly, both of which become quite annoying the more you experience it.

For this test page, the squiggly lines should begin right on the start line.
-If the line begins right on the start line, this indicates that the IAF is extremely low (low IAF is best) and the line just appears naturally without effort.
-On the other hand, if the line does not begin on the start line and instead begins further along the stroke, this means that the IAF is high so I needed to search for the IAF by increasing my force little by little until I finally started outputting a line.

An example of the ideal test page is the Huion New 1060 Plus (2048) IAF test page which I included above for comparison. Almost all the lines begin right on the start line meaning it has extremely low IAF, and the lines are almost transparent showing that the tablet is capable of drawing extremely light pen pressures.

The XP-Pen Artist 12 Pro has a slightly higher than ideal IAF. As you can see, I was not able to get the lines to start on the start line consistently, but I was able to start them fairly close to it most of the time.
Basically, the IAF is low enough that I didn’t really consider it an issue, but I most certainly noticed a few times when my light tap didn’t select something properly. I never noticed it when sketching lightly though.

In terms of the lightest pen pressure, I could get somewhat thin lines with the 300px IAF test pen, but when using a 300px. The thin lines on this tablet obviously pale in comparison to the Huion New 1060 Plus (2048) IAF test page which is the ideal, but this thinness is usable and is borderline acceptable.

Overall, the XP-Pen Artist 12 Pro has decently low IAF and is able to draw acceptably thin lines consistently. This tablet gets a pass-ish here.

XP-Pen Artist 12 Pro Pen Tilt Tests

7) Pen Tilt Test – Pass-ish
Test pen 1 – 100px – pen tilt: opacity
Test pen 2 – 100px – flat pen – pen tilt: direction

This test shows the smoothness of the pen tilt by gradually tilting the pen while slowly moving the pen to the side. This section also includes scribbles using the pen direction determined by pen tilt.

As you can see in the smoothness test, the pen tilt transitions on the XP-Pen Artist 12 Pro are clearly not smooth. You can see all the steps in the gradient and you can basically count how many levels of pen tilt there are.

Fortunately (or unfortunately), XP-Pen doesn’t specify the number of pen tilt levels they have on the XP-Pen Artist 12 Pro’s product page, so they aren’t lying about “having” pen tilt, but you can clearly tell it’s not on the same level as Wacom and Huion’s +-60 levels of pen tilt.

This tablet will get a pass-ish here since they have pen tilt, but it’s not very high quality.

Overall

So all in all, the drawing test results are:
1) Scribble Test – Pass
2) Slow Ruler Line Test – Pass
3) Quick Hatching Test – Pass
4) Short Release Taper Test – Fail
5) Pen Pressure Control/Transition Test – Pass
6) Initial Activation Force & Lightest Pen Pressure Test – Pass-ish

Non-Vital Drawing Tests:
7) Pen Tilt Test – Pass-ish

Ideally, all the above tests should have at least a “Pass-ish” for their grades because the most vital function of a drawing tablet is to draw properly and predictably. Failing any of these tests means that it doesn’t do that.


The drawing experience!

The actual drawing experience on the XP-Pen Artist 12 Pro was decently enjoyable, but there was one issue which I hated having to deal with, and that is the cursor accuracy.

With any tablet, you want the cursor to follow your pen exactly the way you move, but with the Artist 12 Pro you can actually move the pen around the cursor without moving the cursor itself.
Also, the cursor will often move in 2 pixel increments rather than follow the pen to every single pixel on your screen.
This affects small detail work as you will have a hard time aiming at a specific point, and doing very small strokes becomes more difficult.
(Here is a video where I demonstrate how I move my pen around and the cursor doesn’t follow it exactly: https://youtu.be/ALixMTJ5x6I)

This was not an issue on the XP-Pen Artist 15.6 Pro, so it seems that XP-Pen changed something on the Artist 12 Pro which made its pen less accurate.
With this bad accuracy issue, the Artist 12 Pro felt quite cumbersome to use for detail work and I believe this is an issue which absolutely needs to be fixed if XP-Pen wants this tablet to be considered a “Pro” tablet as its name would imply.

Aside from that, the Artist 12 Pro passed most of the drawing tests well, although it did seem to have a somewhat high IAF and wasn’t able to draw spectacularly light pen pressures.
I don’t really emphasize how the pen tilt is so bad because it’s still a “side” feature which isn’t necessary to draw in digital. Quite frankly, with how bad it is, they probably shouldn’t even advertise it yet though.

Another issue I always note about XP-Pen’s tablets is that the pen tapering is a bit uneven when doing very quick strokes from 100% to 0% pen pressure.
As you saw in the Drawing tests section, there are some fairly clear bumps in the taper which make it not as perfect as it could be.

For the most part, this uneven tapering is not so bad that it affects the drawing process as I did not have a problem doing my review drawing with it, and it should be noted that the pen pressure is perfect in every other situation.
The worst it did was make me undo a few extra times during my shading process which involves using quick long tapers in some places, but it was not a massive problem with regards to the overall drawing experience.


Conclusion

The XP-Pen Artist 12 Pro is a respectable tablet which is held back by its bad cursor accuracy. If XP-Pen can find a way to make the cursor follow the pen perfectly, I could recommend the XP-Pen Artist 12 Pro to basically anyone who wants a really good cheap drawing monitor, but as it is right now, I can only really suggest that you consider it if there are no other options.

Even with the bad cursor accuracy, I was still able to finish a full drawing on the Artist 12 Pro. This is meant to show that it’s certainly a noticeable issue, but the tablet is still usable and should not be counted out completely.

If you’re looking for an entry-level drawing monitor for around 250 USD with mostly good specs all around, then keep this tablet in the back of your mind.


Places to buy the tablet

XP-Pen gave me a promotion code to share, so if you’re interested in this tablet, make sure you use the code to save some money!

10%off:HK28UNG4 , works on online store below till Oct. 30th
Website store: http://bit.ly/2n6MQ9J (US,UK,AU promo code works)

People living in other regions should check their regions Amazon or see if the XP-Pen Store ships to them.
If you have any questions about the tablet, feel free to ask me!

My Top Picks – Graphic Tablets (August 2019)

Back when I only had my tablet masterlists on this site, I had the mindset of “I’ll show you all the options I’ve found, so go research them yourself.”, so I never tried to create any sort of list of which tablets I thought were “the best”.
Quite frankly, I’m glad I didn’t because I most certainly didn’t have enough experience with tablets to even make such a list back then.

However, now that I’ve reviewed a decent number of tablets, I feel that I would like to give my recommendations for which tablets that I personally feel are “the best” out of what I’ve tried.
Hopefully, this list will be helpful to those who are looking for a new tablet.

This post is specifically about screen-less tablets, the tablets without screens on them (ex. Wacom Intuos).
I am not sure if I will ever do one for drawing monitors (ex. Wacom Cintiq) as I do not have nearly enough experience with those to judge what might be “the best”. For now, my drawing monitor recommendations will be on hold.

In this post, I will have 3 categories: Best Budget, Best Performance and Value, and Untested Recommendations.
-The Best Budget category will be my 2 top picks from the tablets I have tested for those with very limited budgets. Basically, what I think is the best you can get for the lowest price.
-The Best Performance and Value category will be my 2 top picks of “the best” tablets I have tested with lots of emphasis put on value.
-The Untested Recommendations category will be a bunch of tablets which I have not personally tested, but still think are worth pointing out.

Anyways, let’s get on with the recommendations!

Please note!
-This information is written with digital drawers and painters as the focus. It may not apply to other forms of digital art such as photo retouching.
-I am not a Mac or Linux user!! I mainly test my tablets on Windows 10 version 1803. I also ignore Android compatibility as I do not have a proper device to test it.
-Prices may have changed since I wrote this post.
-It is good practice to check multiple reviews to cross reference their information before you make a conclusion about a tablet.


Table of Contents


Best Budget

These are my top picks of the tablets you can get for the lowest price possible.

This section is mainly aimed towards people who want to try out digital art, but don’t want to spend very much on their first tablet which they may or may not keep using.

1. XP-Pen Star G640

Price: 29.99 USD
(My review: XP-Pen Star G640 Review)

Specifications at a glance
Active Area: 6 x 4 inches
Pen Type: Battery-free
Pen Buttons: 2 side buttons, no eraser
Pen Pressure: 8192
Pen Tilt Sensitivity: None
Shortcut Keys: None
Multi-touch: None

The XP-Pen Star G640 is the lowest priced tablet which has great drawing capabilities due to using the exact same drivers as XP-Pen’s higher tier models.

Although the XP-Pen Star G640 is technically only a small size tablet with its 6×4 inch drawing area, it provides an extraordinarily low entry price into digital art with its 30 USD price tag.
(The 6×4 inch “small” size is the minimum size I recommend for art. There are cheaper tablets such as the XP-Pen G430 and Huion H420, but those are even smaller at 4×3 inches, making them too small to draw on comfortably.)

There are certainly some compromises to build quality and aesthetics because of the low price, but the tablet itself has a surprisingly tough build despite being so thin, and the simple plastic design of the pen is really bare bones, but it isn’t uncomfortable to use either.
Also, if you download one of the great free art programs available nowadays like Medibang or Krita to use with it, you will have everything you need to start drawing digitally for only 30 USD!

In comparison, the most commonly recommended beginner tablet, the Wacom Intuos, is a whopping 80 USD for the exact same 6×4 inch size, despite having no significant advantage over the XP-Pen Star G640.

It may look simple and unimpressive, but the XP-Pen Star G640 is the absolute go-to if you’re looking for the cheapest option for starting digital art.

2. Huion H640P

Price: 49.99 USD
(My review: Huion H640P ReReview 2019)

Specifications at a glance
Active Area: 6.3 x 3.9 inches

Pen Type: Battery-free
Pen Buttons: 2 side buttons, no eraser
Pen Pressure: 8192
Pen Tilt Sensitivity: None
Expresskeys: 6 Buttons
Multi-touch: No

The Huion H640P is one of the lowest priced premium feeling tablets currently available, with drawing performance which has matured over time thanks to driver and firmware updates.

Like the XP-Pen G640, the Huion H640P is also only a small size tablet at 6×4 inches, but it makes up for its somewhat high price with a solid tablet body, and a comfortable and premium feeling Huion PW100 battery-free pen.
It is certainly not as cheap as the XP-Pen Star G640, but its more premium feeling build quality and high level of drawing performance justifies its higher price for the most part.

If you are not looking for the absolute cheapest tablet you can find, then this could be your go-to as a relatively cheap but premium feeling tablet.

Writer’s note: There is actually a new 6×4 inch tablet called the Huion HS64 for only 40 USD, which is cheaper than the Huion H640P’s 50 USD.
Unfortunately, I have not had the chance to test it myself, but you may wish to check it out if the Huion H640P interests you. Please keep in mind though that I cannot guarantee that it works as well as the Huion H640P.


Best Performance and Value

This section has my top picks which are chosen based on drawing performance, and then further judged by the price.
If a tablet is so good that it has no competition, then price will not matter as it has no competition. However, if there are comparable tablets with cheaper prices, then those will be considered better value.

This section is my top tablet picks for all artists, beginner and experienced.
Unless you have so much money that you literally don’t care about price, these are the tablets I recommend you get for the best “bang for your buck”.

“Why is the Wacom Intuos Pro M not on here?”
Like I said, there needs to be at least some semblance of “value” to be recommended here. The Wacom Intuos Pro M does not have magical drawing capabilities that can justify it’s ridiculous 350 USD price tag. The Huion H1060P for 100 USD draws very well and is easily comparable to the Wacom Intuos Pro M in drawing performance.

Certainly, Wacom has extra features which other companies do not have, but that’s all they are. Extra.
However, if you know that you specifically as an individual want those extra features, then perhaps you can justify the high price as necessary for your art. Or perhaps you just have so much money you don’t mind paying the higher price for the brand name.
You make that decision for yourself, but I believe the majority of people prefer value over those “extra” features.

1. Huion H1060P

Price: 99.99 USD
(My review: Huion Inspiroy H1060P Review)

Specifications at a glance
Active Area: 10 x 6.25 inches

Pen Type: Battery-free

Pen Buttons: 2 side buttons, no eraser
Pen Pressure: 8192
Pen Tilt Sensitivity: Yes, +-60 levels
Expresskeys: 12 buttons, 16 soft keys
Multi-touch: No

The Huion H1060P is a very well built tablet with one of the best drawing performances I have seen in a screen-less tablet yet, and it comes at a surprisingly cheap 100 USD price tag at that.

The Huion H1060P is a medium/large size tablet with a spacious 10×6.25 inch drawing area. The tablet itself is made solely of plastic, but it is built very solidly due to it using a thicker tablet design than most other offerings in the current era of “thinness is everything”.
Some people may not like how the surface texture is rather smooth compared to other tablets, but once you become used to drawing on it, it brings the advantage of a texture which never wears out, and it also never wears down your pen nibs.

For the pen, it uses the comfortable and premium feeling Huion PW100 battery-free pen, and it is capable of pen tilt/direction functionality.
It also comes with 12 shortcut keys which should be enough buttons for anyone looking to draw by solely using the shortcut keys.

Whereas many other tablets have some sort of issue in how the pen performs such as uneven tapering or non-linear pen pressure curves, the Huion H1060P has absolutely no problems which I can notice.
This tablet at 100 USD even rivals the drawing performance of the supposed “professional standard” tablet, the Wacom Intuos Pro M (350 USD), while only lacking some of the extra features that the Wacom offers such as: The pen eraser, Bluetooth wireless, felt nibs, and pen rotation functionality (only available with the purchase of a separate 100 USD pen).

It should also be noted that the replacement pen for this tablet only costs 23 USD, and you can even replace the texture sheet with a brand new one for ~30 USD (6 USD + shipping on huiontablet.com).
This means that you won’t have to buy a whole new tablet even if there are some accidents which damage your pen or scratch your drawing surface.
As long as you take care not to break the micro-USB port, I believe this tablet should last you a very long time.

If you are looking for the tablet with the best drawing performance while still having a reasonable price, this is my recommendation.

Writer’s note: I have heard that upgrading to Huion’s newer firmware versions for this tablet is not a good idea, because pen pressure feels worse and initial activation force is higher (worse).
-If you get an H1060P with my firmware version, I suggest that you do NOT risk updating the firmware to anything newer.
-If you get an H1060P with a newer firmware version and are noticing bad pen pressure or higher initial activation force, contact Huion to get a firmware updater for the version I am on so you can roll it back to a good version.

To check your firmware version, open the Huion driver and go to the About page, then press the keys Ctrl+V+E+R all at once. Your firmware version should show up.
My firmware version is HUION_T167_180808. 

Basically, if it’s working properly, don’t update it.

2. XP-Pen Deco Pro Small/Medium

Price: 89.99 USD (Small)/119.99 USD (Medium)
(My review: XP-Pen Deco Pro Small Review)

Specifications at a glance
Active Area: 9 x 5 inches (Small)
11 x 6 inches (Medium)
Pen Type: Battery-free
Pen Buttons: 2 side buttons, no eraser
Pen Pressure: 8192
Pen Tilt Sensitivity: Yes, levels unspecified
Shortcut Keys: 8 buttons, 1 physical wheel, 1 touch wheel
Multi-touch: None

The XP-Pen Deco Pro is a tablet built with a premium aluminum alloy back case and a unique silver accent design, and it features a never-before-seen double wheel shortcut key which combines a physical and virtual wheel into one, and even supports pen tilt functionality.

Thanks to the aluminum alloy back case, the tablet itself feels quite robust and durable, and the new XP-Pen PA1 battery-free pen provides a very comfortable pen experience on the rough paper-like texture. XP-Pen has also used a new and improved texture on this tablet which doesn’t wear off easily, unlike a few of their previous textures which started showing wearing the moment you started drawing on it.
The tablet is also easy to use in left-handed mode thanks to using a symmetrical USB type-C port on the tablet.

Despite the premium build quality on this tablet which can be said to rival even the Wacom Intuos Pro, this tablet only costs 90 USD for the small, and 120 USD for the medium.
It should be noted that the XP-Pen Deco Pro is available in two sizes of small or medium, but you shouldn’t be misled by the naming.
Unlike the Wacom small and medium sizes, the “small” for the XP-Pen Deco Pro is a spacious 9×5 inches (which is actually the Wacom medium size), and the “medium” is an even more spacious 11×6 inches.

The most unique part of the XP-Pen Deco Pro is the double wheel, which has a physical wheel on the outside, and a touch wheel on the inside. Unlike all other wheel designs which only allow you to use one function at a time which often make them an inconvenient waste of space, the double wheel allows you to use two wheel functions seamlessly without the extra step of using a function switch key between each use.
Of course, this only matters if you use shortcut keys, but this is the first tablet where I felt that the wheel wasn’t just a waste of space compared to having 4 more shortcut keys in its place.

It should also be noted that a replacement pen for this tablet only costs 18 USD, and that you can buy 100 pen nibs for 10 USD only.
The biggest problem with rough textures on Wacom tablets is that they burn through pen nibs and Wacom pen nibs cost 1 USD per nib. In contrast, nib wear isn’t a problem with the XP-Pen Deco Pro because pen nibs literally only cost 10 cents per nib!

The only issue with this tablet which makes it “worse” than the Huion H1060P is the small pen tapering issues which affect some quick strokes from 100% to 0% pen pressure (refer to review for more detail).
It is not a massive issue which completely ruins your drawings since everything else about the pen pressure is fantastic, but it is an issue nonetheless.
If XP-Pen can fix that issue, this tablet will be well on par with the Huion H1060P as my top pick.


Untested Recommendations

This section has a few tablets which I believe are worth mentioning, however, I only mention them in passing because I have not tested them myself.

Since I have not tested them myself, I cannot guarantee their actual quality and performance which is why they are not one of my top picks, despite some of these tablets sounding better than the tablets I have recommended above.

-Huion HS64
Price: 39.99 USD

The Huion HS64 is a relatively new Huion tablet which seems to have basically everything Huion H640P does, except for cheaper.

For some reason, I have my doubts about it having pen pressure as good as the Huion H640P (because the Huion HS610 had worse pen pressure than the Huion H1060P), but I really have no idea without trying it myself.
Maybe I’ll consider buying it eventually to review it.

-Huion H610Pro V2
Price: 79.99 USD

The Huion H610Pro V2 is the tablet most people look to when looking for a large tablet with a battery-free pen from Huion because it’s cheaper than the Huion H1060P which I recommend.

I’ve always had my doubts about the build quality of the current and previous H610Pro tablets because I’ve seen a lot of complaints about broken H610Pro’s when I used to prowl Reddit, but I can’t really make any guesses about it without trying it myself.

-XP-Pen G640S
Price: 39.99 USD

The XP-Pen G640S is a small 6×4 inch tablet like the XP-Pen G640 which I recommended as the best budget tablet, but it’s slightly pricier at 40 USD because it comes with the more comfortable P05 battery-free pen instead of the budget P01 pen which the G640 uses.

I used to think of it as a good recommendation for people who wanted something similar to the Huion H640P but cheaper, but now there’s the option of the Huion HS64 for 40 USD as well.
I think I would have to try both the XP-Pen G640S and Huion HS64 to judge which would be the better choice because they both sound like very good deals.

-XP-Pen Deco 01 V2
Price: 59.99 USD

The XP-Pen Deco 01 V2 which was announced a few days ago is the Deco 01 V1 except with a nicer P05 battery-free pen, and it is also advertised to have pen tilt functionality which the V1 didn’t.

My biggest complaint about the V1 was the pen design which was slick and cheap-feeling, so this upgrade is a very welcome change, especially because the XP-Pen Deco 01 V2 will have the exact same low 60 USD price as the V1.

Of course, I haven’t tried it out myself so who knows if the actual pen performance is good or not. I think it’s well worth a look at its low price though.

-GAOMON M10K (2018)
Price 75.99 USD

The GAOMON M10K (2018) is a tablet which has had a relatively low amount of attention since its silent release.
I reviewed its previous version and it was quite a disastrous product back then due to fairly shoddy drivers, however, I have seen that the new version uses GAOMON’s Huion based drivers which basically guarantees that it won’t have the same problems as before (because their tablets which use the Huion based drivers are very stable).

I’m actually quite interested in this tablet because it could be a cheaper alternative to my favourite Huion H1060P due to its similar build design and numerous shortcut keys, but of course, that’s only if the pen pressure works as well as expected.
I think it’s worth a look, but it doesn’t have very many reviews for anyone to go off of.


Conclusion

I recommend the XP-Pen Star G640 if you’re on a budget or just looking for the cheapest option for getting into digital art.
The Huion H640P is also a good choice if you want a budget tablet which feels at least a little bit “premium”.

For the best value overall, I recommend the Huion H1060P. It’s the tablet with the best performance out of all the screen-less tablets I’ve tested so far. I feel that it draws just as well as the Wacom Intuos Pro M, so it completely knocks the Wacom Intuos Pro M out of the value section with its low price.
I also recommend the XP-Pen Deco Pro since it’s almost as good as the Huion H1060P. The only con with it is the small pen tapering issue, but if that one issue were fixed, it would completely rival the Huion H1060P and Wacom Intuos Pro M as a top performing tablet.

To make it completely clear, this top picks list is based on the tablets which I have actually tested and reviewed myself.
There may be some tablets which you believe should be on this list, but are not on here simply because I have not had the chance to try them.

Links to my reviews of my top picks:

Anyways, I hope you found this post useful.
If you believe I have overlooked a tablet which you think I really need to check out, please recommend it to me in the comments below!

XP-Pen Deco 01 Review

The XP-Pen Deco 01 was XP-Pen’s first Deco series tablet released slightly more than a year and a half ago. It has often been reviewed as a tablet which has a fairly low price while still maintaining a decently high level of performance.

Quite frankly, there’s no really special features that define this tablet, and what sets it apart from the rest is the fact that it’s very simple and sits on the border of budget and quality tablets. However, there are clear trade-offs which make this tablet more “budget” oriented than not.

My expectations going into this review were actually rather high because I’d only heard good things about this tablet through other reviews. However, I did also have an inkling that there would be some downsides for being so cheap compared to its competitors.
Did it live up to my expectations? No, not quite, but it draws well enough and isn’t a horrible tablet overall. I don’t regret recommending it to people who were looking for a budget tablet before I’d gotten the chance to test it.

For this review, XP-Pen was kind enough to supply me with the XP-Pen Deco 01. As usual, this review is based on my honest thoughts and opinions about this tablet and I will never agree to review a product if I am required to say only good things about it.
If you believe receiving a review product for free makes a review biased, now is a perfect time to stop reading.

Anyways, onto the review!

Please note!
-I am not a Mac or Linux user!! I mainly only tested this tablet on Windows 10 version 1803.
-Prices may have changed since I wrote this review.
-Check when a review was written. Some aspects may improve or change over time, so it is in your best interest to concentrate on reviews which are less than 1 year old.
-It is good practice to check multiple reviews to cross reference their information before you make a conclusion about a tablet.


Table of Contents


How good is this tablet?

Design choices: Fairly good, except for the pen.
-Nitpicks: Slick pen, non-rounded edges
Hardware quality: Solid tablet, cheaper pen.
-Nitpicks: Cheap-ish feeling pen
Tablet drivers: Good design!
-Nitpicks:
Drawing test results: Mostly good!
-Nitpicks: Quick tapers are not smooth, somewhat high IAF
Actual drawing experience: Quite good!
-Nitpicks: Cursor delay while hovering

Overall: A satisfactory tablet for only 60 USD.

My verdict:
-I can recommend considering this tablet if you are on a budget. The price is very low for a medium size tablet with a decent level of quality, but it has clear trade-offs in the pen quality for the lower price.
The drawing performance of the pen is quite good despite a somewhat high IAF, but the biggest con of this tablet is that the pen itself feels quite cheap with its slick, plastic stick design.

Another con of this tablet is the pen tapering issue which is common among XP-Pen’s tablets, however, that does not affect drawing very often and I was able to do my drawings without much issue.
XP-Pen has also told me they are working on fixing it (and that it’s a complicated issue so they’ll need some time).

The XP-Pen Deco 01 V2 which was recently announced uses a more comfortable style of pen (which addresses the biggest issue I had with this tablet) and has pen tilt, even though its the exact same 60 USD price as the V1.
If the V1 interests you, I highly recommend looking for info on the V2 as well.


Specifications at a glance

Price: 59.99 USD (when this review was written)
Active Area: 10 x 6.25 inches
Pen Type: Battery-free
Pen Buttons: 2 side buttons, no eraser
Pen Pressure: 8192
Pen Tilt Sensitivity: None
Shortcut Keys: 8 buttons
Multi-touch: None


What’s in the box?

2 - Box

The tablet comes in a cool box with triangle cutouts where the blue colour of the inner box shows and makes a nice X shape. This is probably the coolest looking box I’ve seen so far from any tablet company.

3 - Contents

The things that come in the box:

  • XP-Pen Deco 01 tablet
  • XP-Pen P03 Battery-free pen
  • Pen stand
  • Tablet cable (USB type-A to USB type-C)
  • Pen nib replacements x8
  • Anti-fouling glove
  • User manual
  • Warranty policy and warranty card
  • “Thank you” card

4 - Tablet overall

The XP-Pen Deco 01 has a very simple full black design. It looks sleek and doesn’t look like a cheap device.

There is almost no flex when doing a simple twist test by gripping both ends of the tablet and twisting. The tablet is quite rigid despite how thin it is.

5 - Tablet texture

The XP-Pen Deco 01 has a pretty rough surface texture, which is completely expected from XP-Pen as they have always been using rough textures as long as I’ve known them.
Surprisingly, unlike the XP-Pen Deco 03, the texture on the Deco 01 has not worn out whatsoever from my time drawing on it.

The texture on this tablet is really nice and doesn’t feel coarse. If I’m completely honest, I think XP-Pen has some of the nicest textures right now, even more so than even Wacom (by a slight margin, of course).

I often say I prefer smooth textures over rough ones because rough textures are known to wear out very quickly, but the texture on this tablet seems to be a lot more durable than most, so I can recommend the XP-Pen Deco 01 to those who prefer rough paper-like textures on their tablets.

6 - Tablet back

The back of this tablet is made from plastic and has the usual rubber feet and information sticker.

The rubber feet do a good job of keeping the tablet in place while drawing.

7 - Tablet edge

The front and back edge of the XP-Pen Deco 01 is a slightly rounded edge. I personally don’t like this edge design because it digs into my wrists since my table is slightly higher than elbow height.
Of course, this wouldn’t be an issue if I had a proper table and chair which put my elbow right at table height, but let’s not forget that not everyone has a perfect chair/table setup.

I wouldn’t have any complaints if the edge was even slightly more rounded.

8 - Tablet shortcut buttons

There are 8 round programmable shortcut buttons on the XP-Pen Deco 01. They click nicely and are fairly easy to press. I feel that they are kind of harder to press than I would personally like, but it’s not something you can’t get used to after using it for a while.

9 - Tablet port

The XP-Pen Deco 01 uses an L-shaped USB type-C cable on the tablet, which then connects to a USB type-A port on your computer. This cable fits very snugly in the port, and the port doesn’t budge at all when trying to wiggle the cable.
The great thing about USB type-C ports on a tablet is that you can easily reverse it for left-handed mode because USB type-C is symmetrical.

The length of the cable itself is roughly ~160cm from tip to tip.

10 - Tablet pen

The XP-Pen Deco 01 uses the XP-Pen P03 battery-free pen which features a straight plastic body with semi-slick sides. It’s about as light as any other battery-free pen, but you can clearly tell that it’s made with budget in mind.

Holding this pen is a somewhat different experience from all the other pens I’ve had the chance to try, and I don’t mean that in a particularly good way.

The problem with this pen is that the sides are all slick and there is no bulge near the pen tip, so it can get slightly slippery if you sweat even a little bit from your fingertips. Over long drawing sessions, this can get a little annoying as you can lose your grip due to the sweat, and your fingers can slide down the pen when pressing very hard.
Even just having a bulge like the XP-Pen P01 pen would have been a lot better than this pen design for grip.

I also found that the weight of the pen felt top-heavy and I didn’t like that since it made it feel a little unbalanced to hold.

The good point of this pen is that you can hold the pen further down thanks to how far the grip goes before tapering off into the pen nib. This gives you more variety in where to hold the pen.
All in all, the pen isn’t bad, but I don’t think it was very well thought out. Luckily, this is an older tablet and I’m sure XP-Pen won’t be using this pen with their newer tablets.

The XP-Pen Deco 01 V2 was announced very recently and it uses the much nicer P05 pen design for its pen (for the same 60 USD price).
I highly recommend checking out the V2 if the V1 interests you.

The top of the pen has nothing.

12 - Pen nib wear

The rough texture on this tablet causes the pen nib to wear considerably with continued use. The picture above is the pen nib after around 2 days of continuous use.

Luckily for anyone who wants this tablet, XP-Pen sells pen nibs in packs of 100 for only 10 USD. This means you should have no issue with flat pen nibs since it literally only costs 10 cents per replacement nib!

The XP-Pen Deco 01 comes with a rounded square pen stand with a good amount of weight. You can stick the pen in the hole to make it stand up, or place it sideways across the top.

If you twist the base to open it, you will find the 8 pen nib replacement nibs housed inside. I had to twist pretty hard to get it to open, so just keep at it in the direction indicated by the arrows if you’re having a hard time.
The hole in the base of the stand is the pen nib remover which works as indicated by the images.


Tablet drivers

The XP-Pen tablet drivers are extremely easy to install. Just go download the latest version directly from XP-Pen’s site and remove all other tablet drivers you have on your computer before installing it.

Once you’ve installed the driver and plugged in your tablet, the XP-Pen driver icon should appear in the system tray in the bottom right. You can access the tablet settings by clicking on that. The installer will also create a shortcut on your desktop for opening the settings.

If the installer doesn’t prompt you to restart your computer after it finishes, I wholeheartedly suggest restarting your computer anyways to allow Windows to properly update the files necessary for the driver to run smoothly.

15 - Driver overall

The XP-Pen driver is a simple one page driver with all the important settings in one window. Here you can set the pen buttons and pen pressure, and choose which monitor the tablet maps to.

You may need to check the Windows Ink checkbox if you use programs such as Photoshop which require Windows Ink to be turned on for pen pressure to work.

The Barrel Button Settings section lets you choose the function assigned to the pen buttons.

You can set basically all keyboard or mouse shortcuts that you can think of using the function key option, but you unfortunately cannot combine mouse clicks with keyboard keys in the same function. This is one of the few small cons of the XP-Pen driver which has been around for a fairly long time now.

17 - Driver click sensitivity

The Click Sensitivity section allows you to manipulate the pen pressure curve directly. For this pen, the default settings were fine, although it did feel like I needed to press a slight bit too hard for the highest pressures. If you find it too hard for your liking, you should play around with the 3 dots on the graph.

A cool thing to note is that the only other tablet drivers with this custom pen pressure graph is Wacom’s Intuos Pro and Cintiq drivers. Wacom’s low-end Intuos tablets (which this tablet competes with) do not offer you the pen pressure graph, and most of the Wacom alternatives aside from XP-Pen don’t have it either!

18 - Driver current screen

The Current Screen section controls which monitor your tablet is mapped to, and what area of your tablet is used.

If you noticed earlier, there was a function called Switch Monitor among the functions you could assign to your shortcut keys. That function cycles through all the available monitors in the drop-down list at the top of the Current Screen section when used, so you can use that to quickly switch which monitor your pen input goes to.

To make sure your tablet is set to the same ratio as your screen, you should click the Max Active Area button, then click the Display Ratio button. This should adjust the tablet area to match your screen ratio.

19 - Driver expresskeys

If you click the Express Keys button in the bottom right, a new window will open up with the options for changing the functions assigned to the shortcut keys.

All the buttons can be assigned mouse clicks, keyboard functions, or the extra functions, just like the pen buttons.

The bar along the top of this window allows you to make program specific profiles which will only be active when the program you assigned is your current active window. It is a useful feature for people who want different functions for different programs.


Drawing tests

These pen tests are all done with the same settings for both the canvas and the pens. These tests are only done in Clip Studio Paint as that is the only program where I totally understand how to remove all unwanted variables.
If you are worried about whether this tablet will work with your art program, don’t be afraid to contact support to ask them directly.

-The canvas will always be a 3000x3000px 300dpi page (the above test page is a 3000x6000px 300dpi page, so just two pages stuck together).
-The test pens are mostly all 100px linear pressure curve pens. Pen pressure for size and/or opacity is enabled based on the test.
-The slow ruler line test uses a 10px no pen pressure pen to clearly show wobble and jitter. I also use a 50px pen pressure enabled pen to see the visibility of wobble/jitter with pen pressure is enabled.
-The IAF (Initial Activation Force) test uses a 300px linear pressure pen to show the thinnest lines possible, as well as demonstrate the IAF of the tablet.

XP-Pen Deco 01 Test Page-1

1) Scribble Test – Grade: Pass
Test pen 1 – 100px – pen pressure: size
Test pen 2 – 100px – pen pressure: size+opacity

For my pen tests, I always start out with a few pen pressure scribbles to see if I can do some nice squiggly lines with increasing pen pressure. I also do some back and forth shading and some spirals with increasing pen pressure.

With the XP-Pen Deco 01, I had no problems doing my little scribbles going from thin to thick. I didn’t have any problems controlling my strokes and making both thin and thick lines was relatively easy. This tablet gets an easy pass here.

XP-Pen Deco 01 Test Page-2

2) Slow Ruler Line Test – Grade: Pass
Test pen 1 – 10px – pen pressure: none
Test pen 2 – 50px – pen pressure: size

The slow ruler line tests done with a no pen pressure pen were quite good at all angles, but you can see some wobble when tilting the pen completely over.
However, this amount of wobble at max tilt is small enough that it probably won’t be noticeable in most cases. This tablet also does not have tilt functionality, so most people won’t use the pen at such an extreme angle.

This tablet gets a pass here.

XP-Pen Deco 01 Test Page-3

3) Quick Hatching Test – Grade: Pass
Test pen 1 – 100px – pen pressure: size

The quick hatching test is to check whether the tablet keeps up with pen inputs. Usually, the only way to fail this section is if the pen is noticeably laggy and causes unwanted inputs like fishhooks at the beginning or end of the line.

As you can see, this tablet appears to have no problems with fishhooks. I also never noticed the cursor lagging so far behind the pen while drawing that it was a problem, so it gets a pass here.
P.S. I could get fishhooks like once every 50 strokes by going extremely fast, but at that point I honestly think it might just be my hand not keeping up.

XP-Pen Deco 01 Test Page-4

4) Short Release Taper Test – Grade: Fail
Test pen 1 – 100px – pen pressure: size

This test is meant to see the smoothness of the pen pressure taper when going from max to min pressure quickly. Basically, you press your pen down hard then flick to the side to see how smoothly the stroke tapers.

With the XP-Pen Deco 01, these tapers are not smooth and you can clearly see this. This issue applies to all very quick tapers that start from max pressure. In other words, it can also happen on longer strokes as well if you are drawing them very quickly.

Fortunately, this is not an issue that you often notice while drawing on the tablet, and most of the time you are not moving fast enough to cause this issue to appear in your longer strokes.
However, this tablet fails this section even if that is the case.

It appears that this is an issue with all of XP-Pen’s current tablets which use the newer drivers (Deco 03, Artist 12, Artist 15.6 Pro, etc).
I have notified XP-Pen about this and they told me they will work on fixing it, but as it is a complex issue, they are still working on it. This is one of the only issues I currently have with XP-Pen’s products, so hopefully they will be able to fix it soon.

XP-Pen Deco 01 Test Page-5

5) Pen Pressure Control/Transition Test – Grade: Pass
Test pen 1 – 100px – pen pressure: size+opacity

This section is to test the smoothness of the transitions in pen pressure.
-The circles at the top are one of Youtuber Brad Colbow’s tests. It is used to check if you can properly control the pen pressure all the way around a circle. If there is a pressure jump, some circles will feel impossible to control due to that jump.
-The lines at the bottom are slow strokes done with smooth increases or decreases to pen pressure in mind. The arrow points in the direction which the stroke was done, and the smoothness of the gradients show how smooth the pen pressure transitions.

In terms of the pen pressure control circles, I had no problems doing all the different circles smoothly. They showed no signs of pen pressure jumping and it was very easy to do all the different line weights.

I will give this tablet a pass here since there don’t appear to be any noticeable issues in the pen pressure transitions either.

6) Initial Activation Force & Lightest Pen Pressure Test – Grade: Pass-ish
Test pen 1 – 300px – pen pressure: size

This test tries to demonstrate the IAF of the tablet, and also shows the lowest possible pen pressure the tablet is capable of producing consistently.
IAF is the amount of force necessary to cause the pen to output a line. Ideally, your tablet will have an extremely low IAF where the pen will output a line with the least amount of force possible.
A high IAF causes issues such as light pen taps not registering as clicks, and the inability to sketch very lightly, both of which become quite annoying the more you experience it.

For this test page, the squiggly lines should begin right on the start line.
-If the line begins right on the start line, this indicates that the IAF is extremely low (low IAF is best) and the line just appears naturally without effort.
-On the other hand, if the line does not begin on the start line and instead begins further along the stroke, this means that the IAF is high so I needed to search for the IAF by increasing my force little by little until I finally started outputting a line.

An example of the ideal test page is the Huion New 1060 Plus (2048) IAF test page which I included above for comparison. Almost all the lines begin right on the start line meaning it has extremely low IAF, and the lines are almost transparent showing that the tablet is capable of drawing extremely light pen pressures.

The XP-Pen Deco 01 has a somewhat high IAF which I couldn’t find right away most of the time. As you can see, I was not able to get the lines to ever start on the start line, and basically all of my lines have a fairly big gap before the ink starts appearing.
Basically, the IAF feels a bit high when tapping options and settings, but I still able to get used to it with a bit of time, and I thought it was acceptable for drawing once I got used to it.

In terms of the lightest pen pressure, I could get fairly thin lines with the 300px IAF test pen. The thin lines on this tablet aren’t as good as the Huion New 1060 Plus (2048) IAF test page which is the ideal, but this thinness was quite good and is more than satisfactory.

Overall, the XP-Pen Deco 01 has a somewhat high IAF, but is able to draw very thin lines consistently. This tablet gets a pass-ish here.

Overall

So all in all, the drawing test results are:
1) Scribble Test – Pass
2) Slow Ruler Line Test – Pass
3) Quick Hatching Test – Pass
4) Short Release Taper Test – Fail
5) Pen Pressure Control/Transition Test – Pass
6) Initial Activation Force & Lightest Pen Pressure Test – Pass-ish

Ideally, all the above tests should have at least a “Pass-ish” for their grades because the most vital function of a drawing tablet is to draw properly and predictably. Failing any of these tests means that it doesn’t do that.


The drawing experience!

The actual drawing experience on the XP-Pen Deco 01 was quite enjoyable despite the “Fail” mark in the Short Release Taper Test in the Drawing tests section. The pen pressure worked well and come out as I expected it to, and only sometimes would I have to undo a line or two due to the pen tapering issue.

There was also the somewhat high IAF which made me have to re-tap some options when it didn’t sense my tap, but luckily, the somewhat high IAF wasn’t so bad that it affected the drawing capabilities of the tablet. Despite having to re-tap options sometimes, I honestly thought it felt quite nice drawing on this tablet.

I mentioned that the pen wasn’t well designed with its slick plastic surface, and that was probably the biggest problem I faced. Because the pen can become slippery, you grip the pen harder to compensate, and this will most likely cause fatigue over longer periods of use.
This pen is the biggest trade-off you make for the low price.

While using this tablet, I also noticed that the cursor is delayed while hovering your pen. What I mean is that the cursor does not react to your movements as fast as possible while hovering, and you can feel a clear delay there.
However, the odd thing about this is that there’s no delay when actually pressing down and drawing with the pen. This means that the hover delay has absolutely no effect on drawing, and you can get used to it pretty quickly.

Hover delay is a problem on drawing monitors because your pen is beside the cursor, so you can see how delayed the cursor is. However, on a screen-less tablet like the XP-Pen Deco 01, it’s something you can get used to because of the disconnect of pen and screen.
If XP-Pen did this on a drawing monitor, that would be a massive issue, but on this screen-less tablet, it’s really not too big of a deal (unless you play Osu! on it).

Looking at all of what I wrote above, the XP-Pen Deco 01 kinda seems unattractive, but surprisingly enough, I actually had a fairly good time doing my review drawing on it.
I certainly don’t really like the design of the pen itself, but the pen tapering issue, somewhat high IAF, and hover delay were not significantly bad enough to have an extremely negative impact on my drawing experience.


Conclusion

In conclusion, the XP-Pen Deco 01 is a satisfactory tablet that is worth taking at least one look at if you’re on a budget. It’s one of the cheapest 10×6.25 inch tablets available right now from a reputable company.
You can find a lot of 50 USD tablets from newer companies, but the quality of XP-Pen’s drivers are miles ahead and new companies very rarely create tablet drivers that are even remotely as good as Wacom, Huion, and XP-Pen’s. If I run into a good tablet from a lesser-known brand, I’ll recommend it, but I haven’t run into many so far.

Like I mentioned before, the XP-Pen Deco 01 V2 has been released recently and it is the exact same 60 USD price as the V1. It uses a better quality pen and even has pen tilt support, so I recommend taking a look at the V2 if the V1 interests you.

Below are links to the newer XP-Pen Deco 01 V2 if you’re interested in that one!

AU website store:http://bit.ly/2yUaCIz

Places to buy the tablet

XP-Pen Store | Amazon.com | Amazon.ca | AliExpress
People living in other regions should check their regions Amazon or see if the XP-Pen Store ships to them.

If you have any questions about the tablet, feel free to ask me!

XP-Pen Deco Pro Small Review

The XP-Pen Deco Pro is XP-Pen’s newest Deco series tablet which features a very sleek and unique design with silver accents not typically seen on current screen-less tablets which usually have overall black designs.
The Deco Pro is available in two sizes, small or medium, but these should not be confused with Wacom’s small and medium sizes as XP-Pen’s small and medium sizes are much larger!

It should be noted that it’s not just the appearance which is unique. The XP-Pen Deco Pro also features a new type of dual function wheel, which has a physical wheel on the outside and a touch wheel in the center, as well as a robust aluminum alloy back casing which gives this tablet a much more durable feel compared to many other screen-less tablets which are made mostly from plastic.
As a side note, I do not talk about the Android compatibility feature as I feel I do not have the right tools and experience to judge that feature.

Apparently, this tablet has won two awards, the 2019 Red Dot Design Award and the 2018 Good Design Award, so I had fairly high expectations for this tablet going into this review.
Did it live up to my expectations? Yes, it did. It is well up there with my other favourite tablets and I believe it’s well worth a look for how surprisingly low its price is.

For this review, XP-Pen was kind enough to supply me with the XP-Pen Deco Pro Small. As usual, this review is based on my honest thoughts and opinions about this tablet and I will never agree to review a product if I am required to say only good things about it.
If you believe receiving a review product for free makes a review biased, now is a perfect time for you to stop reading.

Anyways, with that out of the way, onto the review!

Please note!
-I am not a Mac or Linux user!! I mainly only tested this tablet on Windows 10 version 1803.
-Prices may have changed since I wrote this review.
-Check when a review was written. Some aspects may improve or change over time, so it is in your best interest to concentrate on reviews which are less than 1 year old.
-It is good practice to check multiple reviews to cross reference their information before you make a conclusion about a tablet.


Table of Contents


How good is this tablet?

Design choices: Mostly perfect!
-Nitpicks: Non-rounded edges
Hardware quality: Very robust!
-Nitpicks:
Tablet drivers: Good design!
-Nitpicks:
Drawing test results: Mostly good!
-Nitpicks: Quick tapers are not smooth
Actual drawing experience: Quite good!
-Nitpicks:

Overall: A very good buy at 90 USD (or 130 USD for the medium size).

My verdict:
-I can recommend considering this tablet whether you are a beginner or experienced user. The price is extremely good for a tablet of this caliber, and basically everything is great ranging from the wheel and touchpad to the pen tilt, surface texture, and build quality.

The only con is the pen tapering issue which is common among XP-Pen’s tablets, however, even that does not affect drawing very often and I was able to do my drawings without much issue.
XP-Pen has also told me they are working on fixing it (and that it’s a complicated issue so they’ll need some time), but once that is fixed, this tablet will be an even more fantastic option than it already is.

XP-Pen gave me a promotion code to share, so if you’re interested in this tablet, make sure you use the code to save some money! Promo code only works at the sites listed below.

10%off code: MYHR10MY, valid til July. 31th.
Amazon.au:https://amzn.to/30ft9uC(promo code won’t work)

Website store NA:bit.ly/2JsPIaS


Specifications at a glance

Price: 89.99 USD (Small) (when this review was written)
129.99 USD (Medium) (when this review was written)
Active Area: 9 x 5 inches (Small)
11 x 6 inches (Medium)
Pen Type: Battery-free
Pen Buttons: 2 side buttons, no eraser
Pen Pressure: 8192
Pen Tilt Sensitivity: Yes, levels unspecified
Shortcut Keys: 8 buttons, 1 physical wheel, 1 touch wheel
Multi-touch: None
Other features: Android Compatible with OTG Adapter


What’s in the box?

2 - Box

The tablet comes in a very simple white box with a picture of the tablet on the front. I like this minimalist approach as this is a tablet which is marketed more towards a “professional” audience.

3 - Contents

The things that come in the box:

  • XP-Pen Deco Pro Small tablet
  • XP-Pen PA1 Battery-free pen
  • Pen case
  • Tablet cable (USB type-A to USB type-C)
  • Pen nib replacements x8
  • Anti-fouling glove
  • User manual
  • Warranty policy and warranty card
  • “Thank you” card

4 - Tablet Overall

The XP-Pen Deco Pro has a rather unique design with bold silver accents around the shortcut button area, light up active area corners, and a blue ring light in the wheel. I won’t deny that this looks quite pleasing to have on your desk.

There is almost no flex when doing a simple twist test by gripping both ends of the tablet and twisting, however, the small amount of flex which you are able to apply is kept by the aluminum alloy back-casing.
I don’t think this is detrimental to the tablet’s durability because the tablet does not flex too much, so you can just twist it back if you find that the tablet is not sitting perfectly flat on your table.

This tablet comes in two sizes, Small or Medium, but please note that these sizes are not the same as Wacom’s.
XP-Pen’s small size is roughly 9×5 inches, while the medium size is roughly 11×6 inches. These are much bigger than Wacom’s small and medium sizes which are only 6×3.7 inches and 8.7×5.8 inches respectively.
In other words, XP-Pen’s small is actually a very respectable medium size.

I was given the choice to review either the small or medium version, and I chose to review the XP-Pen Deco Pro Small because being able to draw comfortably on the smaller size means that the larger size will also be comfortable to draw on.
The same cannot be said for the opposite as a comfortable medium size does not guarantee that it is comfortable drawing on the smaller size.
(I also already have experience drawing on a 11×6 inch tablet with the Huion Q11K, so I already know that size is comfortable.)

The XP-Pen Deco Pro has a pretty rough surface texture, which is expected from XP-Pen as their tablets usually have rough textures, however, unlike the texture on the Deco 03, the texture on the Deco Pro is very resilient to wearing.
Over the few days I drew and tested the Deco Pro, the texture shows absolutely no signs of wearing (the second picture shows the area which I drew on). This is a fantastic improvement from their previous texture which started visibly wearing off right away.

I think with this new texture I can recommend the Deco Pro for those who prefer tablets with rough textures since the texture on the Deco Pro isn’t just going to wear away in a matter of hours.

6 - Tablet back

A special aspect of this tablet is that the back of the tablet is made out of an aluminum alloy. This gives the Deco Pro a fair bit of rigidity despite being quite a thin tablet overall. It also gives the tablet a more premium feel than just plain plastic.

Also on the back, there are the usual information sticker and two long rubber feet. The two long rubber feet design is a good choice compared to the usual four rubber feet in the corners as it also offers support for the center of the tablet while drawing.

7 - Tablet edge

The edge of the tablet is a fairly sharp corner design. I personally don’t like this edge design because it digs into my wrists since my table is slightly higher than elbow height.
Of course, this wouldn’t be an issue if I had a proper table or chair which put my elbow right at table height, but let’s not forget that not everyone has a perfect chair/table setup.

Honestly, if the edge was at least slightly more rounded I wouldn’t have any complaints about it.

8 - Tablet shortcut buttons

The shortcut buttons on the XP-Pen Deco Pro are very nice to use. They require a bit more force to press than I personally would like, but they are in no way bad as you get used to it once you start using them.
My only gripe about them is that the top 4 buttons and the bottom 4 buttons are somewhat far apart because of the wheel between them.

One of the most notable features on the XP-Pen Deco Pro is the special double function wheel in the center. It has a physical spin wheel on the outside, and a virtual touch pad in the middle. It’s a very unique design which is actually fairly useful, unlike a lot of other designs which I’ve seen before involving the wheel.

The physical wheel on the outside is self-explanatory as it works just like any other wheel shortcut would, and it spins extremely smoothly. The touch pad on the other hand has 3 modes which it can be set to in the drivers: Mouse, roller, and customized.
-Mouse mode works like a touchpad on a laptop, except it’s limited to one finger touch and two finger up/down for zoom in/out only. Unfortunately, there are no complex functions like two finger twist for rotate, two finger drag for panning, two finger tap for undo, etc.
-Roller mode works like a scroll wheel on a mouse. Sliding your finger up makes it scroll up, and sliding your finger down makes it scroll down.
Edit: Sliding your finger clockwise makes it scroll up, and sliding your finger counterclockwise makes it scroll down.
-Customized mode uses custom functions which you enter into the drivers for up/down, just like how you would set them for the physical wheel.
Edit: Again, clockwise and counterclockwise, not up/down. I was using it with only up/down and it was working, so I mistakenly thought it was a touch slider rather than the touch wheel it was advertised to be.

In my case, I used the wheel by assigning rotate to the physical wheel and zoom in/out to the touchpad in customized mode. This gave me a rather natural way to move the canvas and was also fairly fun to use.
This is one of the rare occasions where I won’t say that I would have preferred more shortcut keys instead of the wheel. This wheel and touchpad combo are actually quite usable and I have nothing against it since it allows to use two functions at once without having to use some inconvenient switch function.

9 - Tablet port

This tablet uses an L-shaped USB type-C cable on the tablet, which then connects to a USB type-A port on your computer. The cable fits very snugly in the port, and the port doesn’t budge at all when trying to wiggle the cable.
The great thing about USB type-C ports on a tablet is that you can easily reverse it for left-handed mode because USB type-C is symmetrical.

The length of the cable itself is roughly ~160cm from tip to tip.

10 - Pen

The XP-Pen Deco Pro uses the XP-Pen PA1 battery-free pen which features a semi-hard/semi-soft rubber grip with silver plastic for much of the rest of the pen. It is quite light but doesn’t feel unbalanced.

Holding this pen feels very comfortable and is quite nice. The bulge near the tip provides a good hold for your fingers as well to prevent your fingers from sliding down, although the rubber does a fair job of providing good grip already.

The pen buttons are mostly flush with the surface of the grip, but they stick out enough for you to find them without looking down at your hand. They also click nicely and feel very good to use.

The top of the pen does not having anything.

12 - Pen nib wear

Due to the rough texture on this tablet, the pen nib will wear away considerably with continued use. The picture above is the pen nib after around 2 days of continuous use.

Unlike other rough textured tablets, having a flat pen nib doesn’t cause much issue on the XP-Pen Deco Pro because the pen nib is held firmly in place and doesn’t rotate easily inside the pen. This means that you won’t have random moments where the pen nib rolls over onto a flat side and disrupts your stroke with a random bump.
All the other tablets which have pen nib wear issues have pen nibs that spin freely (Wacom Intuos, Wacom Intuos Pro, XP-Pen Deco 03, etc), so the XP-Pen Deco Pro is actually the first tablet I’ve run into that doesn’t have an issue drawing with a flat nib.

The nib itself is also quite long and sticks out quite a bit compared to most other tablet pens, so you can actually get quite a bit of usage out of a single nib before it needs to be replaced.

As the icing on the cake, XP-Pen sells pen nibs in packs of 100 for only 10 USD for this pen, so you should have no issues with flat pen nibs since it literally only costs 10 cents per replacement nib. Take that Wacom!

The pen case is a tube which holds the pen safely inside during transportation. Both ends can be unscrewed, with the lid on one end acting as a pen stand, and the other end holding the pen nib replacements and the pen nib remover.

I always appreciate this pen case because it’s such a nice addition to have. The only problem with it is that it will roll away if you put it on its side since it’s so round, so you always have to stand it up.

14 - Adapters

Two OTG adapters come included in the box for Android usage. One micro-USB and one USB type-C adapter.

I did not try the Android compatibility because I do not think I have the proper hardware (I don’t have a recent Android phone) and experience necessary to judge the Android compatibility feature.
Please look at other reviews for comments on Android functionality.


Tablet drivers

The XP-Pen tablet drivers are extremely easy to install. Just go download the latest version directly from XP-Pen’s site and remove all other tablet drivers you have on your computer before installing it.

Once you’ve installed the driver and plugged in your tablet, the XP-Pen driver icon should appear in the system tray in the bottom right. You can access the tablet settings by clicking on that. The installer will also create a shortcut on your desktop for opening the settings.

If the installer doesn’t prompt you to restart your computer after it finishes, I wholeheartedly suggest restarting your computer anyways to allow Windows to properly update the files necessary for the driver to run smoothly.

16 - Driver overall

The XP-Pen driver is a simple one page driver with all the important settings in one window. Here you can set the pen buttons and pen pressure, and choose which monitor the tablet maps to.

You may need to check the Windows Ink checkbox if you use programs such as Photoshop which require Windows Ink to be turned on for pen pressure to work.

The Barrel Button Settings section lets you choose the function assigned to the pen buttons.

You can set basically all keyboard or mouse shortcuts that you can think of using the function key option, but you unfortunately cannot combine mouse clicks with keyboard keys in the same function. This is one of the few small cons of the XP-Pen driver which has been around for a fairly long time now.

The KL/KR Mode Switch, KL2/KR2 Mode Switch, and Track Pad Mode Switch are for the wheel and touchpad.
-The KL/KR Mode Switch cycles through the functions on the wheel (if you’ve assigned more than one function to it).
-The KL2/KR2 Mode Switch cycles through the functions on the touchpad when the touchpad is set to Customized mode.
-The Track Pad Mode Switch cycles through the Mouse, Roller, and Customized modes on the trackpad.

18 - driver click sensitivity

The Click Sensitivity section allows you to manipulate the pen pressure curve directly. For this pen, the default settings were fine, although it did feel like I needed to press a slight bit too hard for the highest pressures.

A cool thing to note is that the only other tablet drivers with this custom pen pressure graph is Wacom’s Intuos Pro and Cintiq drivers. Wacom’s low-end Intuos tablets do not offer you the pen pressure graph, and most of the Wacom alternatives aside from XP-Pen don’t have it either!

19 - driver current screen

The Current Screen section controls which monitor your tablet is mapped to, and what area of your tablet is used.

If you noticed earlier, there was a function called Switch Monitor among the functions you could assign to your shortcut keys. That function cycles through all the available monitors in the drop-down list at the top of the Current Screen section when used, so you can use that to quickly switch which monitor your pen input goes to.

To make sure your tablet is set to the same ratio as your screen, you should click the Max Active Area button, then click the Display Ratio button. This should adjust the tablet area to match your screen ratio.

If you click the Express Keys button in the bottom right, a new window will open up with the options for changing the functions assigned to the shortcut keys.
You can click the Dial tab to change the functions assigned to the wheel, and the Dial2 tab to change the functions assigned to the touchpad.

All the buttons can be assigned mouse clicks, keyboard functions, or the extra functions, just like the pen buttons.

On the wheel, KL corresponds to counterclockwise spin, and KR corresponds to clockwise spin.
On the touchpad, KL also corresponds to counterclockwise swipes, and KR corresponds to clockwise swipes.

The bar along the top of this window allows you to make program specific profiles which will only be active when the program you assigned is your current active window. It is a useful feature for people who want different functions for different programs.

21 - driver control

The Control tab in the Express Keys Setting allow you to adjust the brightness of the active area lights and the blue wheel light. Unfortunately, it only has 3 settings of 0 (off), 50 (mid-bright), and 100 (bright).
I’m not sure why it’s a slider from 0 to 100 when these are the only 3 options you can pick.


Drawing tests

These pen tests are all done with the same settings for both the canvas and the pens. These tests are only done in Clip Studio Paint as that is the only program where I totally understand how to remove all unwanted variables.
If you are worried about whether this tablet will work with your art program, don’t be afraid to contact support to ask them directly.

-The canvas will always be a 3000x3000px 300dpi page (the above test page is a 3000x6000px 300dpi page, so just two pages stuck together).
-The test pens are mostly all 100px linear pressure curve pens. Pen pressure for size and/or opacity is enabled based on the test.
-The slow ruler line test uses a 10px no pen pressure pen to clearly show wobble and jitter. I also use a 50px pen pressure enabled pen to see the visibility of wobble/jitter with pen pressure is enabled.
-The IAF (Initial Activation Force) test uses a 300px linear pressure pen to show the thinnest lines possible, as well as demonstrate the IAF of the tablet.

XP-Pen Deco Pro Test Page-1

1) Scribble Test – Grade: Pass
Test pen 1 – 100px – pen pressure: size
Test pen 2 – 100px – pen pressure: size+opacity

For my pen tests, I always start out with a few pen pressure scribbles to see if I can do some nice squiggly lines with increasing pen pressure. I also do some back and forth shading and some spirals with increasing pen pressure.

With the XP-Pen Deco Pro, I had no problems doing my little scribbles going from thin to thick. I didn’t have any problems controlling my strokes and making both thin and thick lines was relatively easy. This tablet gets an easy pass here.

XP-Pen Deco Pro Test Page-2

2) Slow Ruler Line Test – Grade: Pass-ish
Test pen 1 – 10px – pen pressure: none
Test pen 2 – 50px – pen pressure: size

The slow ruler line tests done with a no pen pressure pen were quite good at all angles, but you can clearly see some wobble when tilting the pen completely over.
However, this amount of wobble at max tilt is small enough that it probably won’t be noticeable in most cases. It may be a problem if you intend to use tilt functionality at the max angle a lot, but if you don’t intend to use tilt, it will not be a problem at all.

This tablet gets a pass-ish here.

XP-Pen Deco Pro Test Page-3

3) Quick Hatching Test – Grade: Pass
Test pen 1 – 100px – pen pressure: size

The quick hatching test is to check whether the tablet keeps up with pen inputs. Usually, the only way to fail this section is if the pen is noticeably laggy and causes unwanted inputs like fishhooks at the beginning or end of the line.

As you can see, this tablet appears to have no problems with fishhooks. I also never noticed the cursor lagging so far behind the pen that it was a problem, so it gets a pass here.

XP-Pen Deco Pro Test Page-4

4) Short Release Taper Test – Grade: Fail
Test pen 1 – 100px – pen pressure: size

This test is meant to see the smoothness of the pen pressure taper when going from max to min pressure quickly. Basically, you press your pen down hard then flick to the side to see how smoothly the stroke tapers.

With the XP-Pen Deco Pro, these tapers are not smooth and you can clearly see this. This issue applies to all very quick tapers that start from max pressure. In other words, it can also happen on longer strokes as well if you are drawing them very quickly.

Fortunately, this is not an issue that you often notice while drawing on the tablet, and most of the time you are not moving fast enough to cause this issue to appear in your longer strokes.
However, this tablet fails this section even if that is the case.

It appears that this is an issue with all of XP-Pen’s current tablets which use the newer drivers (Deco 03, Artist 12, Artist 15.6 Pro, etc).
I have notified XP-Pen about this and they told me they will work on fixing it, but as it is a complex issue, they are still working on it. This is one of the only issues I currently have with XP-Pen’s products, so hopefully they will be able to fix it soon.

XP-Pen Deco Pro Test Page-5

5) Pen Pressure Control/Transition Test – Grade: Pass
Test pen 1 – 100px – pen pressure: size+opacity

This section is to test the smoothness of the transitions in pen pressure.
-The circles at the top are one of Youtuber Brad Colbow’s tests. It is used to check if you can properly control the pen pressure all the way around a circle. If there is a pressure jump, some circles will feel impossible to control due to that jump.
-The lines at the bottom are slow strokes done with smooth increases or decreases to pen pressure in mind. The arrow points in the direction which the stroke was done, and the smoothness of the gradients show how smooth the pen pressure transitions.

In terms of the pen pressure control circles, I had no problems doing all the different circles smoothly. They showed no signs of pen pressure jumping and it was very easy to do all the different line weights.

I will give this tablet a pass here since there don’t appear to be any noticeable issues in the pen pressure transitions either.

6) Initial Activation Force & Lightest Pen Pressure Test – Grade: Pass
Test pen 1 – 300px – pen pressure: size

This test tries to demonstrate the IAF of the tablet, and also shows the lowest possible pen pressure the tablet is capable of producing consistently.
IAF is the amount of force necessary to cause the pen to output a line. Ideally, your tablet will have an extremely low IAF where the pen will output a line with the least amount of force possible.
A high IAF causes issues such as light pen taps not registering as clicks, and the inability to sketch very lightly, both of which become quite annoying the more you experience it.

For this test page, the squiggly lines should begin right on the start line.
-If the line begins right on the start line, this indicates that the IAF is extremely low (low IAF is best) and the line just appears naturally without effort.
-On the other hand, if the line does not begin on the start line and instead begins further along the stroke, this means that the IAF is high so I needed to search for the IAF by increasing my force little by little until I finally started outputting a line.

An example of the ideal test page is the Huion New 1060 Plus (2048) IAF test page which I included above for comparison. Almost all the lines begin right on the start line meaning it has extremely low IAF, and the lines are almost transparent showing that the tablet is capable of drawing extremely light pen pressures.

The XP-Pen Deco Pro has a decently low IAF which I could find right away most of the time. As you can see, I was not able to get the lines to start on the start line consistently, but I was able to start them pretty close to it almost every time.
Basically, the IAF is low enough that I don’t consider it an issue. At first, I noticed it when tapping options, but it was low enough that I got used to it after the first few minutes of using the tablet.

In terms of the lightest pen pressure, I could get fairly thin lines with the 300px IAF test pen. The thin lines on this tablet obviously pale in comparison to the Huion New 1060 Plus (2048) IAF test page which is the ideal, but this thinness is quite alright and is more than acceptable.

Overall, the XP-Pen Deco Pro has decently low IAF and is able to draw acceptably thin lines consistently. This tablet gets a pass here.

XP-Pen Deco Pro Pen Tilt Tests

7) Pen Tilt Test – Pass
Test pen 1 – 100px – pen tilt: opacity
Test pen 2 – 100px – flat pen – pen tilt: direction

This test shows the smoothness of the pen tilt by gradually tilting the pen while slowly moving the pen to the side. This section also includes scribbles using the pen direction determined by pen tilt.

As you can see in the smoothness test, the pen tilt transitions on the XP-Pen Deco Pro are fairly smooth. You can see some steps in the gradient, but they are not massive steps which don’t properly transition into the next shade.
This is a much better result than the pen tilt on the XP-Pen Artist 15.6 Pro which had extremely clear jumps between pen tilt levels.

This tablet will get a pass here.

Overall

So all in all, the drawing test results are:
1) Scribble Test – Pass
2) Slow Ruler Line Test – Pass-ish
3) Quick Hatching Test – Pass
4) Short Release Taper Test – Fail
5) Pen Pressure Control/Transition Test – Pass
6) Initial Activation Force & Lightest Pen Pressure Test – Pass

Non-Vital Drawing Tests:
7) Pen Tilt Test – Pass

Ideally, all the above tests should have at least a “Pass-ish” for their grades because the most vital function of a drawing tablet is to draw properly and predictably. Failing any of these tests means that it doesn’t do that.


The drawing experience!

The actual drawing experience on the XP-Pen Deco Pro was very enjoyable despite the “Fail” mark in the Short Release Taper Test in the Drawing tests section. The pen pressure worked well and came out as expected for the majority of my time using the tablet, and only sometimes would I have to undo a line or two due to the pen tapering issue.

Drawing on this tablet was quite enjoyable thanks to the nice texture and mostly great pen pressure. It was also a relief seeing that the texture wasn’t wearing out whatsoever even after my time drawing on it, so I have no worries about this nice texture wearing away quickly (at least for a while) which is a plus.
It was also quite fun using the wheel and touchpad because they didn’t require me to press a separate button to change between zoom in/out and rotate. Although I mainly use a keyboard alongside my screen-less tablets, I was able to draw normally using just the shortcut keys on this tablet without any real disadvantages compared to using my keyboard.

For the most part, the uneven tapering is not even so bad that it affects the drawing process. This is shown by the fact that I was able to do my review drawing without much issue, and the pen pressure was perfect in every situation aside from when I required quick tapers.
The worst the pen tapering did was make me undo a few extra times during my shading process when it involved using quick long tapers, but it was not a massive problem with regards to my overall drawing experience using this tablet.
Once XP-Pen is able to fix the pen tapering, I will have basically no issues with this tablet.


Conclusion

In conclusion, the XP-Pen Deco Pro is a fantastic tablet that is very close to being an instant recommendation from me. If XP-Pen fixes the pen tapering issue, this tablet is almost a no-brainer pick for anyone and everyone who’s interested.
Even as it is right now, it’s a very good pick, only losing out to the Huion H1060P as my current favourite.

Quite honestly, I’m surprised that it only costs 90 USD for a tablet with an aluminum alloy build, good pen tilt, decently good pen pressure, and a cool and useful wheel and touchpad. It’s also only 130 USD for the medium size.
It’s a rather stellar price, especially when you consider how similar its features are to the 350 USD Wacom Intuos Pro’s features.

Small or medium, take your pick. If you’re looking for a good tablet for beginners and experienced users alike, this could absolutely be the one for you.

If there are any updates regarding the pen tapering, they will be noted at the very top of the review.


Places to buy the tablet

XP-Pen Store | Amazon.com | Amazon.ca | AliExpress

XP-Pen gave me a promotion code to share, so if you’re interested in this tablet, make sure you use the code to save some money! Promo code only works at the sites listed below.

10%off code: MYHR10MY, valid til July. 31th.
Amazon.au:https://amzn.to/30ft9uC(promo code won’t work)
Website store NA:bit.ly/2JsPIaS

People living in other regions should check their regions Amazon or see if the XP-Pen Store ships to them.
If you have any questions about the tablet, feel free to ask me!

Huion Kamvas Pro 16 Review

Update (Jul. 28, 2019): No progress on the calibration fixes. Since it’s been so long since I reported it, it appears it’s not on Huion’s list of urgent things to fix.
In other words, it probably won’t be fixed any time soon.

If there are no updates above this one, then that means it still hasn’t been fixed, or I haven’t been notified of a fix.


The Huion Kamvas Pro 16 is one of Huion’s many new tablets in their Kamvas line of drawing monitors. In essence, the Huion Kamvas Pro 16 is a 15.6-inch version of the previous Huion Kamvas Pro 13.
You should be careful not to confuse this tablet with the new Huion Kamvas 16 which is a tablet with a similar name but fairly different features and specifications. It should be clear enough which is which based on appearances alone though.

Since this tablet is basically a larger Huion Kamvas Pro 13, I had high expectations going into this review. Whether it lived up to expectations, read on to find out- just kidding, I’m not going to leave you hanging like that.
The Huion Kamvas Pro 16 completely lived up to my expectations and actually has some new and improved software features thanks to Huion’s efforts in improving their drivers since the Huion Kamvas Pro 13. The Huion Kamvas Pro 16 is a very nice tablet and it makes me wonder if the rest of their new lineup of Kamvas tablets is just as good.

For this review, Huion was kind enough to supply me with the Huion Kamvas Pro 16. As usual, this review is based on my honest thoughts and opinions about the tablet and I will never agree to review a product if I am required to say only good things about it.
If you believe receiving a review product for free makes a review biased, now is a perfect time for you to stop reading.

Anyways, onto the review!

Please note!
-I am not a Mac or Linux user!! I mainly only tested this tablet on Windows 10 version 1803.
-Prices may have changed since I wrote this review.
-Check when a review was written. Some aspects may improve or change over time, so it is in your best interest to concentrate on reviews which are less than 1 year old.
-It is good practice to check multiple reviews to cross reference their information before you make a conclusion about a tablet.


Table of Contents


How good is this tablet?

Design choices: Mostly good!
-Nitpicks: Power button placement, function switch button placement, outlet is necessary for power, Huion stand lacks angles
Hardware quality: Really sturdy!
-Nitpicks:
Screen quality: Very vibrant!
-Nitpicks:
Tablet drivers: Quite complete!
-Nitpicks: No anti-ghosting on shortcut buttons, pen calibration tool is a pain to use, slight pen calibration issue on the bottom 1/5th of the screen
Drawing test results: Pretty fantastic!
-Nitpicks:
Actual drawing experience: Very enjoyable!
-Nitpicks:

Overall: An extremely impressive tablet!

My verdict:
-If you are considering this tablet, I think it is an amazing option and it certainly gets my recommendation.

The one nitpick which I need to point out is the issue with the “slight pen calibration issue on the bottom 1/5th of the screen”.
Huion has finally attempted a new pen calibration method which recalculates the cursor position using pen tilt (hurray!) and it works quite well. However, as with most new things, it still has a small issue with not being perfectly aligned along the bottom 1/4th of my screen.
With that said, it’s only a very slight offset and I was only able to notice it while doing my drawing tests. In all honesty, I didn’t notice it at all while drawing as I would normally.

Huion has already told me they are working on fixing it, so I’m very hopeful that it will be fixed by the time this tablet is sent out. Good on them if they fix it quickly, but like I said, it’s a really small issue that didn’t get in the way of my drawing at all. I still recommend this tablet either way.

Promo codes

Huion gave me a promo codes which give you 20 USD off the pre-sale price. They are:
JAZZA16 on huiontablet.com (20 dollar off on the pre-sale discount price)
JAZZAK16 on other sites (20 dollar off on the pre-sale discount price)

I have put all the links and promo code information in the Places to buy the tablet section at the bottom of this review (there were a lot).

The pre-sale and code ends June 24th, 2019. Make sure you use the promo code if you buy this tablet before then!


Specifications at a glance

Price: 469.00 USD (when this review was written)
Active Area: 13.5 x 7.6 inches, 15.6 inch diagonal

Resolution: FHD 1920 x 1080 (16:9 ratio)
Display Type: IPS, gamut = 120% sRGB on product page
Pen Type: Battery-free

Pen Buttons: 2 side buttons, no eraser
Pen Pressure: 8192
Pen Tilt Sensitivity: Yes, +-60 levels
Shortcut Keys: 6 buttons, touch strip
Multi-touch: No
Other features: Tablet stand included/not included depending on seller. Reduced parallax with a fully-laminated display.


What’s in the box?
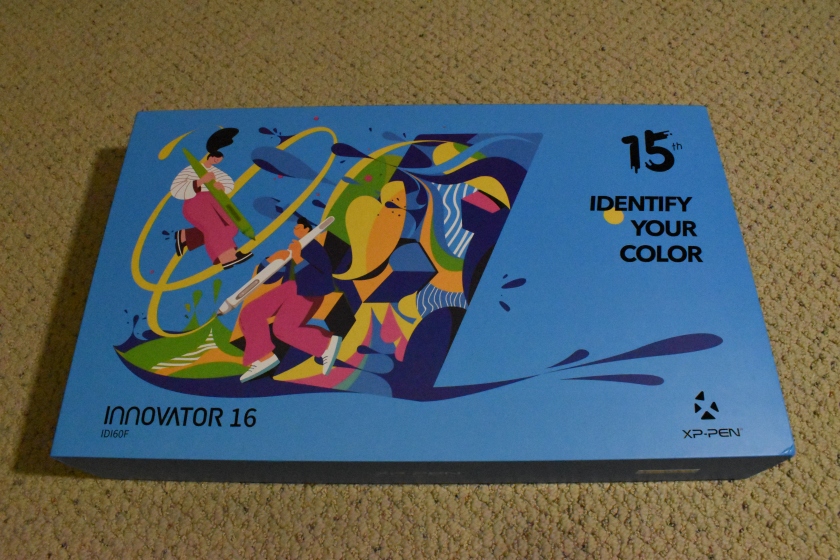
2 - Box

The tablet comes in a simple black box with the tablet peeking in from the side.

3 - Contents

The things that come in the box:

  • Huion Kamvas Pro 16 tablet
  • Tablet stand (included/not included based on seller)
  • Huion PW507 battery-free pen
  • Pen stand
  • Combined cable (USB type-C to USB type-A, HDMI, and power)
  • Pen nib replacements x10
  • Anti-fouling glove
  • Screen cleaning cloth
  • User manual
  • Driver installation CD shaped instruction card
  • Warranty card
  • Shortcut button function stickers
  • “Thank you” card

4 - Warm tips

When you first take out the tablet, it will have a little stick on it. You will want to pull on that sticker to take off the protective film which is protecting the screen during shipping.
This is not a screen protector for you to leave on. If you do not take this layer off, you will not get to experience the actual matte texture of the screen beneath it.

5 - Tablet overall

The Huion Kamvas Pro 16 is a sleek looking device with an all black front with a shiny silver rim.

This tablet is actually quite small for its screen size due to having nothing beyond the bezels around the screen. It still won’t fit in a 15.6-inch laptop bag, but it should for sure fit in a 17-inch or bigger bag.

The tablet feels sturdy when performing a twist test, where I grab both sides of the tablet and try twisting the tablet a bit with just my hands.
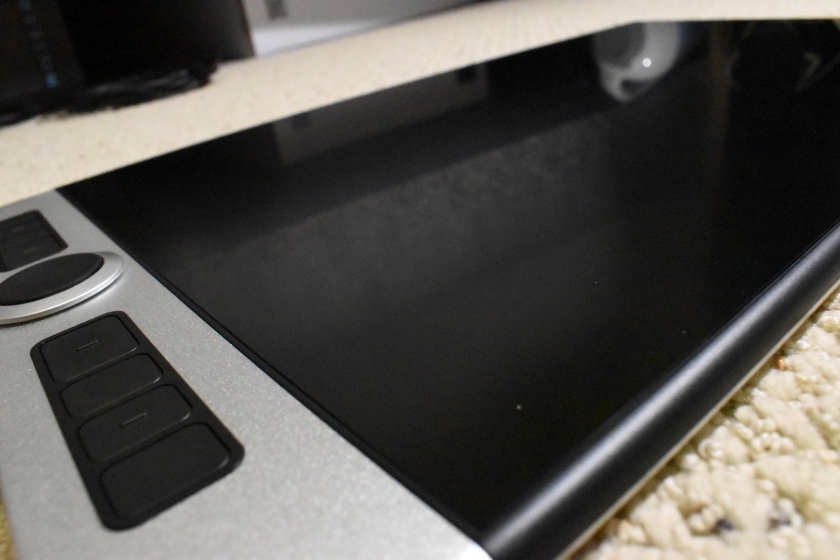
6 - Tablet texture

The tablet comes with a etched glass anti-glare textured screen. This gives it enough resistance to not feel like you’re sliding around uncontrollably, and doubles as an anti-glare texture to prevent too much glare from light reflecting off the screen. It’s a really light texture, but it’s much nicer than not having any texture at all.

This texture has been applied directly to the screen and is not a screen protector so you cannot take it off.
However, it should be noted that I do not see any scratches or worn out areas on the screen despite drawing on it intensively for around 2 weeks.

7 - Tablet side profile

The Huion Kamvas Pro 16 is very thin, so it is very portable in terms of weight. However, as I noted before, it is unable to fit in 15.6-inch laptop bags because it has more length than 15.6-inch laptops due to the shortcut button area.
If you intend to bring it around with you, you may need to get a new bag if you don’t have any larger ones.

8 - Tablet back

The back of the tablet is made of a silver material which feels hard and cool to the touch. According to the info on the product page, this is a type of aluminum alloy, meaning this tablet is made quite durably with a metal casing for the back.

On the back of the tablet there are 2 long rubber feet along the sides. There is also the usual information sticker with the S/N number on it

9 - Tablet shortcut buttons

There are 6 programmable buttons and 1 touch bar along the side of the tablet. The two bigger buttons at the top and bottom are unprogrammable with one of them being the power button, and the other being the function switch button (which doubles as the OSD settings button). I will talk more about how to access the OSD settings using this button in the Screen Quality section.

The buttons give a nice tactile click when pressed, and are not too hard to press. I like the shortcut buttons on a lot of Huion’s tablets, and these ones are very good as well.

One nitpick I have is that it’s somewhat bad design to place the power button directly beside the shortcut buttons. It hasn’t happened to me, but it seems completely possible that people will accidentally press the power button when going to press the very top shortcut button.
Personally, I think the power button should have been placed somewhere else, and that space should have instead been used for more shortcut buttons.

The other nitpick I have about the buttons is the location of the function switch button (the large button on the opposite side of the power button).
I think that there should have been a function switch button right beside the touch bar, rather than 3 buttons away from the touch bar. It would be much more convenient having a function switch button beside the touch bar that it controls. The extra space opened up at the bottom could also be used for more shortcut buttons.

Another thing to note is that none of Huion’s shortcut buttons have anti-ghosting capabilities (so far). In other words, you cannot use two buttons at the same time. This will not matter in most cases, but you should keep this in mind if you think it affects you.

10 - Tablet port&cable

The tablet has a single USB type-C connection port on it. This is a great design choice because this means that the L-shaped cable can be flipped for left-handed use. This is because USB type-C is a symmetrical design, meaning it can be plugged in either direction.

The port has a tunnel in front of it which is there to support the weight of the cable so that the weight of the cable doesn’t ruin the port over time.
I know there are many situations where having a tunnel in front of the port and forcing the user to use a proprietary cable is a bad thing, however, in this case, it is well worth using a proprietary cable to make sure the port lasts as long as it can.

11 - Tablet cable

The included cable is a combined cable which goes from the USB type-C on the tablet to a USB type-A and HDMI on the computer, and a longer cable to a power outlet. The cable must be connected to a power outlet or else the tablet will not power on.

It is a bit inconvenient that the power cable needs to be connected to a power outlet for the tablet to work considering that there are other 15.6-inch tablets which work through USB power alone, however, if you think about it a bit, this isn’t really a problem.
Unless you intend to draw without connecting your laptop to a power outlet, you should usually be able to connect your tablet to a power outlet too. If you intend to draw without a power outlet nearby, you should be getting something made for portability like an iPad Pro + Apple Pencil instead of a drawing monitor anyways.

This cable is the same cable as the one that the Huion Kamvas Pro 13 uses, but I noticed that the Huion Kamvas Pro 16’s is noticeably thicker and seems to be created with more durability in mind. Is it actually more durable? Who knows, but it sure seems like it is.

There are many people who voice complaints about proprietary cables like this one, but I believe it is not a bad thing in this case.
In this case, the proprietary cable is made specifically so that the USB type-C cable is properly supported by the area around the tablet port. I would argue that supporting the cable weight and protecting the port from gradual cable weight damage is important enough to warrant using a special 3-in-1 cable.

12 - Tablet cable lengths

Above is a rough diagram I created to show the lengths of each part of the cable which came with the Huion Kamvas Pro 13. The Huion Kamvas Pro 16 uses the same cable, so I have reused the diagram here.
The cable is ~142cm from the USB type-C to the 3-way split, then ~37cm from the 3-way split to the USB type-A and HDMI. The length of the power cable from the 3-way split is ~193cm.

As you can see, the USB type-A and HDMI can reach around ~70cm apart from each other. This length should be able to accommodate most normal workspaces and reach all the way around most laptops, even if the HDMI and USB type-A ports are not right beside each other on your computer.

There is also a Velcro strip on the cable to help tie it up neatly when you need to. This is a non-painful type of Velcro which is actually pretty soft when you touch it.

The tablet stand which comes with tablet is a bit lackluster (note: the tablet stand is optional and is included/not included based on the seller).
The stand has a good build with a front metal plate and plastic base, and it also keeps a good grip on the table and tablet with its rubber pads. However, the variety of angles that it is capable of are just pathetic.

The way this tablet stand is designed, it supports 7 “different” positions using 2 metal arms and 3 slots. I put “different” in quotes because the rough angles this stand can achieve are only: 0, 15, 17.5, 20, 42.5, 43.8, 45 degrees.
I usually use my tablets at around a 35 degree angle, and this stand just so happens to skip right over that angle. The lower angles hurt my neck, and the higher angles point into my chest. The stand just feels useless because it’s so limited in the angles it can do.

I instead ended up using the XP-Pen AC18 stand which I have from another tablet review since that one can actually do lots of angles between 0 and ~70 degrees.

The Huion Kamvas Pro 16 comes with the PW507 battery-free pen, a premium looking pen with a nice rubber grip, plastic body, and silver accents.

The pen has a subtle taper towards the top, and a bulge near the tip which makes it very comfortable to hold and use.

The pen buttons protrude slightly from the surface of the pen which makes them very easy to find and use. They are very nice to use because they have a nice tactile click and don’t require too much effort to press.

The top of the pen does not have anything.

This is the pen stand which comes with this tablet. It can hold the pen upright, or sideways by wedging the pen in the indent on the top. It has a rubber base so it does not slide or move around at all.

The replacement pen nibs are inside the pen stand, and the pen nib remover is the metal ring held snugly in the middle. Although there are 10 replacement nibs, I have yet to see any wearing on my first one after roughly 2 weeks of use.


Screen quality

16 - Screen

The Huion Kamvas Pro 16 has decent screen colours out of the box. As expected, the colours are not calibrated, but the default settings are okay albeit a bit strong on the blues.
Although the default calibration is somewhat off, once you calibrate the display using a colorimeter, the colours displayed become very accurate as expected.

17 - OSD settings

To access the OSD settings for this tablet, you have to press and hold the bottom shortcut key (the touch bar function switch button) for about 2 seconds until the button lights up and the OSD settings appear on screen. From there, you can navigate the options using the 4 shortcut keys closest to the touch bar.
To return the shortcut keys to their normal functions, press and hold the function switch button again until the light on it turns off.
(If that description didn’t make sense, refer to the user manual book as it is explained there.)

There are a lot of OSD options such as: backlight, brightness, contrast, sharpness, gamma, color temperature, hue, saturation, etc. I believe it has everything necessary for editing your screen colours.
If you change some settings and don’t like them, you can always return the settings to default by going to Other>Reset in the OSD settings.

The settings I have right now are: Backlight=50, Brightness=50, Contrast=50, Sharpness=2, Gamma=Off, Color Temperature=User (Red=129, Green=115, Blue=115).
Please note that all monitors are different and require their own individual settings to be calibrated, so the settings for my monitor very likely do not apply to yours. You can go ahead and try them though.

As a side note, Huion also allows you to adjust the OSD settings through the newest Huion driver version 14.8.25.611 (this experimental feature is currently only available for the Huion Kamvas Pro 16).

18 - IPS viewing angle

The IPS screen on this tablet has fairly good viewing angles, although the colours can look a shade darker when viewing them from an extreme angle, most likely due to the texture of the glass.
However, this is a non-issue as you most likely won’t be looking at the screen from any extreme angles while drawing.

There are absolutely no problems with colours display by the IPS screen when looking at it from a “normal” angle in front of it.

19 - Colour measurement

Huion advertises this tablet as a 120% sRGB monitor, and from my measurements, this appears to be a truthful claim.

The above results are from my calibration using my X-Rite ColorMunki Display with DisplayCAL, and I measured that the tablet has a ~128% sRGB gamut volume, clearly reaching their claimed gamut volume.
These results are fantastic as this means that this tablet is suitable for use with colour accurate work (if you calibrate it). This means that the Huion Kamvas Pro 16 certainly lives up to its name of being a “Pro” tool in terms of its colour capabilities.

One thing to note is that 120% sRGB does not always equate directly to 92% AdobeRGB as claimed on the product page.
The way colour spaces work, some of the 20% extra sRGB in this case actually applies to the reds of the DCI-P3 colour space which is not a part of the AdobeRGB colour space, and this is why the AdobeRGB measurement is ~88% rather than the advertised 92%.
Well in this case, I think it’s close enough to the advertised value to not be an issue, but they should really just figure out how to measure it themselves and advertise measured numbers instead.

20 - Colour Measurements - Uncalibrated

The above chart are my results from using the Spyder colour accuracy checker available on DisplayCAL. I performed the above colour accuracy check with my Huion Kamvas Pro 16 at default settings (uncalibrated). The far right Delta-E’s are better the closer to 0 they are.

As you may be able to see, these are some rather lackluster results with most of the colours being too bright in comparison to what they should be. It’s certainly usable at default, but the colours are clearly bright than they should be.
(I think you can address this a bit by reducing just the Backlight setting to around 50 instead of the default 80.)

21 - Colour Measurements - Calibrated

This second chart has the results from using the same colour accuracy test after the Huion Kamvas Pro 16 has been properly calibrated to sRGB. This second chart reflects the actual quality of the tablet screen, and how accurately it can display colours when calibrated.
As you can see, the Delta-E’s are very close to 0 (closer to 0 is better) after the display has been calibrated, showing that the Huion Kamvas Pro 16 certainly has the capabilities of displaying very accurate colours.

A Blurb About Colorimeters

If you are an aspiring digital creative working with colours, I highly recommend investing in a colorimeter. Even factory calibration can only last so long before the monitor colours start to drift and become less and less accurate, so it is extremely beneficial in the long run if you invest in a colorimeter. Even Wacom’s factory calibrated tablet monitors are no exception to this and their colours will drift over time because colour drift is an unavoidable aspect of monitors as they age.
Having a colorimeter to calibrate your monitor every month or so is vital if you want to have complete confidence in your colours at all times.

My recommendation for the best cheapest option is the Datacolor Spyder5 Express paired with the free software DisplayCAL. I do not recommend the cheaper X-Rite ColorMunki Smile because it is an old type of colorimeter which loses its reliability very quickly, whereas the Spyder5 Express and pricier models will work for many years to come.
You can read great reviews of these colorimeters at this site:
https://www.color-management-guide.com/spyder5express-review.html
https://www.color-management-guide.com/colormunki-smile-xrite-review.html
And here’s a really simple guide on how to calibrate with DisplayCAL:
https://www.pointsinfocus.com/learning/digital-darkroom/displaycal-and-argyll-cms-quick-start-guide/
As well as how to get the Spyder5 colorimeter to be detected by DisplayCAL:
https://hub.displaycal.net/forums/topic/spyder5-not-detected/
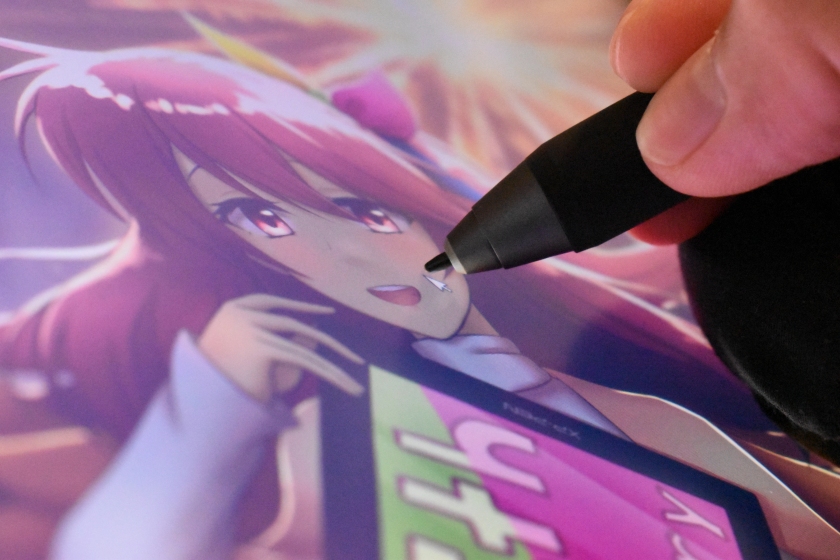
22 - Parallax

One of the most important features of the new Kamvas Pro tablets is the use of fully-laminated displays which combines the glass with the screen, effectively reducing the thickness of the glass between the pen and cursor. This gets rid of the “parallax effect” commonly found on standard glass panel drawing monitors.

As you can see in the picture above, the pen tip is quite close to the cursor, even when viewed from the side. The glass is thin enough on this tablet that it almost feels like you’re drawing directly where you point your pen.

Just like many other fully-laminated displays, due to the thinness of the glass, you can cause ripples to appear on the screen when pressing harder. These ripples only happen when you press around 100% pen pressure or harder, and are only slightly noticeable on a very dark colour background. I believe this is not a problem as you will most likely never notice it and it will not affect your drawing.

23 - Backlight bleed

The easiest way to see backlight bleed is by full-screen a black image. As you can see, there is only some extremely faint light bleed along the sides, but everywhere else appears to completely black. The backlight bleed on my tablet is so faint that I even had to turn off all my lights to see it.

It is fairly typical to have some backlight bleed in monitors, but if your tablet has extremely noticeable backlight bleed (especially when it’s noticeable on all colours, not just pure black), then you may want to contact Huion support to get it replaced as your display may be defective.


Tablet drivers

The tablet drivers are extremely easy to install. You don’t even need to have your tablet plugged in to install them! Just go download the latest version from huion.com and remove all other tablet drivers you have on your computer before installing it.

Once you’ve installed the driver, the icon shows up in your taskbar, and the driver also creates a shortcut on your desktop so you don’t have to go searching for it in your apps.

Although the installer doesn’t prompt you to restart your computer after it finishes, I wholeheartedly suggesting restarting your computer anyways to allow Windows to properly update the files necessary for the driver to run smoothly.
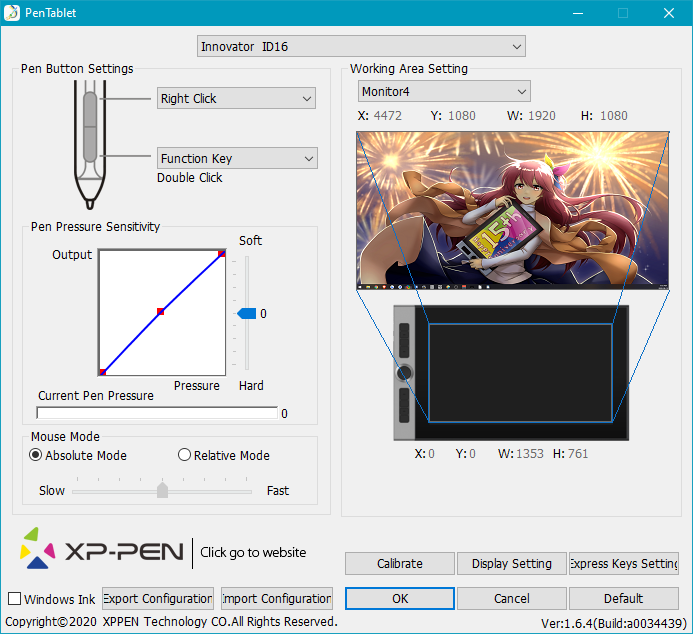
25 - Driver

In the driver, you can configure your tablet expresskeys, pen buttons, pen pressure curve, and work area.

There’s also an option to save different profiles manually using the import and export buttons in the “About” section.
Huion’s newest drivers now have a feature for automatically switching profiles based on your currently open application, and I will talk about this further down in this section.

The Press Keys tab allows you to customize the functions mapped to your expresskeys. As you can see above, the hotkeys menu has keyboard shortcuts, pen clicks, and some “switch” functions available. You should also be able to assign basically any keyboard shortcut you can think of.
They also give you the option of giving custom names to your shortcuts.

Like I mentioned before, the Huion shortcut keys do not have anti-ghosting capabilities. In other words, you cannot use two buttons at the same time. This will not matter in most cases, but you should keep this in mind if you think it affects you.
Every button will work at the same time as the pen nib though, including the pen buttons.

27 - Driver touch bar

The touch bar is also customizable and is able to switch between 3 up/down functions. You can switch between the functions using the function switch button opposite the power button.
One very small limitation of this touch bar is that you cannot disable any of the 3 up/down modes. Even if you only have 2 up/down functions to assign to the touch bar, you cannot disable the third one. You just have to double click the function switch button to skip over the useless third function.

It is important to note that the ‘Enable Touch’ option is referring to the touchbar, not finger touch functions. This tablet does not have finger touch capabilities.

28 - Driver digital pen

The Digital Pen tab allows you to customize the pen buttons and the pen pressure curve. The pen buttons have the same amount of configuration as the expresskeys.

Usually you will want to uncheck the “Enable Windows Ink” option to prevent Windows Ink from messing with your drawing. With that said, some programs such as Photoshop usually do not work if Windows Ink is not enabled, so play with that option as you see fit.

29 - Driver work area

The Work Area tab allows you to customize the monitor your tablet is mapped to, the pen calibration, and the orientation of your pen inputs.

To use this tablet in left-handed mode, right-click on your desktop and select ‘Display settings’, then scroll down and change the Orientation to “landscape (flipped)’. Then go into the Huion driver and go to the Work Area tab, and select 180 degrees under the Rotate settings.

As a note for Windows 10 users, the default scaling in the Windows Display Settings is set to 150%, so you should go and change that to 100%.

30 - Driver pen calibration

The pen calibration for this tablet is a 9-point calibration. However, the default calibration is already pretty good with the fully-laminated display, so for the first while, I did not use the calibration tool.

I tried out the pen calibration tool later on and it was quite a pain because you had to do it once, figure out where it was off, then do it again while pressing slightly off of the dots to compensate, then rinse and repeat.
Basically, you can’t just press the dots in the middle and expect the calibration to be perfect. You have to test, then recalibrate based on the offset, then test again, and repeat until it’s correct.

Of course, once you do this and get it right, there are no problems. Make sure you save your profile after you do this, because you don’t want to lose all that calibrating work later.

As I noted before, there is a slight issue with the pen calibration being very slightly off on the bottom 1/5th of the screen. This is due to Huion trying to implement a new pen position calculation method which takes into account pen tilt/direction to recalculate the pen nib location.
Everywhere else on the screen was very accurate no matter which way you pointed the pen because of this new pen calibration which uses pen tilt, but it was slightly off along the bottom edge.
Huion has told me they are working on fixing this, and it wasn’t a big enough issue to affect my drawing at all, so I’m just mentioning it in passing. It doesn’t take away from how good the Huion Kamvas Pro 16 is.

31 - Driver other settings

A new feature which was implemented with the newest Huion drivers is the option to create automatically switching profiles for different programs. This was a very requested feature and I’m glad Huion has decided to implement it for those who needed it (and couldn’t be bothered to manually switch profiles).
You can access this by pressing the gear button in the top right corner of the Huion drivers. To edit the profiles for each program, just select the program and click the edit button and it will show you the settings which are set for that specific application.

You can also access the OSD settings from the drivers on the Huion Kamvas Pro 16 by clicking the same gear button.

This is not a new feature, but I should mention that you can also check for driver updates from here.

32 - Huion firmware updater

Huion has also introduced a new firmware updater program alongside these new driver changes to simplify the process of updating your tablet firmware. This program is separate from the Huion drivers, and you can download it from huion.com at https://www.huion.com/firmware.html.

Previously, you would have to contact Huion support directly to ask if there is a new firmware update, but with this new updater, all you have to do is run the updater to see if there are any new firmware updates for your device.
This updater is still new and only supports a few of Huions tablets at the moment, but I am extremely thankful that they are doing their best to simplify the firmware update process for everyone.


Drawing tests

These pen tests are all done with the same settings for both the canvas and the pens. These tests are only done in Clip Studio Paint as that is the only program where I totally understand how to remove all unwanted variables.
If you are worried about whether this tablet will work with your art program, don’t be afraid to contact support to ask them directly.

-The canvas will always be a 3000x3000px 300dpi page (the above test page is a 3000x6000px 300dpi page, so just two pages stuck together).
-The test pens are mostly all 100px linear pressure curve pens. Pen pressure for size and/or opacity is enabled based on the test.
-The slow ruler line test uses a 10px no pen pressure pen to clearly show wobble and jitter. I also use a 50px pen pressure enabled pen to see the visibility of wobble/jitter with pen pressure is enabled.
-The IAF (Initial Activation Force) test uses a 300px linear pressure pen to show the thinnest lines possible, as well as demonstrate the IAF of the tablet.
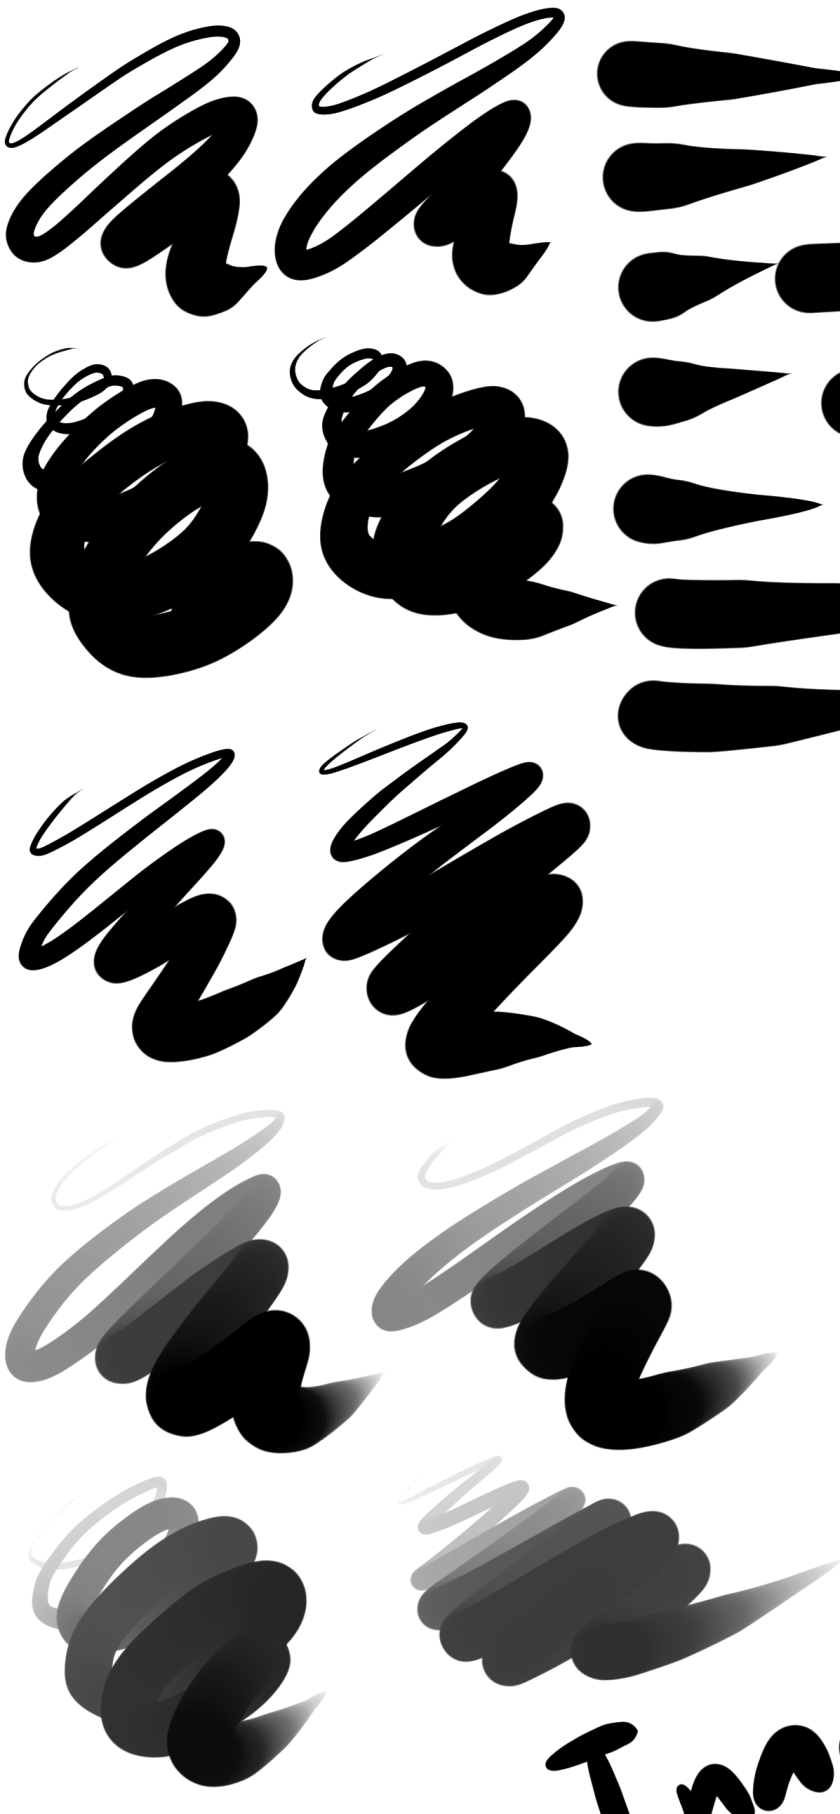
Huion Kamvas Pro 16 Test Page-1

1) Scribble Test – Grade: Pass
Test pen 1 – 100px – pen pressure: size
Test pen 2 – 100px – pen pressure: size+opacity

For my pen tests, I always start out with a few pen pressure scribbles to see if I can do some nice squiggly lines with increasing pen pressure. I also do some back and forth shading and some spirals with increasing pen pressure.

With the Huion Kamvas Pro 16, I had no problems doing my little scribbles going from thin to thick. I didn’t have any problems controlling my strokes and making both thin and thick lines was relatively easy. This tablet gets an easy pass here.
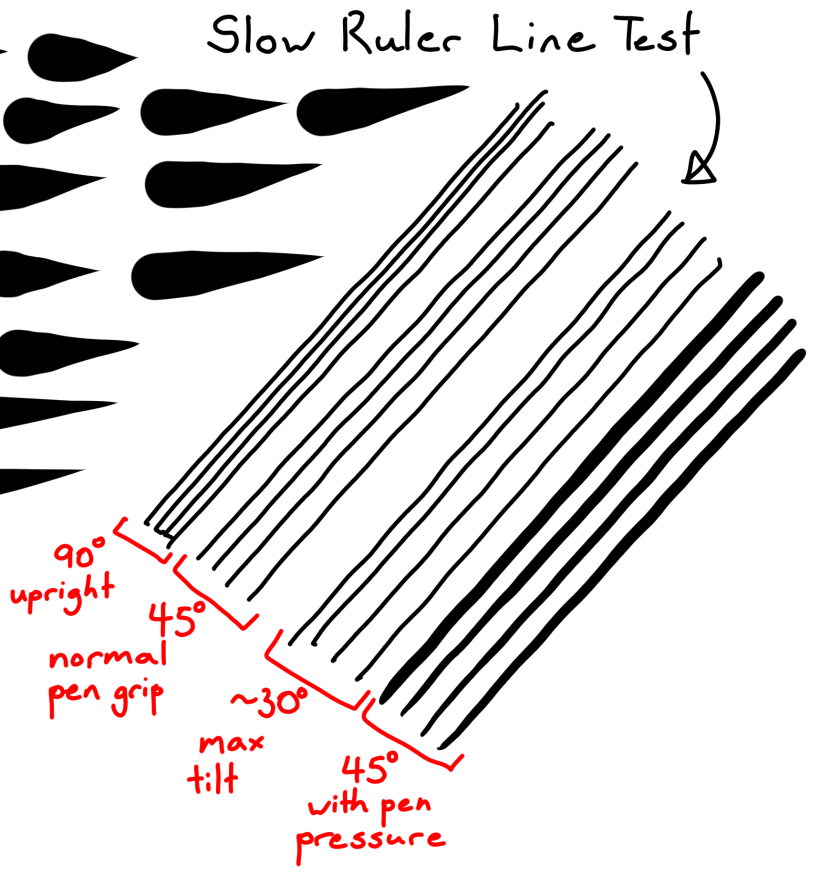
Huion Kamvas Pro 16 Test Page-2

2) Slow Ruler Line Test – Grade: Pass
Test pen 1 – 10px – pen pressure: none
Test pen 2 – 50px – pen pressure: size

The slow ruler line tests done with a no pen pressure pen were very good at all pen angles, even when holding the pen as far tilted as I could. You can see that there is basically no wobble in any of the pen angles tested, which is quite an amazing result.

This tablet gets a pass here.

Huion Kamvas Pro 16 Test Page-3

3) Quick Hatching Test – Grade: Pass
Test pen 1 – 100px – pen pressure: size

The quick hatching test is to check whether the tablet keeps up with pen inputs. Usually, the only way to fail this section is if the pen is noticeably laggy and causes unwanted inputs like fishhooks at the beginning or end of the line.

As you can see, this tablet appears to have no problems with fishhooks. I also never noticed the cursor lagging so far behind the pen that it was a problem, so it gets a pass here.
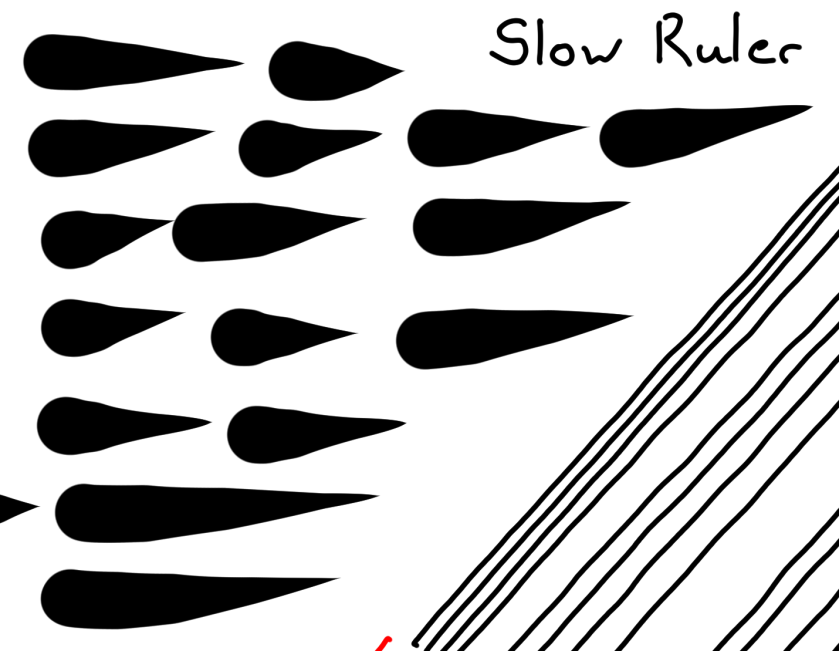
Huion Kamvas Pro 16 Test Page-4

4) Short Release Taper Test – Grade: Pass
Test pen 1 – 100px – pen pressure: size

This test is meant to see the smoothness of the pen pressure taper when going from max to min pressure quickly. Basically, you press your pen down hard then flick to the side to see how smoothly the stroke tapers.

With the Huion Kamvas Pro 16, the tapers happen very nicely and appear to have no problems with jaggedness. This tablet gets an easy pass here.

Huion Kamvas Pro 16 Test Page-5

5) Pen Pressure Control/Transition Test – Grade: Pass
Test pen 1 – 100px – pen pressure: size+opacity

This section is to test the smoothness of the transitions in pen pressure.
-The circles at the top are one of Youtuber Brad Colbow’s tests. It is used to check if you can properly control the pen pressure all the way around a circle. If there is a pressure jump, some circles will feel impossible to control due to that jump.
-The lines at the bottom are slow strokes done with smooth increases or decreases to pen pressure in mind. The arrow points in the direction which the stroke was done, and the smoothness of the gradients show how smooth the pen pressure transitions.

In terms of the pen pressure control circles, I had no problems doing all the different circles smoothly. They showed no signs of pen pressure jumping.

I will give this tablet a pass here since there don’t appear to be any noticeable issues in the pen pressure transitions either.

6) Initial Activation Force & Lightest Pen Pressure Test – Grade: Pass
Test pen 1 – 300px – pen pressure: size

This test tries to demonstrate the IAF of the tablet, and also shows the lowest possible pen pressure the tablet is capable of producing consistently.
IAF is the amount of force necessary to cause the pen to output a line. Ideally, your tablet will have an extremely low IAF where the pen will output a line with the least amount of force possible.
A high IAF causes issues such as light pen taps not registering as clicks, and the inability to sketch very lightly, both of which become quite annoying the more you experience it.

For this test page, the squiggly lines should begin right on the start line.
-If the line begins right on the start line, this indicates that the IAF is extremely low (low IAF is best) and the line just appears naturally without effort.
-On the other hand, if the line does not begin on the start line and instead begins further along the stroke, this means that the IAF is high so I needed to search for the IAF by increasing my force little by little until I finally started outputting a line.

An example of the ideal test page is the Huion New 1060 Plus (2048) IAF test page which I included above for comparison. Almost all the lines begin right on the start line meaning it has extremely low IAF, and the lines are almost transparent showing that the tablet is capable of drawing extremely light pen pressures.

The Huion Kamvas Pro 16 has a fairly low IAF which I could find almost right away. As you can see, I was able to get a lot of the lines to start on the start line, and even the ones which did not start on the start line, I was able to start almost right beside it.
Basically, the IAF is low enough that I don’t consider it an issue. I never noticed it when tapping options or sketching lightly.

In terms of the lightest pen pressure, I could get decently thin lines with the 300px IAF test pen. The thin lines on this tablet are not amazingly thin, and I had trouble consistently getting the thinnest lines possible, but this thinness is more than acceptable.
You have to take into consideration that these lines were done with a 300px pen, which is the size of the circle in the top left. When using a “normal” size pen, it felt like I could draw fairly thin lines easily.

Overall, the Huion Kamvas Pro 16 has fairly low IAF and is able to draw decently thin lines consistently. This tablet gets a pass here.

Huion Kamvas Pro 16 Pen Tilt Tests

7) Pen Tilt Test – Pass-ish
Test pen 1 – 100px – pen tilt: opacity
Test pen 2 – 100px – flat pen – pen tilt: direction

This test shows the smoothness of the pen tilt by gradually tilting the pen while slowly moving the pen to the side. This section also includes scribbles using the pen direction determined by pen tilt.

As you can see in the smoothness test, the pen tilt transitions on the Huion Kamvas Pro 16 are not perfectly smooth at times.
There are certainly places where the gradient goes up in clear steps, and others where it’s fairly smooth. It’s not perfect, but it seems to be quite good around half of the time.

This tablet gets a pass-ish here.

Overall

So all in all, the drawing test results are:
1) Scribble Test – Pass
2) Slow Ruler Line Test – Pass
3) Quick Hatching Test – Pass
4) Short Release Taper Test – Pass
5) Pen Pressure Control/Transition Test – Pass
6) Initial Activation Force & Lightest Pen Pressure Test – Pass

Non-Vital Drawing Tests:
7) Pen Tilt Test – Pass-ish

Ideally, all the above tests should have at least a “Pass-ish” for their grades because the most vital function of a drawing tablet is to draw properly and predictably. Failing any of these tests means that it doesn’t do that.


The drawing experience!

The drawing experience on the Huion Kamvas Pro 16 was quite enjoyable, and I didn’t feel like I was being held back in any way by the tablet. I’ve come to a point with tablet reviews where I get bothered by small issues that affect my drawing experience, but this tablet didn’t bother me at all and I really did enjoy drawing with it.

This new pen calibration which takes pen tilt into account is actually really nice since the cursor always stays under the pen nib even when using the pen from a different angle than usual.
Although I mentioned a small pen calibration issue in the bottom 1/5th of the screen, I repeat again that it absolutely didn’t affect me while drawing.
The only other places where I noticed that the pen calibration was off was in the absolute corners of the screen, and in a ~0.5cm area right along the top/right/bottom edges.

Using the Huion Kamvas Pro 16 was also a pleasure thanks to its fairly smooth but slightly textured screen. It gives you enough tooth to feel some texture, but it’s smooth enough that it doesn’t feel like you’ll quickly wear out the screen or pen nib while drawing.

The temperature on the tablet stayed consistently cool over long drawing sessions. The only part which gets warm is the upper middle edge (in right-handed mode), but even that small area is only slightly warmer than my body temperature.


Conclusion

I recommend this tablet to anyone interested in it.
It has a really good screen with great colours and basically no parallax. Along with that, the battery-free pen is comfortable and has pen tilt functionality.
This tablet might not be the best in terms of portability because it won’t fit in most “normal” size bags, but it’s still really slim so you can probably bring it around with you easily if you get a slightly bigger bag for it.

The Huion Kamvas Pro 16 is actually a decent bit pricier when compared to its “budget” competitors, but I believe it justifies its price with its high quality features and drivers.
I also believe it’s a step above most of the “budget” competition simply due to its new pen calibration which actually takes into account pen tilt/direction to calculate cursor position.

If you’re looking for an all-around great drawing monitor, I think the Huion Kamvas Pro 16 is a fantastic choice. This will be especially true once Huion gets the pen tilt/direction pen calibration perfected.

The one thing I wouldn’t recommend is Huion’s tablet stand though because it doesn’t really have many choices for angles.


Places to buy the tablet

Huion Store | Amazon.com | Amazon.ca | AliExpress
People living in other regions should check their regions Amazon or see if the Huion Store ships to them.

If you have any questions about the tablet, feel free to ask me!

Promo codes

Promo code:
JAZZA16 on huiontablet.com (20 dollar off on the pre-sale discount price)
JAZZAK16 on other sites(20 dollar off on the pre-sale discount price)

1. KAMVAS 16

Info: https://www.huion.com/pen_display/kamvas-16.html

Official Store: https://www.huiontablet.com/all-products/presale-item/kamvas-16.html
(Pre-sale discount 15% off + promo code JAZZA16: US $302.15(no stand), US $322.15(with stand))
(Pre-Sale Time: 00:00 May 24th 2019 – 23:59 June 24th 2019 PDT, Shipping Time: June 24th 2019.)

Amazon sites(20 dollar off promo code JAZZAK16):
US: https://www.amazon.com/dp/B07RP1V2K5
UK: https://www.amazon.co.uk/dp/B07RWWFZ85
FR: https://www.amazon.fr/dp/B07RWWFZ85
DE: https://www.amazon.de/dp/B07RQWTHTY
CA: https://www.amazon.ca/dp/B07R4JFY2X?ref=myi_title_dp
ES: https://www.amazon.es/dp/B07RT2X5NR
IT: https://www.amazon.it/dp/B07RT2X5NR

Global(20 dollar off promo code JAZZAK16):
Aliexpress: https://www.aliexpress.com/item/HUION-Kamvas-Pro-16-GT-156-Graphic-tablet-Drawing-tablet-Digital-Monitor-8192-Levels-with-Shortcut/33016749008.html
ebay: https://www.ebay.com/itm/233229316169

2. KAMVAS Pro 16(In video Jazza said KAMVAS 16 Pro)

Info: https://www.huion.com/pen_display/kamvas-pro-16.html

Official Store:https://www.huiontablet.com/all-products/presale-item/kamvas-pro-16.html
(Pre-sale discount 15% off + promo code JAZZA16: US $378.65(no stand), US $398.65(with stand))
(Pre-Sale Time: 00:00 May 24th 2019 – 23:59 June 24th 2019 PDT, Shipping Time: June 24th 2019.)

Amazon sites(20 dollar off promo code JAZZAK16):
US: https://www.amazon.com/dp/B07S4HSKR2
DE: https://www.amazon.de/dp/B07RV83QL3
UK: https://www.amazon.co.uk/dp/B07RV83QL3
FR: https://www.amazon.fr/dp/B07RW4Y2HQ
CA: https://www.amazon.ca/dp/B07R8Q911H?ref=myi_title_dp
ES: https://www.amazon.es/dp/B07RW4Y2HQ
IT: https://www.amazon.it/dp/B07RSXK4RC

Global(20 dollar off promo code JAZZAK16):
Aliexpress: https://www.aliexpress.com/item/Huion-Kamvas-16-GS1561-Digital-Pen-Tablet-Monitor-Graphics-Drawing-Monitor-Pen-Display-with-Adjustable-Stand/33021151701.html
ebay: https://www.ebay.com/itm/233229309731

“The Painful Truth About Drawing Tablet Reviews” – My Opinion

I am making this post as a pseudo-response piece to the “The Painful Truth About Drawing Tablet Reviews” videos which a few Youtubers have created following Aaron Rutten’s original video on the topic.

I am writing this post because, as a tablet reviewer myself who has worked with these companies, I do not completely agree with a few of their points about what they are trying to paint as “the painful truth” about drawing tablet reviews.

I honestly just wanted to get this uncomfortable feeling off my chest where I feel they are misinforming people about these tablet review agreements. It feels like they’re pitting too much of the blame on the tablet companies for their experiences when, in my eyes, much of what they point out appears to be the reviewers responsibility (or irresponsibility).
To me, these videos which they made seem much more suitably named as a “How I Feel Tablet Companies Treat Me Badly”, rather than some kind of “painful truth” about tablet reviews.

I don’t have anything against these Youtubers, and I refer to a lot of Brad’s review videos myself, but I just really needed to put out my own thoughts on this matter somewhere.

The videos I am referring to are:
Aaron Rutten’s – The Painful Truth About Drawing Tablet Reviews
Brad Colbow’s – The Painful Truth About Drawing Tablet Reviews: Response
Crowne Prince’s – I’m Quitting: Painful Truth About Drawing Tablet Reviews

P.S. This post is a very long wall of text with no pictures. You have been warned!


Table of Contents


Sending in Reviews For Fact Checking is Not Bad!

The biggest issue I have with these videos is that all three of these Youtubers make it sound like sending the company your full review before you publish it is a bad thing. They make it seem like every tablet company is only interested in censoring what you say in your review.

Yes, if you send your review in and they tell you to delete all the criticisms, then that’s wrong of them to do so. However, letting the company fact check your review is NOT an inherently bad thing whatsoever.

It is completely and absolutely possible that you as the reviewer have misinterpreted something, or done something unintended which caused the issues you experienced. Checking in with the company is obviously the correct thing to do if you are aiming to do your review as “correctly” as you can. As a matter of fact, it’s clearly worse to avoid consulting them before publishing your review.
Think about it. If you avoid checking in with the company before releasing your review, you are just doing your own viewers a disservice by shirking your responsibility to fact check!


You As The Reviewer Have A Voice

I also can’t help but dislike how all three of these Youtubers make it sound like the reviewer has no voice when it comes to renegotiating the terms and conditions tablet companies offer you before they send you the tablet.
The complaints they make about these review agreements that they themselves agreed to are… odd.

-Aaron Rutten mentions a case where he received a condition along the lines of “send us your review to look at before publishing it”.
-Brad Colbow also mentions a case where he received the same condition as Aaron.
-Crowne Prince mentions a case where she was given a condition along the lines of “finish the review within 1 week of receiving the tablet”.

In all of these cases, you can decline the terms!

Unlike how these three Youtubers made it sound, many companies are open to renegotiating the terms which you found disagreeable, and that is completely your responsibility to let them know that you do not think their terms are fair for you.

If you are willing to do dishonest reviews just because you’re afraid of losing partners for your Youtube channel, you are very clearly not going to last long. The fear of losing partners is not something that should prevent you from speaking out against what you think are unfair terms.

My Experience

I once reviewed a drawing monitor with the following conditions:

  1. Finish a review within 2 weeks of receiving the tablet.
  2. Allow them to troubleshoot all issues I encounter before publishing the review.
  3. Make a drawing specifically for the company to use in marketing/promotion/etc within 2 weeks of receiving the tablet.

Since it was a drawing monitor (which is fairly expensive), I felt this was a fair trade and agreed to this offer.

However, the next offer I received from this company was to review a screen-less tablet with the exact same conditions I received for the drawing monitor review despite this screen-less tablet being 1/4th the price of the drawing monitor.
Obviously, I felt that these terms were not fair for me for a tablet worth 1/4th the price, so I argued to them why I logically felt that I could not accept these terms.

They accepted my logical arguments and readjusted the terms to:

  1. Finish a review within 2 weeks of receiving the tablet.
  2. Allow them to troubleshoot all issues I encounter before publishing my review.

The removal of the company specific drawing made this a much fairer agreement, so I accepted these new terms.

What This Means

What I am trying to demonstrate with my example is that, you as the reviewer are the one with the responsibility to argue any terms which you logically feel are not fair.

  • If Aaron and Brad felt that it wasn’t fair to show their review to the company before they published it, they should have argued against that term with a logical reason before they agreed to it.
  • If Crowne Prince felt that 1 week was too short a deadline, then she should have argued for a longer deadline with why she logically needed a longer deadline.

In both cases, if the company doesn’t accept the proposed changes to the terms, then it’s completely up to the reviewer whether they accept or reject the terms that they feel are unfair for them.

Obviously, if you don’t have a logical reason to reject a term, then the tablet company will not be willing to accommodate your request to change the terms. But in the case that a company won’t give you fair terms, why should you feel any need to agree to work with such a company?
Please do not be so desperate to get free products that you agree to terms that you feel are unfair. This will just make your future dealings with that company difficult as this will just make a track record of you being very “generous” with your time and effort, so your future agreements will most likely be with similar unfair terms.


Reviewers Being Used As Testers

One very true fact which is brought up by these Youtubers is the fact that reviewers are being unfairly used as testers a lot of the time, and this is a problem which affects all types of reviews, not just tablet reviews in particular.
However, I do not completely agree with them even about this.

Testing is an inherent part of reviewing, and I think that we as reviewers need to be pseudo-testers who test a tablet thoroughly enough to be able to inform our viewers about all the pros and cons of a tablet.
Unfortunately, we can’t test the nitty-gritty details which we don’t understand such as the inner electronics and wiring, but if we do not test a tablet beyond what is on the product page, then we are just influencers or advertising agents. We would no longer be the reviewers we pride ourselves to be.

The Value of Time

There are certainly many cases where the amount of issues you run into and the troubleshooting you have to do is beyond what you were “paid” when you received the tablet. However, this is a very grey area which changes based on the subjective value each person puts on their time.

In my case, I do not receive any money for my reviews because this is just a hobby of mine. The only “payment” I receive for my work is the tablet itself. Because of this, it is fairly easy to calculate what I feel is fair or unfair when it comes to tablet review agreements.

In the case of decently accomplished Youtube reviewers, it is probably much harder to calculate this because they also receive “payment” through Youtube ad revenue in addition to the tablet itself.
As Youtube reviewers receive some monetary benefit from being given the chance to review a tablet, and also get the benefit of having more content to post, I feel that at least some troubleshooting can be justified as “part of the job description”. At least, up to a point.

Honestly, the problem here is the same as the last section. It’s the reviewers responsibility to make sure that they only agree to terms and conditions which they think are fair for them.

You can’t tell if a tablet is going to give you more trouble than it’s worth before receiving it, but if it does, you should bring it up with the company and tell them that you are not getting value worth your time. You should try to convince them that what you were given is not worth the amount of troubleshooting which you are having to go through, and that you would like to request reimbursement for the “overtime” which you have had to work.

In the case that the company does not agree to pay you, you have the choice and responsibility to choose whether you will continue working with them or not.
If you decide to stop working for them, they are the ones losing the tablet they sent you, and you are only losing a partner who will not “pay” you properly for your time. You are not losing anything here. As a matter fact, you would just be hurting yourself wasting your time with a company who does not value your time.

Small Blurb About Review Offers For Pre-Release Tablets

The value talk in the previous section only includes testing a product which is already released. Pre-release testing is a whole different story and it should not be called a review offer. Period. 

This is because pre-release tablets will often have many bugs and issues, so what you will mainly be doing is beta testing. It is completely possible that the hardware will be changed before the official release based on your input, rendering the model you have on hand obsolete for review.
This means that you can no longer review the tablet properly because your model does not reflect the performance of the actual consumer model. Well, unless the company is will to send you the newer model as well, of course.


Conclusion

The many situations which these three Youtubers give in their videos are most likely true, and a lot of what they say is true about how these tablet companies will sometimes overreach to try and get the positive reactions they are looking for.
However, they are trying to throw too much of their own responsibilities as reviewers onto the tablet companies they agreed to work with.

The terms and conditions are negotiable if you have good reason to refute them. A lot of their complaints stem from the fact that they as reviewers avoided their responsibility to properly consider and revise the terms and conditions before they agreed to them.

If the terms and conditions are something that you read and agreed to, it is, without a doubt, improper business practice to break those terms and conditions willy-nilly.
It is your responsibility to follow through with what you agreed to unless there is good reason not to. A reason like “oh, I realized I don’t really like these terms after all” after the fact is extraordinarily irresponsible of you, and it is almost certain that the company will stop working with such an irresponsible individual afterwards.

Even in Brad’s case where he was asked to change parts of his review after he published it, aside from the fact that he forgot to fulfill his part of the agreement, there was most likely no clause in his review agreement which said that he couldn’t just outright reject the changes suggested to him.
Sure, the company might not like it that much that he won’t take out those points, but he just needs to logically explain to them why he can’t leave those parts out so that they can accept it. Then they might actually work on fixing those issues instead of getting angry about how Brad didn’t follow the agreement.

I often try my best to convince the companies I work with to fix all the issues I find, and I always make sure to give them proper reasons as to why I believe it’s important to fix them.
A lot of little issues are left untouched simply because the company thought it was unimportant to the general user. They are more than willing to fix these issues if you give them a good enough reason why they should fix it. They’re not going to get mad at you for criticizing something that you have good reason to criticize.

And again, if the company is unreasonable and won’t listen to logic, then you’re really not losing anything by losing them as a partner. Their products probably won’t improve since they won’t listen to criticism, so you’ll just be saved from the effort of reviewing more of their crappy products.

Perhaps I’m just biased because I’m not a Youtuber who has to “keep all the partners happy”, but I’ve honestly been as critical as I can of all the tablets I get to review and I still get review offers from these companies, so I really can’t understand why so many people agree with these Youtubers about this.
Many of these tablet companies are very reasonable, so just tell them what you don’t like about the review agreement, and if you have a valid, logical reason, they will try to work out terms that you can accept.
(Just note that it’s a bit harder to get your point across if your contact can’t speak decent English, which is the case with some lesser known companies.)


If you read the entirety of this post all the way to the bottom, hats off to you. Thanks for reading.

Wacom Intuos Pro M 2017 Review

The Wacom Intuos Pro M 2017 (PTH-660) is the tablet that almost everyone refers to as the “professional” grade screen-less tablet. One, because it’s Wacom, and two, because it’s got a ridiculously high price.
Clearly, it must be head-and-shoulders above the competition when it costs nearly triple the price of competing products.

I bought this tablet from my nearby electronics store because it was a refurbished item on sale for around 40% off. There was no chance that I was going to buy this tablet at full price when I could buy 3-4 other tablets to review for the same price, so I figured this was my best chance to finally get hands-on experience with Wacom’s current high-end offering.
With this, I should finally be able to confirm how legitimate people’s claims are about Wacom being “the best” in the business.

My expectations for this tablet were, surprisingly, not very high. I already knew about most of its flaws from the internet because it has been out for 2 years already, and I already have experience with the previous Intuos Pro M (PTH-651). Honestly, I didn’t expect it to be groundbreakingly different from the previous generation.
Were my expectations wrong? Not really. It’s almost exactly how I expected it to be. Obviously, it’s quite good because of how much it costs, but quite frankly, I still feel that the price is well above what it’s really worth, especially in comparison to the other tablets I’ve tried.

Anyways, let’s just get onto the review!
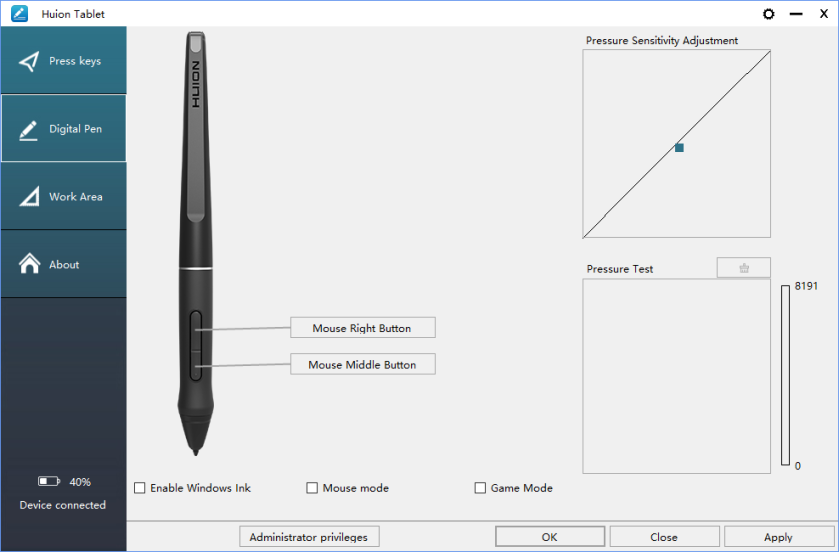
Please note!
-I am not a Mac or Linux user!! I mainly only tested this tablet on Windows 10 version 1803.
-Prices may have changed since I wrote this review.
-Check when a review was written. Some aspects may improve or change over time, so it is in your best interest to concentrate on reviews which are less than 1 year old.
-It is a good practice to check multiple reviews to cross reference their information before you make a conclusion about a tablet.


Table of Contents


How good is this tablet?

Design choices: Very good!
-Nitpicks: Power button placement
Hardware quality: Pretty solid.
-Nitpicks: Button quality, touch ring sensitivity, pen build quality, pen nib wear, bad Bluetooth connectivity
Tablet drivers: Fully featured!
-Nitpicks: Custom pressure curve limits, touch ring settings reversed
Drawing test results: Mostly good!
-Nitpicks: Not smooth pen pressure for shorter strokes, hard to draw thin lines
Actual drawing experience: Really good!
-Nitpicks: Flat pen nib

Overall: Quite good! But… only if you ignore the price.

My verdict:
I would probably only recommend this to Wacom enthusiasts, or to people who are afraid to shop online.

After actually getting to test this tablet myself, I can state with confidence that this tablet is absolutely not worth its price, especially in today’s tablet market.
It draws quite well, as it obviously should for 350 USD, but it basically offers nothing that you don’t get from other cheaper options. To make things even worse, you have to buy separate accessories like the 100 USD Wacom Art Pen to make it unique from cheaper options, increasing the already ludicrous price even more.


Specifications at a glance

Price: 349.95 USD (when this review as written)
Active Area: 8.7 x 5.8 inches

Pen Type: Battery-free
Pen Buttons: 2 side buttons, eraser on end
Pen Pressure: 8192, both pen tip and eraser
Pen Tilt Sensitivity: Yes, +-60 levels
Shortcut Keys: 8 buttons, 1 Touch ring
Multi-touch: Yes
Other features: Bluetooth wireless


What’s in the box?

2 - Tablet Box

My tablet came in this box which I assume is missing the outer cover. It’s missing the outer cover because it’s a refurbished device.

The Wacom Intuos Pro that I got is a Wacom refurbished device, meaning that Wacom themselves cleared it as “like new” sell-able status before returning it to the store I bought it from. Therefore, it should perform just like a brand new Intuos Pro and the fact that it is refurbished should have almost no effect on this review.
With that said though, if it turns out my device was worse than a “normal” Intuos Pro, we might need to talk about Wacom’s standards for refurbishing.

3 - Tablet Contents

The things that come in the box:

  • Wacom Intuos Pro (PTH-660) tablet
  • Wacom Pro Pen 2 battery-free pen
  • Pen stand
  • Tablet cable (USB type-A to USB type-C)
  • Pen nib replacements x10 (plastic nib x6, felt nib x4)
  • User manual
  • Coloured pen rings
  • Rough/Standard/Smooth texture sample pads

4 - Tablet Overall

This tablet has the base design which most other drawing tablets currently follow. The textured drawing area in the center, and shortcut buttons off to one side for easy access. You could even say that the Intuos4, the first version of the current Intuos Pro line, was the very tablet which defined how a screen-less tablet should look.
I like this design and it is very functional as well as aesthetically pleasing.

There is almost no flex when doing a simple twist test by gripping both ends of the tablet and twisting, and the tablet feels extremely solid and is actually fairly heavy. This is most likely due to the back being made of some kind of metal alloy, and the battery for the wireless.

5 - Tablet Texture

The surface of the tablet has a very rough finish which is meant to imitate a paper-like feeling. Wacom was the company which came closest to a paper-like experience, however, the newest texture they use feels slightly rubber-y compared to their previous textures due to the new plastic+rubber material they use. I also noted this same feeling on the new Intuos 2018.

This new texture is quite nice when using a brand new nib, but once the nib starts flattening and having more surface area rubbing against the surface, it starts gripping the texture more and more, increasing the rubber-y feeling the flatter your nib gets.
It’s not a bad texture even when it feels rubber-y, but I personally prefer the less grippy plastic textures they used to use.

With that said, an advantage of this new plastic+rubber texture is that it doesn’t wear out as quickly as plastic textures. Unlike plastic textures which show wear immediately, this new texture shows no wear yet (despite completely annihilating my pen nib).
This is a good thing in that it addresses the age old problem of the texture just wearing off right away, but it is a rather bad thing in terms of pen nib life.

This tablet has replaceable texture sheets, meaning you can replace the drawing surface if it’s worn down or damaged. There are also 3 different textures you can get which are Rough, Standard, and Smooth. This tablet comes with the Standard texture.
The Wacom Intuos Pro is probably the only current tablet which has replaceable texture sheets which is a really nice feature in terms of long time usage.

6 - Tablet Back

The back of the tablet appears to be made from some sort of metal alloy as it is cold to the touch, and the tablet itself is quite heavy overall. This is one of the few screen-less tablets on the market which uses a metal back, so it was most certainly built to last.

The back also has two long rubber feet spanning the whole tablet for maximum stability, and the usual information sticker.

7 - Tablet Edge

The front edge of the tablet has a beveled edge, giving it a comfortable place to rest your wrist while drawing.

I appreciate that Wacom is keeping this design on their tablets because a lot of screen-less tablets now have non-beveled edges (they’re just cornered edges), and I find those quite uncomfortable to work on for long periods of time.

8 - Tablet Shortcut Keys

This tablet has 8 shortcut buttons and a touch wheel along the side of the tablet. These buttons are… decent, but they’re far below what I expected from a device of this price range.
The outermost buttons in each clump of 4 feel extremely mushy and require way too much force to press, while the inner buttons in each clump of 4 feel fantastic and have just the right amount of feedback. The feeling of the outer buttons are horrible compared to the inner ones.
This could certainly be because my tablet is a refurbished product, but then that brings up questions about Wacom’s refurbishing standards as this is technically being sold as a “like new” product. 

The touch wheel on this tablet was also a rather big disappointment for the price of the tablet. It is very insensitive and I could often move my finger halfway around the wheel before it finally registers a “click” of the function. It certainly works, but it is frustrating using it because you can never properly control how much it activates.

The button in the middle of wheel is only for switching the function of the wheel and nothing else. There are 4 white lights around the wheel which show you the function you are currently on based on which is lit up.

The tablet port for the Intuos Pro is located on the side opposite the shortcut keys so the cable doesn’t end up under your hand when using the shortcut keys. This is a good design which not many other companies currently use for some reason.

The port itself is a standard USB type-C port with no tunnel in front of it. The use of USB type-C is really good here as it allows for the user to plug in the L-shaped cable whichever direction they need to, depending on whether they are right or left-handed.

The tablet cable is a ~200cm cable (quite long!). It does not come with a strap or twist tie.

10 - Tablet Power Button&Touch Lock

On the side of the tablet, there are two extra features. One is the power button for the Bluetooth wireless, and the other is the touch on/off switch.

To use the Bluetooth wireless, you should turn on the power using the power button, then press and hold the touch wheel button to start pairing. A blue light on the opposite side of the tablet will start flashing while pairing.
The way the power button is protruding also caused my to accidentally click it all the time. I’m sure accidentally turning it on in your bag won’t cause the batteries to drain that much, but it’s annoyingly easy to click accidentally.

On the topic of Bluetooth wireless, it was very noticeably laggy and all my inputs were clearly delayed.
This was tested on my Laptop which runs Bluetooth 4.0 and has no problems with using the tablet with the USB wired connection. I also made sure to put the tablet as close to the laptop as I could when using Bluetooth, but that made no difference and the inputs were still noticeably delayed.
I believe you should pretend that this tablet doesn’t come with wireless because it’s almost unusable with the delay.

The touch on/off switch is the only way for you to enable/disable the finger-touch feature on this tablet, which is a great idea because now the touch on/off function doesn’t have to be assigned to one of your shortcut keys. However, I disabled the touch because I use my tablet with a glove on and my palm often registered random touches.
The touch control was quite good, like what you would expect from a laptop touchpad, but it was a nuisance while drawing so I had to leave it disabled. I also just see no use for it because rotating or zooming with my fingers is no quicker than using my keyboard.

11 - Pen

The Wacom Intuos Pro uses the Pro Pen 2 battery-free pen. This is the wide barrel rubber grip pen shape that basically all tablet companies use now thanks to Wacom popularizing it. It has a semi-hard/semi-soft rubber grip with two side buttons and a pen eraser on the end.

12 - Pen Grip

Holding this pen is very comfortable and I like how it feels to hold.

However, I have to point out that the whole inner mechanism of the pen moves around slightly when I shake the pen. Pressing the pen nib also moves the whole inner mechanism, and holding down the eraser is the only way to keep everything in place.
The fact is, I noticed this exact same issue with the previous generation Wacom Intuos Pro which I used to own. With that one, the inner mechanism gradually started moving around so much that I needed to tape down the eraser to prevent it from affecting my pen pressure control.

The inner mechanism should not and will not budge in a “perfect” Wacom pen, and I know this because my colleagues who have new Pro Pen 1’s have solid pens, but clearly it is fairly easy to break these Pro Pen’s as I’ve already experienced 2 pens with this exact same issue out of the box.
It should be noted that none of the pens from other companies have had this issue with the inner mechanisms moving about, so clearly this is a Wacom specific pen design issue.

This is not a good impression for the quality of the Pro Pen 2, and this is really worrying due to the fact that this is a 90 USD pen. Yes, 90 USD for the pen!
The quality of the tablet itself is very good and I have absolutely no doubts about its durability, but the Wacom Pro Pen 2 seems worryingly easy to break despite its ridiculously high replacement cost. I really wish Wacom would concentrate on increasing the durability of their pen to match the durability of their tablet.

If you have a pen where the whole inner mechanism moves when you shake the pen, you may want to try contacting Wacom for a replacement because it can get worse over time and actually start affecting your pen pressure control.
You can tell whether your pen has this issue or not by comparing how the pen feels to shake with the pen nib held down or not. The eraser tip will rattle in both tests, but the pen will feel noticeably more solid when holding the pen nib down if you have this issue.

This is most likely caused by the fact that the pen tip and eraser tip are both attached to the same PCB which spans the whole pen. Basically, it’s a rod (the pen tip, PCB, and eraser tip) put inside a tube (the pen outer shell).
The “rod” is most likely not properly held in place inside the pen, and this allows for the inner mechanism to move, which in turns affects how the pen tip moves when you use the pen.

I was actually able to fix this by heating the plastic around the middle of the pen with a hair dryer, enough to melt and deform it slightly and make it form a tighter grip on the inner mechanism.
I was actually trying to melt the glue so I could pull the pen apart, but I accidentally fixed the issue instead by making the plastic melt into a tighter shape around the inner mechanism.

The two side buttons protrude noticeably from the surface of the pen, making them easy to locate without having to look down at your pen to find them. The also feel good to use them and click nicely.
The common complaint about protruding buttons is that you accidentally click them sometimes, but I would much rather have protruding buttons I can actually find without looking at, rather than buttons that I can’t find at all (therefore making them useless) because they are flush with the surface of the pen.

13 - Pen Top

The top of the pen has the pen eraser.

I personally think that a pen eraser is useless as flipping the pen is slower than using a shortcut, and the eraser tip will eventually wear out thanks to the rough surface, making it unusable without buying a replacement pen.
Of course, if you find it necessary for your art, then Wacom is the only one who offers a good pen eraser at the moment. Hopefully, you don’t mind the price of it.

14 - Pen Nib Wear

The pen nib wear is absolutely ridiculous on this tablet. The above is my pen nib after using the tablet for roughly one whole day. As you can see, it is completely flattened, and I often felt it rolling around when I was drawing my strokes.
I actually did adjust the pen pressure curve as much as I could to still have decent thin lines and less force for the highest pressure, but Wacom’s drivers don’t let you lower the max pen pressure very much, so the pen nib wear still happened even with those adjustments.

The flat pen nib luckily does not affect your drawing, but like I said before, the flatter it gets, the more it grips the new texture, causing you to feel more like you’re drawing on rubber rather than paper.

The rate at which the pen nibs wear is very worrying. These nibs are thinner and smaller than previous generation nibs, so if you draw intensively for just 3 days, it seems like you will need to replace your nib (depending on whether you press hard or not, of course).
This means that your 7 included plastic nibs will last only 3 weeks! (Or something like ~2 months assuming you don’t draw intensively every single day).
(I did not use the felt nibs because I really disliked how much they gripped the rough surface.)

The pen stand is a solid piece of metal with a plastic cap. It’s really weighty so it won’t move at all, especially with its rubber feet.
You can put the pen standing upright, or sideways on the stand.

Opening it up reveals the pen nib compartment, and the bottom of the stand is the pen nib remover with instructions printed on it. This tablet comes with 6 plastic replacement nibs, and 4 felt replacement nibs.
To close the stand, line up the dot on the metal part and the plastic part, then twist opposite the “open” arrow.

16 - Pen Colour Rings

These are the coloured rings they include which you can put on the end of your pen to “personalize” the look of your pen.

17 - Texture Sheet Samples

Inside the box comes a texture sample pad which allows you to test how the textures feel in case you want to buy a new one. I really like how the smooth feels compared to the standard. It’s actually a lot smoother than the standard sheet and it seems like it would’ve been a much better texture for most people as it would clearly not wear out pen nibs as fast as the standard texture.

Honestly, it’s such a scam that you have to buy these sheets separately for 30 USD each after already paying 350 USD for the Intuos Pro. At least give us the option to choose which texture we want the tablet to come with when buying the tablet online, rather than making us pay an extra 30 USD on an already expensive tablet.
This obviously isn’t possible for in-store purchases, but they really should at least offer that option online.


Tablet drivers

The tablet drivers are very simple to install. Just go download the latest version from Wacom’s site and uninstall all other tablet drivers you have on your computer before installing it.

The Wacom drivers are very extensive, so this section is kind of long.

If you installed the driver successfully, it should ask you to restart your computer. Once you’ve restarted your computer and plug in your tablet for the first time, it should bring up a “first-time setup” window which will guide you through the main features of the Intuos Pro, then open the Wacom Desktop Center.

You can access the Wacom driver options by right-clicking the Wacom Intuos Pro battery icon in the system tray, but to access the Wacom Desktop Center again, you will have to manually search for it through the start menu (by clicking Windows key).

In the Pen tab in the Pro Pen 2 section, you can select the tip feel, double click distance, tilt sensitivity, and assign functions to the two side buttons and pen nib.

There are a lot of functions to choose from, so take your time to look through all of them.

The reason why the Pro Pen 2 appears as an individual tool in the upper section is because you can set different functions for different pens if you have any of the special pens Wacom sells.

The customize button under the tip feel allows you to manually adjust the pen pressure curve. I adjusted the curve to have a lower max pressure so I wouldn’t need to press as hard.

Unfortunately, the manual pen pressure curve option is limited in that it doesn’t let you reduce the max pen pressure very far, so it doesn’t really let you reduce the pen nib wear that much. I was really surprised that the curve wouldn’t let me move the max pressure lower than ~70%. What’s the point of this limitation?

21 - Pro Pen 2 Eraser tab

The Eraser tab in the Pro Pen 2 section controls the settings of the pen eraser. You can change the function that the eraser activates, or just customize the pressure curve for the eraser.

22 - Pro Pen 2 Mapping tab

The Mapping tab in the Pro Pen 2 section controls the orientation of the tablet, as well as which screen it’s mapped to.

Select which monitor you are using the tablet with in the Screen Area section, and remember to select the “Force Proportions” option so that the area ratio of your tablet matches your monitors aspect ratio.

Most programs work better with Windows Ink disabled, so you should uncheck the Use Windows Ink checkbox unless you are using a program like Photoshop which requires it to be turned on.

23 - Functions Expresskeys tab

The Expresskeys tab in the Functions section controls the functions which are assigned to the shortcut keys. Just like the pen buttons, there are a lot of functions to choose from, and I doubt anything is missing.

The “Show Express View” checkbox changes whether the Express View feature shows up on screen when holding your fingers on the buttons.
An issue here is that the Express View doesn’t properly show up on the monitor your pen is assigned to. It only shows up on the “main” monitor which your computer has assigned. If you’re not using your “main” monitor as your drawing screen, then the Express View will show up on the wrong screen.

24 - Functions Touch Ring tab

The Touch Ring tab in the Functions section controls the functions which are assigned to the touch ring. You can assign 4 different functions and the center button will toggle through them.

If you want to disable function slots for the touch wheel, select the SKIP function instead of the Disabled function. That way, the wheel won’t toggle to the Disabled slots.

An odd issue here is that the function you assign to counter-clockwise will activate when you spin clockwise, and vice versa. I really wonder how Wacom never noticed this.

25 - Functions Display Toggle tab

I honestly have no idea what this tab is for…
I think you can just ignore it honestly.

26 - Functions On-Screen Controls tab

The On-Screen Controls tab in the Functions section controls the menus which you can have floating around on your screen. These are very helpful if you want to only use the shortcut keys and no keyboard.

You should look up how to use them if you find that the 8 shortcut keys and touch wheel are not enough for all your functions. The Radial Menu is especially useful.

The Touch Options tab in the Touch section controls the finger touch options such as pointer speed, scrolling speed, and double-tap time.

The Standard Gestures tab in the Touch section controls what gestures are enabled. If you have touch off, these options will be greyed out.

The My Gestures tab in the Touch section controls some gestures which are left available for you to customize.

30 - Wacom Desktop Center

The Wacom Desktop Center is your go to for everything related to your Wacom tablet. To open it, press the Windows key and search Wacom. It should be one of the search results.

In the My Devices section, you have the options to edit your tablet settings, find tutorials, and help for the tablet, and other info about your tablet.

In the Backup Settings section, you have the option to save all your Wacom settings either on your computer, or on the Wacom cloud. If you made a lot of changes to the defaults settings, you will most likely want to backup your settings

In the Updates section, the Wacom Desktop Center will automatically check for driver updates, or firmware updates for your tablet(s). Automatic update checking is a feature that no tablet company aside from Wacom has, and it is very nice that you do not need to manually check the Wacom site for driver updates.
However! Never update your driver if your tablet is already working with the current driver! Wacom is notorious for releasing driver updates which break tablet functionality, so you are much better off sticking with the driver version you have until it stops working. If you ever update and your tablet stops working, go look up how to roll-back to a previous version.

Aside from those main sections, the Marketplace button opens a website for buying drawing applications, the Store button opens the Wacom store website, and the Support button opens the Wacom Customer Support page.

Overall, the Wacom drivers are the most customizable and user-friendly drivers I have seen. Everything is quite high quality as expected from their higher price point (although there are, of course, some small issues here and there as I highlighted).


Drawing tests

These pen tests are all done with the same settings for both the canvas and the pens. These tests are only done in Clip Studio Paint as that is the only program where I totally understand how to remove all unwanted variables.
If you are worried about whether this tablet will work with your art program, don’t be afraid to contact support to ask them directly.

-The canvas will always be a 3000x3000px 300dpi page (the above test page is a 3000x6000px 300dpi page, so just two pages stuck together).
-The test pens are mostly all 100px linear pressure curve pens. Pen pressure for size and/or opacity is enabled based on the test.
-The slow ruler line test uses a 10px no pen pressure pen to clearly show wobble and jitter. I also use a 50px pen pressure enabled pen to see the visibility of wobble/jitter with pen pressure is enabled.
-The IAF (Initial Activation Force) test uses a 300px linear pressure pen to show the thinnest lines possible, as well as demonstrate the IAF of the tablet.

32 - Wacom Intuos Pro 2017 Test Page - 1

1) Scribble Test – Grade: Pass-ish
Test pen 1 – 100px – pen pressure: size
Test pen 2 – 100px – pen pressure: size+opacity

For my pen tests, I always start out with a few pen pressure scribbles to see if I can do some nice squiggly lines with increasing pen pressure. I also do some back and forth shading and some spirals with increasing pen pressure.

With the Wacom Intuos Pro, I have some troubles consistently getting the thinnest lines at the start of my scribbles. It was really hard getting my strokes to start with very thin lines and I often just ended up with a pretty thick blotch at the start instead.
I could see that it could do thin lines sometimes though, so I can give the tablet a pass-ish grade here.

33 - Wacom Intuos Pro 2017 Test Page - 2

2) Slow Ruler Line Test – Grade: Pass
Test pen 1 – 10px – pen pressure: none
Test pen 2 – 50px – pen pressure: size

The slow ruler line tests done with a no pen pressure pen were absolutely perfect on this tablet. Even when the pen was tilted all the way over, there was no noticeable wobble appearing in the line.

This tablet completely lives up to the Wacom name when it comes to how perfectly straight these slow ruler lines came out.

This tablet gets a pass here for sure.

34 - Wacom Intuos Pro 2017 Test Page - 3

3) Quick Hatching Test – Grade: Pass
Test pen 1 – 100px – pen pressure: size

The quick hatching test is to check whether the tablet keeps up with pen inputs. Usually, the only way to fail this section is if the pen is noticeably laggy and causes unwanted inputs like fishhooks at the beginning or end of the line.

As you can see, this tablet appears to have no problems with fishhooks. I also never noticed the cursor lagging noticeably, so it gets a pass here.

35 - Wacom Intuos Pro 2017 Test Page - 4

4) Short Release Taper Test – Grade: Pass
Test pen 1 – 100px – pen pressure: size

This test is meant to see the smoothness of the pen pressure taper when going from max to min pressure quickly. Basically, you press your pen down hard then flick to the side to see how smoothly the stroke tapers.

With the Wacom Intuos Pro, the tapers look very nice and appear to have no problems with jaggedness. The pen pressure didn’t register when I only pressed the pen nib in a single spot, but that has no relation to this test, so it gets a pass here.

36 - Wacom Intuos Pro 2017 Test Page - 5

5) Pen Pressure Control/Transition Test – Grade: Pass-ish
Test pen 1 – 100px – pen pressure: size+opacity

This section is to test the smoothness of the transitions in pen pressure.
-The circles at the top are one of Youtuber Brad Colbow’s tests. It is used to check if you can properly control the pen pressure all the way around a circle. If there is a pressure jump, some circles will feel impossible to control due to that jump.
-The lines at the bottom are slow strokes done with smooth increases or decreases to pen pressure in mind. The arrow points in the direction which the stroke was done, and the smoothness of the gradients show how smooth the pen pressure transitions.

In terms of the pen pressure control circles, I only had problems with the very light circles where I couldn’t properly control the thinnest lines.

In the pen pressure transition testing, there is a weird effect which happens for the shorter strokes, but the pen pressure transitions are quite good if you do longer strokes.
If you look closely, the pen pressure transition happens in noticeable steps when doing shorter strokes.
(Please refer to the full testing page at the top of this section. You cannot zoom into the preview on the right because of how WordPress scales it.)

I believe this is caused by what I mentioned earlier in the Short Release Taper Test about the pen pressure not registering if I just press the pen nib in one spot. Because the Wacom pen is powered by movement through the electromagnetic field, the less it moves, the less power it has, causing it to update the pen pressure less often for shorter strokes. (That’s just my guess though.)
It’s a weird issue though considering I haven’t seen it on other battery-free tablets doing the same tests. I’m not sure why only Wacom has this issue.

I can give this tablet a pass-ish grade here as it seems to have no problems in all the other sections of the test, although again, it was very hard to consistently get very thin lines with this tablet.

6) Initial Activation Force & Lightest Pen Pressure Test – Grade: Pass
Test pen 1 – 300px – pen pressure: size

This test tries to demonstrate the IAF of the tablet, and also shows the lowest possible pen pressure the tablet is capable of producing consistently.
IAF is the amount of force necessary to cause the pen to output a line. Ideally, your tablet will have an extremely low IAF where the pen will output a line with the least amount of force possible.
A high IAF causes issues such as light pen taps not registering as clicks, and the inability to sketch very lightly, both of which become quite annoying the more you experience it.

For this test page, the squiggly lines should begin right on the start line.
-If the line begins right on the start line, this indicates that the IAF is extremely low (low IAF is best) and the line just appears naturally without effort.
-On the other hand, if the line does not begin on the start line and instead begins further along the stroke, this means that the IAF is high so I needed to search for the IAF by increasing my force little by little until I finally started outputting a line.

An example of the ideal test page is the Huion New 1060 Plus (2048) IAF test page which I included above for comparison. Almost all the lines begin right on the start line meaning it has extremely low IAF, and the lines are almost transparent showing that the tablet is capable of drawing extremely light pen pressures.

The Wacom Intuos Pro has an acceptably low IAF and I was able to get the lines to start decently close to the start line. The IAF was low enough that I never noticed it getting in my way when tapping options or sketching.

In terms of the lightest pen pressure, I could often get pretty thin lines during the test, but it was very hard to keep it consistent as it would often suddenly become thicker or completely disappear.

With that said, the Wacom Intuos Pro is good enough in both these regards that I can give it a pass here.

38 - Wacom Intuos Pro 2017 Pen Tilt Tests - Copy

7) Pen Tilt Test – Pass
Test pen 1 – 100px – pen tilt: opacity
Test pen 2 – 100px – flat pen – pen tilt: direction

This test shows the smoothness of the pen tilt by gradually tilting the pen while slowly moving the pen to the side. This section also includes scribbles using the pen direction determined by pen tilt.

As you can see in the smoothness test, the pen tilt on the Wacom Intuos Pro is quite smooth. You can technically see the steps in the gradient, but it is very smooth for pen tilt which only has 60 levels from upright to tilted.
The tablet receives a pass here for sure.

Overall

So all in all, the drawing test results are:
1) Scribble Test – Pass-ish
2) Slow Ruler Line Test – Pass
3) Quick Hatching Test – Pass
4) Short Release Taper Test – Pass
5) Pen Pressure Control/Transition Test – Pass-ish
6) Initial Activation Force & Lightest Pen Pressure Test – Pass

Non-Vital Drawing Tests:
7) Pen Tilt Test – Pass

Ideally, all the above tests should have at least a “Pass-ish” for their grades because the most vital function of a drawing tablet is to draw properly and predictably. Failing any of these tests means that it doesn’t do that.


The drawing experience!

My actual drawing experience with the Wacom Intuos Pro was quite good and it was decently enjoyable. The pen pressure worked mostly as expected, and the feeling of using the tablet was quite nice.

The biggest factor which made me not really love the experience was the flat pen nib. Occasionally, it would roll over the flat spot and remind me about how I would have to buy pen nibs in a week or so if I wanted to avoid getting reminded of the pen nib every time. I could certainly replace it every day, but then I would just have to buy replacements even more frequently.
I didn’t particularly hate the texture despite how it felt a bit rubber-y, but the pen nib becoming flat and rolling around was a nuisance.

In terms of the pen pressure, I found it odd that I couldn’t draw light pen pressures very easily, despite this being a 90 USD pen on a 350 USD tablet.
This level of drawing performance, I’ve seen in a lot of other much cheaper tablets. This fact just made it feel even worse than it is, just because of how ridiculous the price is for this level of performance.


Conclusion

This tablet is a complete step up compared to the low-end Wacom Intuos, but it’s truly nothing magical or special when compared to the tablets I have tested from other companies.
It’s almost undeniable that Wacom is deliberately making their low-end products crap so that anyone who upgrades from an Intuos to an Intuos Pro will feel like they’ve actually made a great upgrade to a “professional” product, when in fact, they only moved up from trash to a standard product.

The biggest problem with the Wacom Intuos Pro is that it’s simply an average tablet with big pen nib wear problems, and you have to buy extra things to make it unique or usable, despite it already having a ludicrous price of 350 USD which is 3-4 times any of its competitors.
-For instance, you have to buy the 100 USD Wacom Art Pen to get the pen rotation functionality which no other company has, otherwise this tablet is not unique in any way aside from its metal alloy back cover.
-Then you also have to buy a 30 USD smooth texture sheet separately to control how quick your pen nibs wear. If you don’t buy the smooth texture sheet, you have to buy pen nibs 10 for 10 USD every few months.

If you look at the paper specs, this tablet certainly looks like it has unique features such as Bluetooth wireless, multi-touch, pen eraser, and touch wheel. However, as I pointed out:
1) The Bluetooth wireless is noticeably laggy and delayed, so it is unusable when compared to the wired mode.
2) The multi-touch doesn’t add anything useful to the drawing experience, and the palm rejection is fairly bad.
3) The pen eraser is not very useful in the first place, and wearing it out will just result in you having to buy a new expensive pen.
4) The touch wheel is not very sensitive and ends up being a chore to use because of this.

Now, if these features were actually good, then this would be a different story and we could attempt to explain the 350 USD price with “high quality” features. However, with how subpar those features actually are, we really can’t use them to explain the high price of this tablet at all.

Quite frankly, this tablet is most certainly not worth 350 USD for what it offers in today’s tablet market.
Like I said before, I would probably only recommend this to Wacom enthusiasts, or to people who are simply afraid to shop online (because Wacom is basically the only brand being sold in-store).


Places to buy the tablet

Amazon.com | Amazon.ca | Wacom Store
People living in other regions should check their regions online retailers.

If you have any questions about the tablet, feel free to ask me!

GAOMON S620 Review

Edit (Apr. 26, 2019): GAOMON’s most recent posts about this tablet on their Facebook page is apparently advertising Android support on this tablet.
My unit, however, was bought before they announced Android support, so it does not come with an Android adapter for the cable. Because of this, my review will not go over this tablets android functionality whatsoever.

The GAOMON S620 is a new GAOMON tablet which competes in the small (~6×4 inch) tablet category. It offers a battery-free pen with a relatively low retail price of ~35-40 USD on AliExpress, which is the only place I can currently find it being sold officially by GAOMON. Edit: It is now officially released on Amazon.

I bought this tablet through AliExpress because it had a fairly ridiculous sale coupon available for it which gives you 13 USD off the S620 specifically (it’s still available while I’m writing this review), and it was also on sale for 35 USD from it’s original 40 USD price in addition to the coupon. I also used an AliExpress first time buyer 2 USD coupon.
So in total, it just cost me a little over 20 USD!

If I am honest, my expectations for this tablet were fairly high considering I had noticed that GAOMON uses altered Huion drivers for their tablets (and Huion drivers are quite good overall).
However, as usual, my expectations were a bit too high and the GAOMON S620 turned out to be just a “decent” tablet if anything. I could argue it’s pretty good for a 20 USD tablet, but I don’t think I would recommend it at its normal retail price of 40 USD.

Anyways, that’s enough introduction. Onto the review!

P.S. You may notice that this review is done with a slightly different format compared to my previous reviews. This is because I am cleaning up my review methodology to include some more pen tests. I hope to update my other recent reviews to include these tests as soon as I can as well.

Please note!
-I am not a Mac or Linux user!! I mainly only tested this tablet on Windows 10 version 1803.
-Prices may have changed since I wrote this review.
-Check when a review was written. Some aspects may improve or change over time, so it is in your best interest to concentrate on reviews which are less than 1 year old.
-Always check multiple reviews to cross reference their information before you make a conclusion about a tablet.


Table of Contents


How good is this tablet?

Design choices: Pretty good!
-Nitpicks: Button placement
Hardware quality: Not fantastic, but not bad.
-Nitpicks: Plastic-y texture
Tablet drivers: Very good!
-Nitpicks: Auto-startup
Drawing test results: Decent, but lacking.
-Nitpicks: High IAF (Initial Activation Force)
Actual drawing experience: Usable, but not pleasing.
-Nitpicks: High IAF

Overall: A pretty good tablet for 20 USD, but lacking at 40 USD.

My verdict:
I would probably only recommend this while it has the 13 USD off coupon available for it on AliExpress (look here for coupon), and even then, only to the people who really can’t afford anything over ~20 USD.
At its actual retail price of 40 USD, the high initial activation force makes it lose out to other options like the XP-Pen G640/G640S and Huion H640P.


Specifications at a glance

Price: 39.99 USD (when this review was written)
Active Area: 6.5 x 4 inches

Pen Type: Battery-free
Pen Buttons: 2 side buttons, no eraser
Pen Pressure: 8192
Pen Tilt Sensitivity: None
Shortcut Keys: 4 buttons
Multi-touch: No
Other features: Android compatibility (?)


What’s in the box?

2 - Box

The tablet comes in a really simple white box with just the GAOMON logo in the middle and the name of the tablet in the corner. I admit that I actually really like this kind of box design, so it gave me a good impression when I first saw it.

3 - Contents

The things that come in the box:

  • GAOMON S620 tablet
  • GAOMON Artpaint AP32 battery-free pen
  • Felt pen pouch
  • Tablet cable (USB type-A to Micro-USB)
  • Pen nib replacements x8
  • Anti-fouling glove
  • User manual
  • Driver installation instruction card
  • Warranty card

4 - Tablet Overall

The tablet has a fairly simple design with the textured drawing area covering most of the front surface of the tablet. The tablet itself is very compact and small.
I noticed that any hand oils you get on the tablet are very noticeable.

There is some flex when doing a simple twist test by gripping both ends of the tablet and twisting, however, the tablet does not creak at all which means that the pieces are properly built and fit snugly together.

5 - Tablet Texture

The surface of the tablet has a decently rough finish to it to imitate a paper-like feeling. Unfortunately, you can clearly feel that the texture is more plastic-y than paper-like, so you probably won’t enjoy it if you were expecting a “like paper” experience.

However, with that said, it is not particularly bad and is completely usable, it’s just more on the plastic-y side if anything.

6 - Tablet back

The back of the tablet has 4 round rubber feet and the usual information sticker. The rubber feet did their job properly and prevented the tablet from moving around while I was drawing.

The dotted design may not be for everyone, but I didn’t notice it until I started taking pictures since you don’t see the back when drawing on the tablet.

7 - Tablet Edge

The front edge of the tablet is slightly beveled.

I appreciate this beveled design choice because a lot of screen-less tablets now have non-beveled edges (they’re just cornered edges), and I find those ones uncomfortable to work on for longs periods of time because they dig into my wrists the way I rest my arm on my tablets while drawing.

8 - Tablet Buttons

The tablet has 4 shortcut buttons on the top left edge of the tablet. These buttons are quite nice because they don’t click obnoxiously loudly, and they also don’t require a large amount of force to press either. The only con about them is that they feel a bit cheap, but I think I could ignore that because they’re relatively good otherwise.

Clearly, this tablet was not created with left-handed people in mind as those buttons are completely unusable in left-handed mode. (Unless you flip the tablet upside down. I think that could work.)

At least for right-handed people, the placement of the buttons is at least logical and usable, but again, this design doesn’t seem to consider left-handed use at all.

The tablet port is a standard Micro-USB port with no tunnel in front of it.

The tablet cable is a ~150cm cable. It comes with a non-painful velcro strap attached for holding the cable together.

10 - Pen

The GAOMON S620 uses the Artpaint AP32 model battery-free pen (according to the product page) which is a very simplistic but nicely designed pen. It has a semi-hard/semi-soft rubber grip with two side buttons.

Holding this pen feels very comfortable and I have no complaints about using it. It’s a pretty good quality pen which I didn’t expect with such a budget tablet. I was completely expecting a simple hard plastic pen to be completely honest, so seeing it had a comfortable rubber grip was a pleasant surprise.

The two side buttons protrude noticeably from the surface of the pen which helps a lot with feeling where they are.
The common complaint about protruding buttons is that you accidentally click them sometimes, but I would much rather have protruding buttons I can actually find without looking, rather than buttons that I can’t find at all (therefore making them useless) because they are flush with the surface of the pen.

The top of the pen does not have anything.

12 - Pen Nib Wear

The pen nib wear on this tablet is pretty high due to the rough texture of this tablet. My pen nib already has a fairly large flat side after just 1-2 days of straight use.

The tablet surface on the other hand is not scratched at all despite the wear on the pen nib.

13 - Pen Pouch

This tablet comes with a felt pouch to hold the pen if you feel the need to use it.


Tablet drivers

The tablet drivers were very simple to install. Just go download the latest version from gaomon.net and uninstall all other tablet drivers you have on your computer before installing it.

If you’ve installed the driver successfully, there will now be a desktop shortcut and a system tray icon. The system tray icon will show up in your system tray (where your clock is), and this is the icon which shows that your driver is running and also gives you quick access to the driver settings.

Although the installer doesn’t prompt you to restart your computer after it finishes, I wholeheartedly suggest restarting your computer anyways to allow Windows to properly integrate the driver files into your system.

Oddly enough, the GAOMON driver does not properly auto-start on my Windows 10 computer after turning on/restarting the computer. It also doesn’t automatically make a auto-start option in the “Startup” section of Task Manager.
I found this odd because all my other tablet drivers properly add a auto-start option for themselves on the same Windows 10 computer, and my Windows 8.1 laptop also auto-starts the GAOMON driver properly (also adds the GAOMON driver to the “Startup” section in Task Manager) unlike my Windows 10 computer.

I contacted GAOMON support about this and they just told me to Google how to manually make a program auto-start on restart/login. Hm.
This obviously isn’t a particularly big issue (because you can just start up the driver manually when you’re ready to draw), but I would have appreciated if they had at least tried to figure out whether it was the GAOMON installer or my computer which is the problem, rather than tell me I should just accept it as is and put in extra effort to fix it for myself.

15 - Driver

In the driver, you will have the ability to configure your tablet shortcut buttons, pen buttons, pen pressure curve, and work area. There’s also the option to save and open your settings using the Export and Import buttons.

You will see an “Administrator privileges” button along the bottom, but there is no need to worry about it. I’ve tried working without pressing that button and I’ve noticed absolutely no difference in performance or anything, so I don’t think it does anything important.

The Press Keys tab allows you to customize the functions mapped to your shortcut buttons.

As you can see above, the Press Key Settings menu has keyboard shortcuts, pen clicks, “switch” functions, and run program features.
These drivers allow you a lot of freedom with the functions you can create, and you can mix and match the categories if you need to.

The buttons on the GAOMON S620 also have anti-ghosting capabilities, so you are able to activate more than one shortcut button function at the same time.

17 - Driver Digital Pen

The Digital Pen tab allows you to customize the pen buttons and the pen pressure curve. The pen buttons have the same configuration options as the shortcut buttons.

Usually, you will want to uncheck the “Enable Windows Ink” option to prevent Windows Ink from messing with your pen inputs. With that said, however, some programs such as Photoshop require you to enable Windows Ink to have pen input. Adjust this option as you see fit.

18 - Driver Work Area

The Work Area tab allows you to customize the monitor your tablet is mapped to, and the size of the active area your tablet uses. Pick your monitor from the drop down menu, then click the Full Area button, and then click the Screen Ratio button to properly adjust your tablet area to match your monitor.

There is also the option to rotate your tablet input as needed.


Drawing tests

These pen tests are all done with the same settings for both the canvas and the pens. These tests are only done in Clip Studio Paint as that is the only program where I totally understand how to remove all unwanted variables.
If you are worried about whether this tablet will work with your art program, don’t be afraid to contact support to ask them directly.

-The canvas will always be a 3000x3000px 300dpi page (the above test page is a 3000x6000px 300dpi page, so just two pages stuck together).
-The test pens are mostly all 100px linear pressure curve pens. Pen pressure for size and/or opacity is enabled based on the test.
-The slow ruler line test uses a 10px no pen pressure pen to clearly show wobble and jitter. I also use a 50px pen pressure enabled pen to see the visibility of wobble/jitter with pen pressure is enabled.
-The IAF (Initial Activation Force) test uses a 300px linear pressure pen to show the thinnest lines possible, as well as demonstrate the IAF of the tablet.

20 - Scribble Test

1) Scribble Test – Grade: Pass-ish
Test pen 1 – 100px – pen pressure: size
Test pen 2 – 100px – pen pressure: size+opacity

For my pen tests, I always start out with a few pen pressure scribbles to see if I can do some nice squiggly lines with increasing pen pressure. I also do some back and forth shading and some spirals with increasing pen pressure.

With the GAOMON S620, I had a little bit of troubles getting really thin lines consistently in my scribbles. I had to try pretty hard to get the scribbles to start with really thin lines, and the lines would often start quite thick.
However, since I was able to get thin lines a fair amount of times, I can give the tablet a pass-ish grade here.

21 - Slow Ruler Line Test

2) Slow Ruler Line Test – Grade: Pass
Test pen 1 – 10px – pen pressure: none
Test pen 2 – 50px – pen pressure: size

The slow ruler line tests done with a no pen pressure pen were pretty good on this tablet. The only time the wobble became noticeable was when I was holding the pen as tilted as I possibly could.

I think it is unrealistic to expect that people will be using the pen at that angle because this tablet does not have pen tilt, so I believe the wobble is negligible on this tablet as there is almost no noticeable wobble at a normal drawing angle.
If you use your pen tilted as far over as it can go, then consider yourself warned.

This tablet gets a pass here.

22 - Quick Hatching Test

3) Quick Hatching Test – Grade: Pass
Test pen 1 – 100px – pen pressure: size

The quick hatching test is to check whether the tablet keeps up with pen inputs. Usually, the only way to fail this section is if the pen is noticeably laggy and causes unwanted inputs like fishhooks at the beginning or end of the line.

As you can see, this tablet appears to have no problems with fishhooks. I also never saw the cursor lagging noticeably, so it gets a pass here.

23 - Short Release Taper Test

4) Short Release Taper Test – Grade: Pass-ish
Test pen 1 – 100px – pen pressure: size

This test is meant to see the smoothness of the pen pressure taper when going from max to min pressure quickly. Basically, you press your pen down hard then flick to the side to see how smoothly the stroke tapers.

With the GAOMON S620, I would sometimes get uneven tapers, and other times get nice tapers. Good tapers occurred more frequently than bad tapers, so I’ll give this tablet a pass-ish for this section.

24 - Pen Pressure Control+Transition Test

5) Pen Pressure Control/Transition Test – Grade: Pass
Test pen 1 – 100px – pen pressure: size+opacity

This section is to test the smoothness of the transitions in pen pressure.
-The circles at the top are one of Youtuber Brad Colbow’s tests. It is used to check if you can properly control the pen pressure all the way around a circle. If there is a pressure jump, some circles will feel impossible to control due to that jump.
-The lines at the bottom are slow strokes done with smooth increases or decreases to pen pressure in mind. The arrow points in the direction which the stroke was done, and the smoothness of the gradients show how smooth the pen pressure transitions.

For this tablet, there didn’t seem to be any particularly noticeable pressure jumps. You can see a slight jump at the low end of the pressure curve, but everywhere else seems to be very smooth.

I think I can give this tablet a pass here.

6) Initial Activation Force & Lightest Pen Pressure Test – Grade: Fail
Test pen 1 – 300px – pen pressure: size

This test tries to demonstrate the IAF of the tablet, and also shows the lowest possible pen pressure the tablet is capable of producing.
IAF is the amount of force necessary to cause the pen to output a line. Ideally, your tablet will have an extremely low IAF where the pen will output a line with the least amount of force possible.
A high IAF causes issues such as light pen taps not registering as clicks, and the inability to sketch very lightly, both of which become quite annoying the more you experience it.

For this test page, the squiggly lines should begin right on the start line.
-If the line begins right on the start line, this indicates that the IAF is extremely low (low IAF is best) and the line just appears naturally without effort.
-On the other hand, if the line does not begin on the start line and instead begins further along the stroke, this means that the IAF is so high that I needed to search for the IAF by increasing my force little by little until I finally started outputting a line.

An example of the ideal test page is the Huion New 1060 Plus (2048) IAF test page which I included above for comparison. Almost all the lines begin right on the start line, and the lines are almost transparent, showing that the tablet is also capable of drawing extremely light pen pressures.

The GAOMON S620 on the other hand has a relatively high IAF and I had troubles getting the lines to begin near the start line in the test page.
As such, I cannot give a passing grade to the GAOMON S620 in this test.

A funny thing I noticed is that I could use my Huion PW100 pen on the GAOMON S620, and the IAF for that pen was extremely low in comparison to GAOMON’s pen. The very last line on the GAOMON S620 test page is done with the Huion PW100 pen, and I was easily able to begin the stroke on the start line because the IAF was so much lower on the Huion pen.
If GAOMON wants to improve the S620, perhaps they could start by improving the pen that it uses.

Overall

So all in all, the drawing test results are:
1) Scribble Test – Pass-ish
2) Slow Ruler Line Test – Pass
3) Quick Hatching Test – Pass
4) Short Release Taper Test – Pass-ish
5) Pen Pressure Control/Transition Test – Pass
6) Initial Activation Force & Lightest Pen Pressure Test – Fail

Ideally, all the above tests should have at least a “Pass-ish” for their grades because the most vital function of a drawing tablet is to draw properly and predictably. Failing any of these tests means that it doesn’t do that.


The drawing experience!

My actual drawing experience with the GAOMON S620 was okay, but it certainly wasn’t particularly enjoyable.

The high IAF showed itself too frequently in the form of my clicks not being registered when I was tapping options and tools. I also had a hard time adapting to the pen pressure because my lines just wouldn’t appear when I pressed as lightly as I was used to pressing on my other tablets.

Aside from the high IAF, there weren’t any particularly notable issues and I could actually use the GAOMON S620 to draw, but the high IAF was more than enough to ruin the overall drawing experience for me.


Conclusion

Like I said before, I wouldn’t really recommend this tablet to anyone, especially at its actual retail price of 40 USD.

If you simply don’t have more than ~20 USD to use on a tablet, or you have some money you want to throw around, you can consider the GAOMON S620 for the coupon price of ~20 USD on AliExpress (look here for coupon), but I wouldn’t suggest this tablet to anyone who’s looking for a serious tablet they want to practice drawing with.

If you absolutely need something cheap, you can go for this tablet with the AliExpress coupon, but I seriously suggest that you save up just a tiny bit more to get one of Huion or XP-Pen’s equivalent small size (~6×4 inch) offerings which perform noticeably better, especially with regards to the IAF.


Places to buy the tablet

Amazon.com | Amazon.ca | AliExpress
People living in other regions should check their regions online retailers.

If you have any questions about the tablet, feel free to ask me!